
12.1 Introduction
Bathrooms and toilets are often seen as the dirtiest elements of a house or property.
People associate them with germs, bacteria and just generally being unpleasant. The truth is that the bathroom is not always the dirtiest room in the house. In fact, the typical residential bathroom is no dirtier than the kitchen in terms of bacteria. However, this is not true of establishments such as pubs or nightclubs.
Although this is less likely to be the case in domestic properties, there is still a chance that diseases like clostridium difficile and norovirus are present. This is particularly true during colder months. Thus, cleaners have an obligation to themselves and their workers to engage in strict hygiene practices when cleaning bathrooms and toilets.
In this module you will learn about the different elements that go into cleaning a bathroom. You will learn how to clean the toilet, the bath, the shower and other surfaces that you may encounter in a typical bathroom.
12.2 What You Need to Professionally Clean a Toilet
Here is a brief list of the things you will need to clean each area of the bathroom:
- Disposable gloves
- All-purpose cleaner
- Bleach
- A rubbish bag
- Sponge
- Colour-coded cloths (Blue - glass and mirrored surfaces. Yellow - toilet. Pink - bath, sink and walls.)
- Disposable gloves
- All-purpose cleaner
- Sponge
- Mould remover
- Drain cleaner
- Disposable gloves
- All-purpose cleaner
- Specialist shower cleaner
- Glass/shower door cleaner
- Washing machine for the shower curtain
- Drain cleaner
- Limescale remover
- Sponge
- Cloths
- Disposable gloves
- All-purpose cleaner
- Drain cleaner
- Sponge
12.3 The Cleaning Routine for a Bathroom
Before you learn more about cleaning the individual bathroom appliances, you need to know about the general cleaning routine for the bathroom.

Just like any room of a house or building, the whole area needs a general clean before you get into the deep clean.
Here are the steps to follow.
Dust & vacuum.
Start by dusting the bathroom. Work from top to bottom, starting with light fixtures, so that all of the dust gets as close to the floor as possible. Take the feather duster around first, then proceed to use a microfiber cloth on all shelved areas to pick up loose dust, also letting it fall to the floor. Make sure you do not forget the high areas and do not neglect the corners.
Once the dusting is complete, vacuum the floor to ensure dust and loose hairs are picked up. Take extra care when vacuuming in hotels, restaurants, bars and nightclubs. Hairs in these bathrooms often leads to complaints, for if found by customers they deem it unhygienic.
Raise the temperature.
Raising the temperature just ten degrees above normal room temperature is enough to double the effectiveness of any alkaline cleaning agent.
To take advantage of that, run the hot water tap for a couple of minutes, allowing time for the bathroom to heat up. Put the plug in the bathtub and fill it to a couple of inches, too, before leaving it for a few minutes. The heat from the water will raise the temperature of the tub making it easier to clean. For tiled areas, sprinkling the hot water onto tiled surfaces will heat those too, making them easier to clean.
Drain and spray.
After leaving the hot water for a few minutes, drain the tub. Then spray your all-purpose cleaner over tiled walls, bathtub, counters, sink, toilet and floor.
Use the sponge to spread the cleaning fluid across all the surfaces.
Taking the sponge to all the surfaces sprayed; simply spread it around to cover entire surfaces, ensuring that tiled areas have an even coverage.
Leave for 5 minutes.
Disinfectants do not work on impact. They need contact time to activate the ingredients, killing off bacteria. Leave the surfaces for 5 minutes, giving the cleaning agents time to work. Do not leave harsh chemicals for too long as you risk doing damage or creating fumes.
Get scrubbing.
This is where use of colour-coded cloths becomes relevant. You must not use the same cloth in a bathtub or sink that has just been used to clean the toilet pan.
Rinse the surfaces
Cleaning agents work well because they are designed to attract dirt, grime and soiled particles. Therefore, you must rinse it thoroughly from the surfaces, deactivating it so that the area stays clean for longer.
Dry the surfaces
After rinsing all surfaces, take a dry clean cloth over all the areas and dry them off.
Clean the glass and mirrors
Spray the glass cleaner onto the surface and clean it using a squeegee in a sideward motion. Any excess water can be soaked up with a dry cloth. Finish off with a microfiber cloth getting into the corners of surfaces picking up loose debris.
Clean the floor
Start cleaning from the farthest area of the bathroom, working backwards towards the door to rinse, wipe, and dry the floor as you exit.
Organise your cloths
Also, you should organise a system for your cloths. Having colour-coded cloths is essential to prevent cross contamination.
- Blue - glass and mirrored surfaces
- Yellow - toilet
- Pink - bathtub, sink and walls
Use the appropriate cloth to clean the bathtub, sink, toilet and tiled areas. The warm water used in step 2 will have helped boost the effectiveness of the spray, loosening grime ready for easier cleaning.
12.4 Important Focus Points for the Bathroom
In this section you will learn more details about deep-cleaning the important bits of the bathroom.
Follow the steps here to make sure that you get a good clean every time. This will set you apart from other cleaners, help you maintain hygiene standards and show how valuable having a professional cleaner can be.
The Toilet
Begin by cleaning around the bowl with the toilet brush. Then, prop the brush under the seat to drain.
Spray both the brush and toilet from top to bottom with disinfectant. This can be cleaner or vinegar spray. Let the spray sit for a few minutes.
Use toilet roll to wipe down the toilet bowl and dispose of the paper in the bowl, to flush away. Do the same for the tank and handle.
Add the toilet bowl cleaner to the toilet bowl. Leave it for a time, according to the manufacturer's instructions, before washing it away. Leave the brush to drain under the seat again.
If you are cleaning in a commercial setting remember to wipe down the doors, stalls, toilet roll dispensers and any sanitary containers found in the bathroom.
The Shower
Cleaning the shower requires you to use the shower cleaner according to its instructions. However, there are several important parts of the shower that you need to ensure are clean. Here are a few things that you will need to clean when cleaning the shower:
Cleaning the Shower Doors
Start by spraying the doors with the cleaning solution. You can use a shower door cleaner but if you do not have one a general cleaner will do. Use your sponge and clean the inside and the outside of the doors. Make sure you clean the area were the doors overlap so that everything gets clean. If you cannot get in with the sponge, spray your shower cloth, put it on a brush and move it in the door. Then, do the same thing with a dry cloth.
After you have cleaned the doors you will need to clean the runners on the shower doors. Spray them with a cleaning solution and use the same brush and cloth combination to make sure that you can fully get into the runner. Use the brush and cloth to push any dirt or grime towards the shower, catching it with a second cloth.
After you have cleaned the glass, use a degreaser or a mild alkaline cleaning solution and spray it on the shower doors. Then, dry and polish the doors with a clean cloth.
Removing Stains
After you have cleaned the shower, the doors and wiped down, you might notice that there are still some marks left. Hard water stains or limescale are often found on shower doors and they are unsightly. Hard water stains build up when the water on the shower surface evaporates and leaves minerals from the water on the surfaces. Soap scum often sticks to this which then makes it look even worse.
The best way to tackle hard water stains is to prevent them. If your client asks, suggest they purchase a squeegee to use on the doors after every shower, so that water does not sit on the surface. You can also recommend a daily spray product for clients to use each time they shower.
However, to remove these stains you need the right cleaners. Most general bathroom cleaners will be alkaline and have a bleach base. For soap scum and hard water stains you will need an acidic cleaner to break up the minerals.
You might need a specialist cleaner for difficult stains and it is good to keep one in stock, particularly in rural areas where the water can be harder.
To use the special cleaner, just follow the instructions on the bottle and use a dedicated limescale cleaner cloth. Avoid mixing up the cloths in the event your specialist product has a reaction with your general products.
Unclogging the Drain
Use an untwisted wire hanger to remove any visible hair from the drain. Then add a drain cleaner or an ammonia mixture to the drain to get rid of any soap that may be adhering to the pipes.
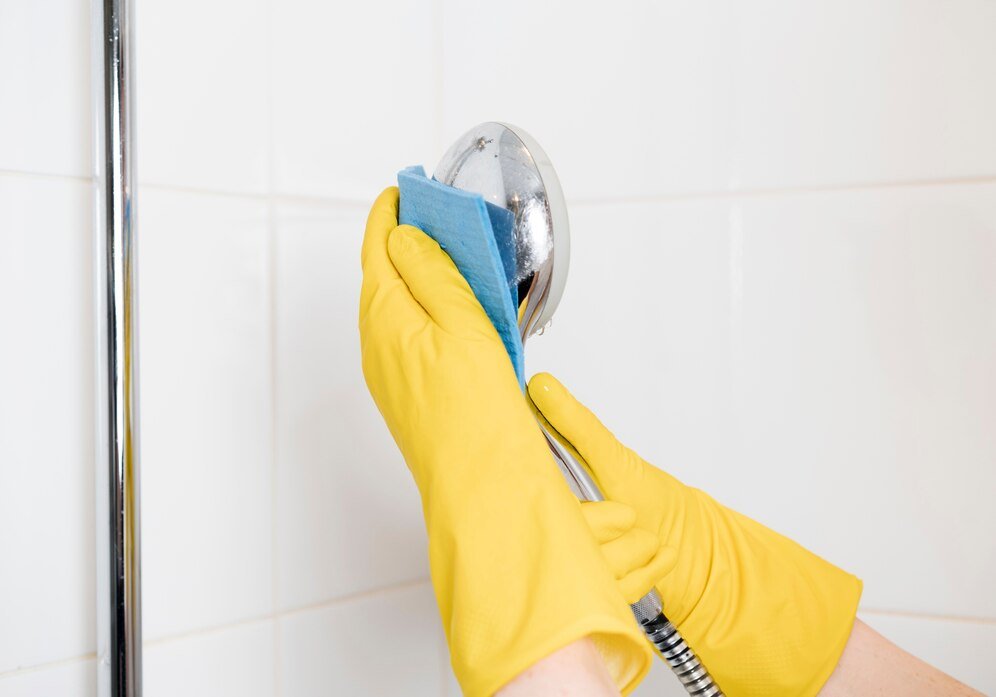
Fixing the Shower Head
If the shower head is not working properly you should clean it to restore the water spray.
First, wipe any dry debris from the head using the sponge used on the tile.
If that does not work, fill up a plastic bag with 1 cup of white vinegar and 1 cup of water. Place the shower head in the bag so that holes are covered. Leave it to soak for between 15 minutes to one hour, depending on the time available to you.
Once that is done, wipe any deposits off the shower head and run the shower to flush out the rest of the appliance.
Washing the Shower Curtain
If there is a shower curtain, you may be required to wash it. Most plastic shower curtains are washable (check the curtain's washing instruction label to make sure). Plastic shower curtains can be cleaned in a washing machine. To get best results, add a few towels and some detergent into the load. Hang the shower curtain to dry. If the shower curtain is made out of fabric, there is generally a care label to follow, to avoid any damage.
The Bath
You can use general surface cleaners on a bath tub but for a better result it is advisable to use a cleaner specifically designed for bath tubs. Another recommendation is to look for a scrub or a cleaning paste rather than using a spray. The scrubs are better for breaking up the grime that builds up on the tub.
Use all products in accordance with their instruction.
Black Mould
Sometimes you will encounter black mould near or around the tub. Black mould needs to be removed as it is unsightly and can be bad for some people's health.
Ridding the area of black mould requires more than a general household cleaner. Usually you use ammonia or bleach when are cleaning black mould. However, never mix the two or use one after the other. Also, it is preferable to use ammonia when cleaning mould because the bleach does not kill the mould and if it is living in a porous area, it will just grow back later.
If using ammonia, combine the ammonia and the water in equal proportions. Pour the solution into the dedicated spray bottle and spray the areas evenly, making sure you reach even the smallest patches of mould. Let it sit for up to 10 minutes so that it kills the mould.
After 10 minutes take a scrubbing brush or a scourer and wipe clean. The mould should come off but the process may need to be repeated if the mould is old or there is a lot of it.
If you do choose to use bleach, combine a cup of bleach with four litres of water. Add it to the dedicated spray bottle and spray it to the mouldy areas. If the spray bottle does not work, apply it with a brush. Let it sit and then brush it away using a brush or a scrub. Do not rinse the area if you are using bleach. Give it time to disinfect the area and stop the mould from growing back.
- Vinegar
- Tea tree oil
- Baking soda
- Hydrogen peroxide
- Grapefruit seed extract
The Bidet
You may encounter a bidet when cleaning houses. Although it may be unfamiliar, it is not very different to cleaning the rest of the toilet. Also, most bidets have a self-cleaning function that will keep the pipes clean. This means that you generally do not have to worry about anything other than keeping the exterior clean.
You will clean the bidet after the toilet is totally clean. Then, you can wipe down the nozzles of the bidet with an antibacterial wipe. Make sure you wipe other exposed parts, too.
After it is all clean, run the bidet once or twice to flush it out.
The Counter
You might expect the counter to be the easiest part of cleaning the bathroom. It is a smooth, flat surface that does not require you to bend or twist. However, the counter is important because you need to use the right cleaning agents. To do this, you need to determine what the counter top is made out of.
If you have a tiled counter top you can use a general bathroom cleaning agent. Just spray, let it sit and then wipe it up.
If you have a plastic or laminate surface you can use a mild bleach or warm water. Do not use abrasive brushes or sponges on these counter tops. Be careful when using bleach on a new counter top - test an area to make sure you will not alter the colour.
If you have a stone surface, such as marble or granite, you will need a water-based cleaner. The best cleaners will be pH-neutral or a cleaner that is specifically designed to clean stone. Do not use a scrub or a brush on the counter top. Always use a microfiber cloth or another soft damp cloth. Using anything abrasive on the counter top will cause damage.
To remove a stain from a stone surface, make a past from baking soda and water and apply to the stain. Gently rub the stain with a soft brush or a soft cloth. If the stain is deep, you may need several applications to get it to work.
12.5 Things to Remember When Cleaning Bathrooms
When cleaning bathrooms and toilets, do not neglect any of the general cleaning duties that apply to other rooms of the house.
- Dusty skirting boards, door frames and ledges
- Cobwebs in the corners of the room
- Bad smells
Another important thing to remember is to wipe down all the handles in the bathroom. Wipe down the door handles, any drawer pulls, faucets and the toilet handle to make sure that you remove bacteria.
Module Summary
Cleaning bathrooms may not be as bad a job as imagined, especially in domestic environments. However, in commercial premises they can often be very dirty.
When you clean a bathroom and toilet, it is important to ensure that you have the right equipment and that you always wear gloves to protect yourself from bacteria and from harsh cleaners.
Remember that cleaning a bathroom works best when you methodically work through the cleaning of bathroom areas in the manner described here, all the while making sure you keep the area well ventilated. Work through your check list and you will be finished in no time.
.svg)