
13.1 Introduction

Undoubtedly, the majority of handyperson repairs focus
on fixings within the home.
However, the exterior of a home comes
with its fair share of plumbing needs. Whilst cleaning out the gutter and repainting the fence or shed
are some of the simple exterior jobs that homeowners can do themselves, most will contract
the services of a handyperson in order to get them done.
Just as people are judged based on outward appearances, the exterior of a home creates an impression about the home in general.
Simple things like cleaning out gutters and repairing them, fixing a home's fence and shed issues and keeping outdoor
lighting working are all that is needed to maintain
a presentable outlook of a home.
Having a working knowledge in carrying out these tasks will help you to approach the job skillfully
and with a marked level of ease. This module will give you a basic understanding of repairing gutters,
fences and sheds, as well as the tools needed to get the job done. Also, the module will look into exterior lighting installation and home exterior
painting as well.
13.2 How to Repair Guttering
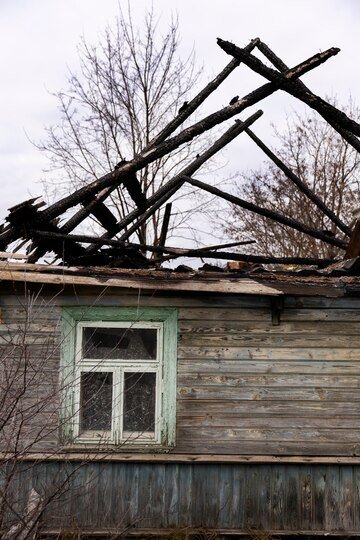
Every house gets consistently damaged from adverse weather conditions, such as extreme wind conditions, hailstorms, torrential downpours, falling trees with rainstorms and due to many other environmental elements.
Heavy downpours and the wind, in particular, may result in damage caused to the home's guttering
system.
If it happens that the guttering system is not functional, the flow of water gets hindered and it will overflow to the wall and cause further damage to the house. It is, therefore,
necessary to repair the guttering before more damages occur.
Fact
Before
the 19th century, rain gutters were made out of wood, but currently, 90% of guttering
systems are aluminium
made. The current choice of guttering material
keeps in mind the natural climate in the area of installation in mind, as well as the price range and the home's overall design.
Source: Gutterslondon.co.uk
Tools and Materials Needed to Repair
The correct tools will make your work easier and prevent frustrations during the repair process.
The following tools and materials
are required, when working on a guttering
system:
![]() *Scrub brush, or you can use coarse/rough steel wire
*Scrub brush, or you can use coarse/rough steel wire
![]() *Drill
*Drill
![]() *Cleaner or any detergent
*Cleaner or any detergent
![]() *Gutter sealers
*Gutter sealers
![]() *Gutter hangers
*Gutter hangers
![]() *Ladder
*Ladder
![]() *Flashtac tape, which should be weatherproof
*Flashtac tape, which should be weatherproof
![]() *Gloves
*Gloves
Some of the issues that affect guttering
systems and need regular addressing include:
![]() *Leaking gutters
*Leaking gutters
and gutter joints
![]() *Sagging gutters
*Sagging gutters
![]() *Rusted gutters
*Rusted gutters
![]() *Blocked drainage
*Blocked drainage
![]() *Leaking downward
*Leaking downward
pipes
13.3 Repairing the Gutter
When fixing a home's guttering
system, make sure that the ladder is not resting
on the gutter.
If the ladder leans on the gutter, your weight can crush it and make it harder to repair. Using a standoff
ladder is necessary.
Safety comes first when using a ladder.
Ensure that it is well fixed and resting on well levelled
and firm ground.
Make sure you have ladder stabilisers at the bottom, for added support.
Repairing a Rusted Gutter
Rusting often occurs with iron-made
guttering systems. When the metal gets exposed to water and oxygen,
oxidation takes place. When the metal gets oxidised, rust begins to form on it.
You will need to use your scrub
brush to remove the rust residue. Be careful not to make holes byscraping on
the metal too hard. You can then apply a metal primer to slow down the rusting
process and after that, paint it with gloss paint. If the gutter has many small
holes in it, however, it makes sense to replace the whole guttering system
altogether.
Repairing a Sagging Gutter
A sagging gutter occurs when the wood to which it is affixed gets rotten. Add rust to the equation
and the entire structure may fall off or hang outwards from its usual position.
To repair a sagging gutter,
hook and mount the gutter
hanger under and over the hanging edges.
Nail or screw the gutter hangers to a beam or roof board, so that they can maintain a firm hold. Replace
the old gutters with new ones at about two and a half to three inches apart.
Repairing a Leaking Gutter
After some time, every guttering
system made of iron starts
to develop holes and leaking
issues. Using the scrub brush
and a cleaner, clean up the areas
with holes - and this should happen
after removing all of the debris and other dirt particles from the metal.
In case the gutter is leaking at the joints, separate them and clean them both up. Wear a pair of protective gloves, to keep your hands safe whilst working with the rusted metal. Afterwards, apply a sealant
and smooth it using your gloved finger. If you do not have a sealant, use bitumen.
Following these basic steps should make you a home-based
expert in repairing
gutters.
13.4 How to Repair Fences
One of the things that give the exterior of any home a unique and charming
look is its choice in structural barriers.
In the case of residential apartments, home, business,
or relaxation area, consider erecting
a fence to boost security
and the outer beauty of the property.
Fences also increase
privacy, mark property
boundaries and fulfil any other need that homeowners want. Different types of home barriers exist and their main difference
lies in their area of use.
Types of fences according to their use:
![]() *Pool fences create safety for swimmers
*Pool fences create safety for swimmers
and keep those who are relaxing by the pool safe.
![]() *Garden-based barriers
*Garden-based barriers
offer protection to your plants from animals and interference from people.
![]() *Dog fences enable you to keep your dogs within the confines of your compound.
*Dog fences enable you to keep your dogs within the confines of your compound.
![]() *Privacy fences give you the security and seclusion
*Privacy fences give you the security and seclusion
you need.
![]() *Security barriers
*Security barriers
are common fencing
choices for commercial institutions.
![]() *Temporary fences serve an interim purpose
*Temporary fences serve an interim purpose
for safety or demarcation needs.
![]() *Stockade fences
*Stockade fences
are often waist-high and used as agricultural, perimeter
and pool barriers.
![]() *Rail fences are very cost effective, but offer excellent
*Rail fences are very cost effective, but offer excellent
protection.
All of the above boundary structures need repairs at one time or another,
particularly if a section breaks off or falls apart. Many things
can lead to fence damages,
including heavy thunderstorms and heavy snow during the winter season, or unforeseen
occurrences like wreckages.
Fences come in different materials,
but generally, there are four main types:
![]() *Wooden fences are the most common type found around homes.
*Wooden fences are the most common type found around homes.
![]() *Iron rails come with a high initial cost of buying and installation, making them the most expensive model.
*Iron rails come with a high initial cost of buying and installation, making them the most expensive model.
![]() *Chain linked fences are durable, but they do not last as long as the others.
*Chain linked fences are durable, but they do not last as long as the others.
![]() *Vinyl fences are the most durable of the lot.
*Vinyl fences are the most durable of the lot.
Repairing Wooden Fences
The most common sign of a wooden fence
needing repair is rotting. Most of the rotting occurs at the bottom of a pole, making it weaker with
time. Insects also cause damage and that is why we apply an anti-ant
seal to prevent this type of damage. Put the sealant on when the wood or timber is parched.
The main thing that determines the durability of a wooden fence is the kind of tree used in its construction and whether or not it got treated
during the fencing
process. The type of tree that the wood came from determines
the overall appearance of the fence.
The repair of a wooden fence involves
replacing the rotten timber.
13.5 Fixing Shed Issues

A shed is a place where all of the garden tools, as well as any other home-based equipment, are stored.
Many homeowners take care of their tools by putting them in a dry place but fail to check on the overall
state of the shed regularly.
You need to pay attention
to the shed too.
Some of the signs that indicate
that a shed needs repair include:
![]() *Holes in the roof requiring immediate
*Holes in the roof requiring immediate
replacement of the roofing material,
to avoid timber damage.
![]() *Leaks whenever
*Leaks whenever
it rains.
![]() *Warped woods, especially when it is damp.
*Warped woods, especially when it is damp.
![]() *Shaky shed and a shed that has minimal stability.
*Shaky shed and a shed that has minimal stability.
![]() *Massive damage,
*Massive damage,
as a result of break-ins.
![]() *Rotting wood and dampened
*Rotting wood and dampened
floors.
Some of the tools and materials needed to fix a shed include:
![]() *A heavy duty broom
*A heavy duty broom
![]() *Rags and buckets
*Rags and buckets
![]() *Dustpan
*Dustpan
![]() *Glass cleaners
*Glass cleaners
![]() *A washer or any cleaning agent
*A washer or any cleaning agent
![]() *Paint
*Paint
![]() *Other optional
*Other optional
materials include nails, a hammer,
paint and brushes
The Shed repairing process
You can make a shed look new by repairing
it. Follow these steps to fix up shed issues:
Take all of the stored items out and keep them in a safe place. Thoroughly inspect the shed, in order to know what needs repairing. Check for leaks coming from the walls, roof and floor. Make sure the windows and the doors can open and close without any difficulty. Ensure you carry out any window and door repairs needed, before moving on to other fixing needs.
Map out a plan of how you want the shed to look in the end and list all of the materials
you will need for the job.
Do a thorough
clean up. Use the broom to sweep the shed properly and wipe the windows using a washer.
Remove the old paint and give the shed a fresh coat of paint. You can change the shingles of the shed's roof if it is necessary.
Add beautification detailing
like flower boxes and other types of décor, to give the shed a new lease of life.
Last but not least, reorganise the shed properly
by putting the tools back in order. Advise the client to try and maintain cleanliness as much as possible. Build a rack for storing
equipment appropriately.
Always paint on a dry day, so that the paint job dries up as required.
Also, clean the tools thoroughly, before returning them in the shed.
Activity 1
Estimated time: 10 - 15 minutes
So far, this module has explored at length the process of fixing up guttering system
issues and fence repairs. There are different types of
property barriers and each often serves a particular function. Different regions have different laws
relating to property boundaries, which most homeowners do not know.
Conduct research on fencing laws in various areas, because it will ultimately help when working on fence
repairs. This knowledge
will also help you to advise your clients accordingly, if they are in breach of any property boundary
or zoning laws.
13.6 Exterior Lighting
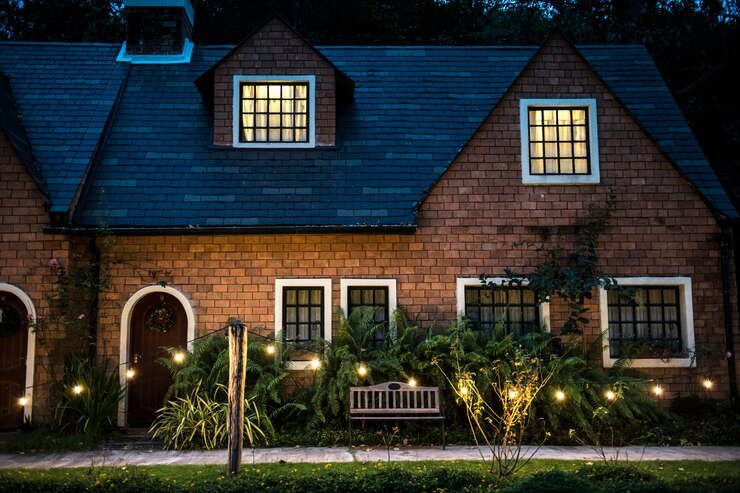
The outdoor lighting
needs of a home need a good amount of consideration, when designing or redesigning.
After installation, regular
maintenance is necessary to keep the lights in order. Exterior
lighting is a vital part of maintaining visibility within a property boundary
and also works towards enhancing
overall security.
The main problems that usually affect outdoor lighting
include the following:-
Burning of light bulbs
The primary cause of the problem comes from the way in which lights get installed. Most outdoor lighting
features a chain installation model and therefore, the first light is usually
the brightest and the others continue getting dimmer up to the last, which is the dimmest of all. The installation model means that the lights never get the appropriate voltages and at the end, they will blow and burn out.
Connection issues
For all outdoor lighting, use links that are waterproof.
Corrosion of wires
burns as a result of the incandescent bulb.
Insects
fixtures is quite common. Proper treatment of a home needs to be carried
out, in order to drive out these insects and keep them away from the premises.
especially in roof overhangs, include:
![]() *Light emitting
*Light emitting
diode (LED) - these are semiconductors that usually glow when current flows through
them. They are cheap to buy and operate and they often produce less heat. Changing
these bulbs comes with a level of risk because
of their placement
on roofs - and that is why LED bulbs are good, because of their long shelf life.
![]() *Compact Fluorescent (CF) - these are cheaper and even easier to operate
*Compact Fluorescent (CF) - these are cheaper and even easier to operate
than the LEDs. However, these bulbs do not do well in freezing climatic
conditions, especially during winter.
![]() *Halogen Bulbs - these are usually used as floodlights, especially
*Halogen Bulbs - these are usually used as floodlights, especially
in fields and stadiums. They are efficient
in their use of energy and their pure light makes the place look glorious.
![]() *Incandescent bulbs - these bulbs
*Incandescent bulbs - these bulbs
are usually hotter
and more expensive
than the CF or LEDs.
However, despite their high costs, they are short-lived.
![]() *Halide bulbs - these are usually dazzling and mostly used in museums and showrooms.
*Halide bulbs - these are usually dazzling and mostly used in museums and showrooms.
Modern exterior
lighting allows the owner of the house to choose from an array of options.
For instance
Some models stay off during the day, but at night, when motion is detected, they automatically come on.
Outdoor or exterior
lighting should have motion sensors
installed on them.
13.7 Installing Exterior Lighting

The interior and exterior installation of lights are similar.
However, for exterior
lighting, you have to connect
the wires in a way that ensures
they remain waterproof. This will help to avoid any dangers that may arise as a result of short-circuiting.
Materials needed:
*Circuit tester![]()
*A saw, usually keyhole type, is used![]()
*Screwdriver![]()
*Nails![]()
*Electric cables![]()
*Screws used in wooden materials![]()
During Installation
When carrying out the exterior
installation of lights, keep the following tips in mind:
![]() *Location - Come up with the best place for fixing your light and do the wiring.
*Location - Come up with the best place for fixing your light and do the wiring.
![]() *Power Off - As you are aware, when working with electricity, you should make sure that the power is off whilst you complete the installation.
*Power Off - As you are aware, when working with electricity, you should make sure that the power is off whilst you complete the installation.
![]() *Power Testing - Before touching the wires, test them using a load tester to make sure there is no power running through them.
*Power Testing - Before touching the wires, test them using a load tester to make sure there is no power running through them.
![]() *Mark the Installation Points - Using a pencil,
*Mark the Installation Points - Using a pencil,
ensure that you mark the lighting fixture
placement positions. Cut the hole and pull the wires through. Fix the wires on the fixture and tighten the screws correctly
using a screwdriver.
![]() *Correct Mounting
*Correct Mounting
- Make sure the lighting fixture is solidly mounted to a beam, to avoid loose connections.
![]() *Fix Bulbs Properly - If there are any protective materials
*Fix Bulbs Properly - If there are any protective materials
to be attached to the bulbs, remember
to do so.
![]() *Test the Lights - After installing the lights, turn on the power to see if they are working as required.
*Test the Lights - After installing the lights, turn on the power to see if they are working as required.
If you are not conversant with electrical operations, consult an electrician to help out with lighting
installations.
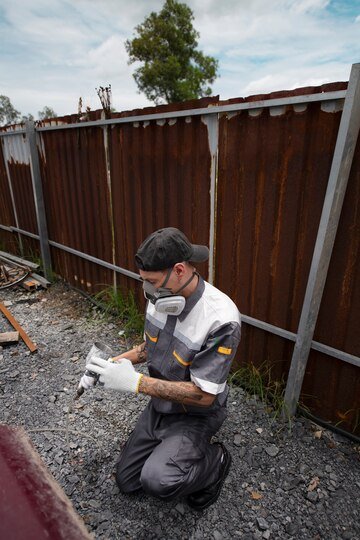
Fact
Home
renovations can spark up lead hazards, if proper handling
does not go into the removal of old paint containing lead. Paint removal methods, including
blasting, the use of power tools, dry scraping, burning
and dry sanding create most
danger by releasing inhalable particles
of lead into the air.
Source: Environment.gov.au
13.8 Painting the Exterior
of a Home

One of the best ways to spruce up the exterior of a home is by painting the outside wall.
Painting, in particular on a home's outer wall, is a complex issue because it creates a lasting visual
impact to onlookers,
as well as aids in protecting the outer wall.
Materials Required
Some of the equipment and tools that prove useful when painting
a house include:-
![]() *A ladder
*A ladder
![]() *A polythene
*A polythene
sheet
![]() *A washer that is well pressured
*A washer that is well pressured
![]() *A sprayer
*A sprayer
![]() *A tape used by painters
*A tape used by painters
![]() *A paint brush
*A paint brush
![]() *Paint
*Paint
![]() *Some water
*Some water
Factors to Consider Before Painting
Painting a house goes beyond having the right combinations of colours and changing the outlook of a home.
The things that are important
to keep in mind throughout
the process include:
![]() *Geographical Area - The geographic scope includes the weather condition
*Geographical Area - The geographic scope includes the weather condition
of the region. This is what we call the emotional loading
of the surrounding environment. It determines the overall moods of your environment. It has been discovered that a home's colour choice determines the mental and physical uprightness of the dwellers.
![]() *Architecture - If the house was built long ago, do not go with new painting options.
*Architecture - If the house was built long ago, do not go with new painting options.
It will look odd and the best solution is to stick to the colours that show off the home's historical ageing.
![]() *Ownership - If the property does not belong to its current resident and is owned by an association, it is best to consider
*Ownership - If the property does not belong to its current resident and is owned by an association, it is best to consider
the laws concerning modifications allowed on the property,
including painting. Otherwise, the tenant may end up paying penalties and incur losses,
as a result of only wanting to change the colour of their home.
![]() *Time - Give yourself enough time and do not underestimate the amount of work, especially if the building has not had a paint job for years.
*Time - Give yourself enough time and do not underestimate the amount of work, especially if the building has not had a paint job for years.
![]() *Costs - Make a budget that you will follow through the whole process, to avoid depleting
*Costs - Make a budget that you will follow through the whole process, to avoid depleting
your resources before completing the job. When painting an entire building,
make sure to do your calculations properly,
because it tends to be costlier.
Factors to Consider when the Paint Colour
which only depends on the homeowner's colour scheme, exterior painting becomes
complicated, because of colour preferences and the surrounding factors.
To work around
these needs:
![]() *Pay a before-job visit to the neighbourhood - it is advisable that you go around the region, to see how other houses are painted.
*Pay a before-job visit to the neighbourhood - it is advisable that you go around the region, to see how other houses are painted.
Look at their size and design and compare them with your client's home. However, you should not paint the house the same colour as those around the neighbourhood and you should instead get creative with it.
![]() *Consider the landscape - the environment surrounding the house should play a significant role in determining the colour choice.
*Consider the landscape - the environment surrounding the house should play a significant role in determining the colour choice.
For example, a house that is surrounded by trees should get a coat of exterior paint in natural tones, such as green or yellow.
![]() *Look into the location of the home - if the house is a residential property located in the city, paint it in bright colours so that it stands out and shows off a display of your painting
*Look into the location of the home - if the house is a residential property located in the city, paint it in bright colours so that it stands out and shows off a display of your painting
skills.
![]() *Permanent
*Permanent
features - some houses feature elements such as tree stumps, which determine
the colour of choi
Painting the House
Follow these steps, when finally painting the house:
![]() *Remove dirt from the wall using a pressure washer
*Remove dirt from the wall using a pressure washer
![]() *Repair all the damaged
*Repair all the damaged
areas
![]() *Remove any paint that is loose
*Remove any paint that is loose
![]() *Fill in any gaps
*Fill in any gaps
![]() *Eliminate stains,
*Eliminate stains,
by applying a coating
![]() *Cover all the doors, bulbs and windows
*Cover all the doors, bulbs and windows
![]() *Spray the surfaces first, before the main colour
*Spray the surfaces first, before the main colour
![]() *Paint the doors and windows using a paintbrush
*Paint the doors and windows using a paintbrush
Activity 2
Estimated time: 10 - 15 minutes
The module discussed
the process of exterior home painting and how to approach the process. One of the things the module has explored is the architectural factor that influences
the colour choice.
Research into old paint methods and find viable information that will help clients retain the current
colour of their old/historical homes.
The module also briefly touched on the risks painting poses when a home has had a previous
lead- based painting.
Explore options of how to test for possible lead existence within a home, in order to factor them in your conversations with clients who need painting services.
Module
Summary
Homes come with various
handyperson repair needs, both internally and externally.
This module has explored how to approach
most of the regular exterior
jobs, including repairing
guttering systems, fixing fences and sheds and installing and maintaining exterior
lighting.
Most homeowners get to a point where they need to give their home a new lease of life and painting is often the popular way of changing
things.
The great thing about exterior
home repairs and painting is that you do not have to spend a lot to work on these jobs. The materials
needed are what you would typically find in any home or use for interior jobs. It still makes sense to invest in your set of tools and equipment needed to carry out outdoor
handyperson jobs.
With the basic working knowledge
offered through this module, you should be able to skilfully approach
any exterior home jobs.
.svg)