
9.1 Introduction
Fixing sink blockages and carrying out everyday plumbing
needs, such as washing machine installations, can get complicated, if
you overlook a few important steps.
However, equipped with the right knowledge, you can get the job done in the shortest
time possible.
In this module, we discuss the detailed process of
unblocking sinks/drains, as well as the most essential tools you will need in order to get the job done. Also, we look into the process
of installing a washing
machine in new buildings, whether the newer or older models.

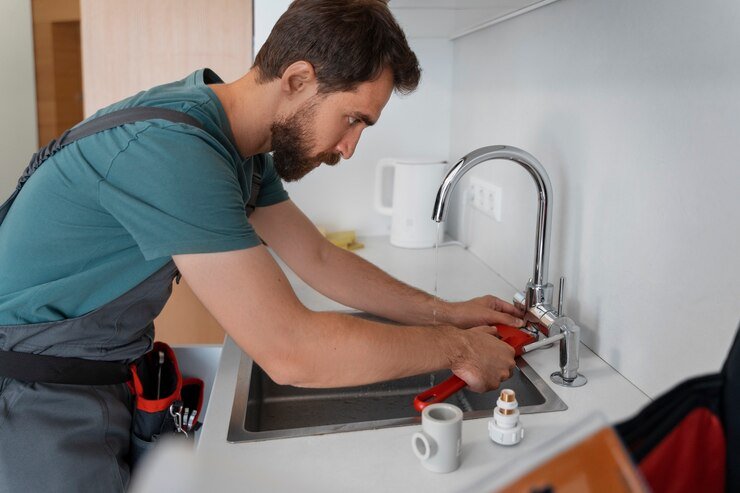
One of the important things to make a note of
before fixing a kitchen sink is to check up on the number of holes it has for
the tap.
Most kitchen taps have between
two and four holes. In case the new tap has more or fewer holes,
make use of the old one. However, your client should make the choice of whether
to buy accessories, such as a soap dispenser, or not. When you are in the process of identifying the number of holes in the sink, also check for worn out or
rusted water pipes that supply the sink area and if necessary, replace them with new ones.
Tools and Materials Needed
When working on kitchen or bathroom sinks/taps,
there are some tools you will need to have in place.
![]() *An adjustable wrench
*An adjustable wrench
![]() *A putty knife
*A putty knife
![]() *The new tap
*The new tap
![]() *Plumber's tape
*Plumber's tape
![]() *Basin wrench
*Basin wrench
![]() *Plumber Putty
*Plumber Putty
Some other items that you will also need are a bucket and kitchen roll.
Removing The Old Tap
Start by cleaning up the sink area using kitchen
roll, dry any water around the sink basin and empty the bucket.
Follow the tap removal instructions in Module 8 and
you will have the tap out in no time. Check for leaks and if none are present, then you are done.
When it comes to replacing bathroom taps, apply the
same procedure, keeping in mind that you only
have two holes - hot and cold water holes. Therefore, you do not have to
waste time checking for additional
holes.
In the bathroom, fit only three
types of tap, including the lever head valves, shrouded
head tap and the two-hole mixer taps. In all
three, you will fix them using the same procedure and then make sure they are leak-free.
9.3 How to Unblock Sinks
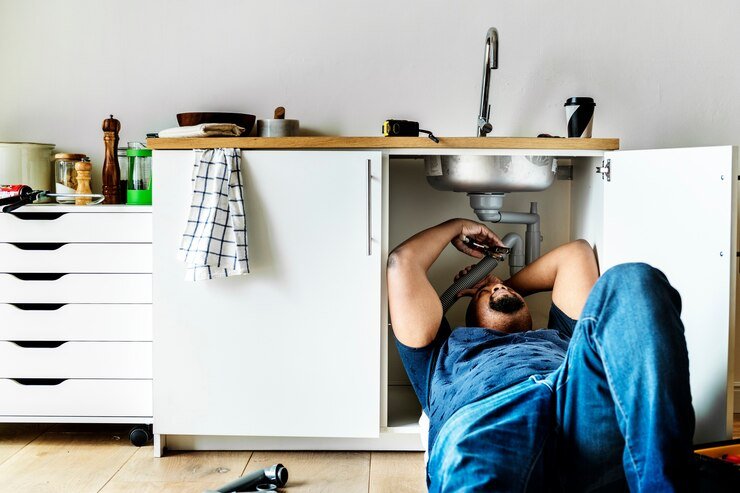
It is worth noting that most blockages usually occur in the U-bend.
This part of the sink contains some water and if the water has been in there for a long time, it emits
a terrible odour.
Whenever you want to work on blockages, always
remove the U-bend and have a water bucket ready, along with some kitchen roll
to handle the mess. Have a pair of gloves on too, because you will likely have to forage through the grime and sediment that has collected.
The Purpose of U-Bends
The purpose of having a U-bend in a sink is to
prevent any massive particles from entering into the draining system. Once you have removed the U-bend, push a wire
brush inside to ensure that all particles,
if any, are removed from it.
In homes where there are kids, expect to find all
manner of things stuck up in the U-Bend, from
crayons to wet pipes and of course,
all these things
lead to sink blockages.
Naturally, when a blockage occurs,
the first suspect
should always be the U-bend.
Just remove it and
put a wire brush in it, before replacing it.
Fixing Drainage System Blockages
If the U-bend is not the cause of an obstruction, then the drainage system may have a problem. Use a plunger, which is more advanced because
of its suction capabilities, to unblock the system.
of a professional and an advanced plunger
is the power plunger.
With this tool, you fill it up with air by pumping
it up and then placing it inside the drain. You then release the trigger and all the compressed air in the plunger is
forced into the drainage system, which will
unblock the drain.
You can also use a plunger that applies water
force, like the water injection plunger. This is similar
to the power plunger, but the only difference is that it uses water exertion
instead of the compressed air alone.
Just pull the water into the plunger and then push harder downwards, to release
the accumulated water energy.
When using a power plunger, you are
advised to close all water outlets so that the air does not find an escape route. Also, close the main
outlet overflow pipe. Nevertheless, the plungers are useful in removing any
blockage set within a few metres in the drainage system.
Using a Plumbing Snake
You may have cleaned the tap, used both the water
injection and the power plunger, blown into the drainage system with force, but the blockage
still persists. In such a situation, make use of a
plumbing snake.
cord with a handle, but it functions as a very
powerful plumbing tool.
It goes through
the U-bend and proceeds into the drain system. You only need to push it through whilst turning the handle, if it
is a manual one. This enables its head to crush the obstacles in its way into pieces. However, if it is electric,
you just need to connect it to a power source and it does all the work
for you. The powered one rotates at a faster
rate, compared to the manual
model.
Start by removing the drain cover in the sink and
push the snake into the drain system. A little
pressure may be required, to get the snake through the U-bend. Most
people mistake the U-bend as the blockage
and fail to look for the actual
blockage in the drainage system.
Be careful to recognise
the difference between
the U-bend and the main blockage debris
or pieces.
As you push the snake, make sure you are rotating the handle of the equipment.
This automaticallymakes the snakehead rotate, enabling the breaking
of any obstacle around the drainage system into tiny pieces.
rotating drill and therefore, you are advised to perform a manual check for obstructions several
times. When the blockage is gone, turning
the snake through the drainage system should become easier. Sometimes,
there are solid objects, which usually stick
at the snakehead, when pulling
it out of the draining
system.
Be prepared with somewhere to put these blockages
For example
Use a rubbish bag.
Also, wear gloves to safeguard
yourself from contact with germs.
Activity
1
Estimated time: 10 - 15 minutes
So far, the module has discussed how to unblock
sinks and mentioned the tools you will need, as well as the unblocking procedure.
Make an assessment of the tools you
already have and what you will need to quickly, efficiently and
cost-effectively remove sink obstructions. The plumbing snake is the most
crucial tools that you will need to work on drain blockages.
Check for prices online and go ahead
and purchase one, to get you started on building up your sink blockage removal
tool kit.
9.4
How To Perform Plumbing/Installation On Washing
Machines
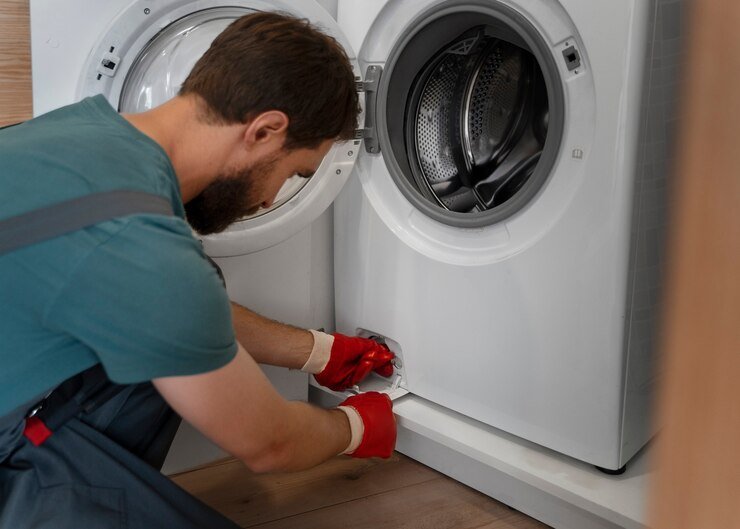
When someone is moving to a new property, they may not fully know how to go about operating and fixing
their washing machine
They may contact you because your service is
cheaper compared to calling for the dealer or the plumbing engineer from the manufacturing company of the washing
machine. Therefore, you should expect
to be hired by such clients who need these installations.
always have the appropriate tools at hand. Some of them
include an adjustable wrench and a spirit level. However, your client will not
always have tools that are long
enough to reach the drainage or water supply and it is wise to invest in
additional parts,
such
as a hose connector, a drain hose and a cold fill hose.
Some of the crucial parts you are going to focus on
during the installation of the washing machine include
transit bolts and the draining hoses are listed below:
Transit Brackets or bolts
For every washing machine, there are always screws
required during transportation, to hold the drum
firmly, to prevent it from bouncing around and becoming damaged.Should you happen to forget to remove them and you
turn on the machine, you will experience an unexplained
bouncing that eventually destroys the washing machine.
When you are done with the installation process, you might think that it is in excellent
condition, but if the brackets
remain, it could lead to a flooding disaster. To avoid this, make sure to
remove the transit bracket bolts.
Connecting the Fill Hose
When installing a brand new washing machine, it is
always fed by cold water. However, if it is fed by hot water, the pipes come already installed and
every connection will be in place. The first thing you need to do is turn off the water supply.
There are coloured
mini T valves, which are coloured blue and
red. The blue is for the cold water and the red is for the hot. Make sure all are turned off, before
working on them.
Some of the clients may prefer to have their old
washing machine disconnected and removed. Remember
the customer is the boss, so do as they say and remove the old one first. Most
modern machines use only cold water. Therefore,
connect the blue valve to the cold water and the red valve
to the hot water. So, on a modern device,
the red T piece valve
will have no use.
To solve the problem of the red valve hanging
without any use, you can purchase a blanking cap. These are just screws that prevent the water from leaking out
and they are tightened over the T valve.
When the New Fill Hoses are not Long Enough
This is a very common problem that you will encounter more often than not.
called the waste pipe, not
reaching the machine. The manufacturers always assume that the washing machine will always be just next to the fixtures
used for plumbing and therefore, they always make very short connection pipes.
However, we all know this is not always the case.
Most new washing machines come with new connection
pipes that are of course shorter than those of
the old washing device. You can fix the two if the older ones are not worn out.
However, many clients may not be
comfortable with it and it is important to enquire from them, before making
this swap.
either buy new connection pipes or fix the old ones to the new ones using a
hose connector. The connectors will definitely double the length of the pipes,
to serve the purpose well.
Fitting the Draining Hose
This is one part of the washing machine
installation process that you need to get right. If the draining hose is not
installed as required, it will result in having wastewater flow back to the
washer, which is not suitable for either business or home use
hose but one of the most commonly
used is called the spigot. It
comes with a tapered nozzle and allows you to just put the drain hose over to
the nozzle. In case the connection is weak after you have fitted it, use a cable tie that will fasten the drainpipe to the spigot.
Most of the spigot is aligned using a blanking
nozzle, which becomes advantageous to landlords in controlling any amount of water that may leak from the spigot when the taps are opened. Therefore, it is crucial to check the spigot first, to make sure it has been opened and in case the cap is still on
the nozzle, just trim it and remove it from the vent.
One important thing to check in a spigot is the
positional angles. They mostly move out of place, when removing the original connection during installation. The
spigot should either run out of the waste
pipes straight on or at an upward angle. They should never move downwards
because they will cause the wastewater to run back and down to the washing machine.
The U-bend should be positioned seven to 10
centimetres lower than the spigot. The drain hose should never be fixed
running downwards - rather, it should be fixed, if possible, at the highest point. If your drain tubes are short, you have to fix another
one, just like with the water feed pipes,
to make it long enough
so that it can get set at the highest
point. Drain hoses
or pipes are easy to obtain from your nearest hardware
store, or any other shop that deals with plumbing tools.
Also, you might be using a standpipe as
a wastewater pipe. This also may be employed for draining the water from the
washing machine out.
In case you are going to use the
standpipe, you need to make it go to the lowest point possible, to avoid some
water seeping back to the machine. You should also fix some cable tie, to
prevent the pipe from slipping
or coming out of place, especially if the machine
is at its full rotation
speed.
The standpipe should be as deep as 12
to 15cm, before even thinking of fitting the waste drain pipe and the drain
hose should be at the height point possible. The reason for doing all this is
to prevent the backflow of dirty water back to the washing
machine, which is not professional.
Getting the Machine Levelled
Since your working position is not where the
machine will be kept, level it before putting it back in place. Most modern
washing machines have adjustable feet.
Therefore, make sure you have adjusted
it to the preference of the client and in line with the manufacturer's instructions.
some water has got into the soap drawer. To fix this problem, use your spirit level tool to make sure the washing
machine is well fixed and levelled.
make the machine
rotate and keep moving around
when it spins
at the highest speed.
To adjust the feet properly, use an adjustable
wrench. It will help you either move the machine up or down as required until your washing device is in the proper
position. When it is in its permanent position, use the spirit level again to
ensure it is well balanced.
Fact
The per-wash water consumption of
washing machines vary tremendously, but some use as much as 20 litres for every
kilo of washing, whilst others only use
six litres per kilo.Source: Waterwise.org.uk
9.5 How to Bleed and Drain Radiators

Fitting Thermostatic Valves to Help Save Energy Costs
With increased standards of living, everyone needs
to save on cost as much as possible. Energy consumption
often plays a role in determining a household's general spending costs. When
fitting thermostatic valves,
the cost of power consumption within a household
will significantly be reduced.
Your clients may upgrade their boilers to modern
ones, but this will not cut back on their energy costs if they are not fitted with thermostatic valves. You can
bring this option to your client's attention. All that is needed is adjusting the thermostatic valves on their boilers - and it does not necessarily call for buying new ones.
The advice you provide to your clients makes you
appear even more professional. Give them energy saving tips, including the
helpful information of only switching on heaters and radiators in rooms that are frequently used.
Fact
Having room thermostats installed,
along with thermostatic radiator valves and a programmer, can help save
anywhere from £75 to £155 off annual energy
consumption costs.
Source: Energysavingtrust.org.uk
9.6
Other
Energy-Related Cost Saving Measures to Propose to Clients
Advise clients not to leave the boiler on, because it may lead to higher energy bills.
every time they leave their house or business
premises. Also, if they do not shut down the furnace, the water will be too hot for comfortable use and
this leads to wasted energy.
At night, the boiler should be off, in order to give it time to cool the water.Before working with any radiator, drain water from
it. For modern boilers, you can close the furnace and remove the water. However, for the old radiators that have
water cylinders, they require the closing
of the main supply of water.
Before commencing any repairs on the radiator, make
sure the water has been drained out from it.
You need a drain point for removing any water in the core heating
system. This drain point acts as the
valve on the radiator or the pipe found on the bottom part of the heating
system. If possible, attach another
hose to the valve and drain the water in an outdoor area.It is highly advised that you do not remove the
water from the radiator into any flower or vegetable garden or orchard because
it contains some chemicals that may be very dangerous to the life of plants, pets and children.
The draining pipe placement should be leaning a
bit, in order to avoid blockages and consequently, will make the water flow with ease.It is important to hold the tube in position using
a clip to prevent slipping off since the water will be under high pressure
from the radiator. Put a bucket
under the radiator
for a catchment, in case there is excess water. Use the right protection for the floor too. Before the draining
valve is opened, go around the radiator and ensure
every valve is opened. The reason for this is that if one is not opened, all the water in it will not drain
out.
Once you have made sure all valves including the square head are open, go outside
and check whether the water is
flowing out properly. Once you are done with that, go back to the radiator and open all of the air valves using a
radiator key and the air will be sucked into the system and will help push the water out.It usually
takes between 10 to 20 minutes before the radiator
drains out thoroughly.
When the flow stops from the outdoor pipe, it means
the system has been removed. However, it may
not be possible to let all of the water
out. Any remaining water can be bailed out with a bucket or pail. Now you can work on your
radiator.
Activity 2
Estimated time: 10 - 15 minutes
So far, we have explored
the process of installing a washing machine
and how to go about working
on the fill hose length issues. Given that most new washing devices come with
shorter fill and drain hoses, conduct
research on the costs of buying these new pipes.
Remember, you will have to give the client the option to purchase a new drain hose and fill tube, so
it will also help if you are equipped with accurate cost information.
Secondly, look into more energy-saving tips that
you can impart to your clients, as a way of helping them bring down their power consumption costs.
Module
Summary
This module has given you a comprehensive guide on
how to go about fixing blocked sinks/drainage systems, as well as the washing
machine installation process.
Get started by trying it out with your own
drain/sink to see what is inside and how to go about fixing blockages, using
this guide.
Remember that practice makes perfect and the more
you give it a try, the more skilled you will
become at efficiently fixing sink/drain blockages.
The same applies to installing washing machines.
Analyse your own washing machine, to get familiar with all its parts and connections.
Having this familiarity will make it much easier when working on your first installation job.
Also, keep on reading and soaking up knowledge
about energy efficiency, to impart this wisdom to your clients.
.svg)