
8.1 Introduction

A leaking tap can drive anyone crazy - and more so if it persists even after attempting
all the quick-fix solutions.
The worst thing about leaking taps is that they will often keep dripping,
despite efforts to prevent them from leaking
further whilst waiting
for a more permanent solution.
A handyperson's services
provide the relief that every homeowner needs, to repair a leaking or broken tap with cost-efficiency.
A leaking or broken tap are often categorised as some of the seemingly
simple jobs - those jobs that homeowners would rather fix themselves or get a handyperson, as opposed to plumbers who come with high costs. Also, more than often, plumbing professionals concentrate on the bigger jobs and this makes these small tap fixing jobs a handyperson's haven for income. Regardless, most homeowners will contact a handyperson to fix their leaking taps and toilet cisterns to make sure that the job is done well.
Fixing a leaking or broken tap does not come with complex requirements. A screwdriver, washers,
an adjustable wrench and a reseating tool are all you need to get the job done.
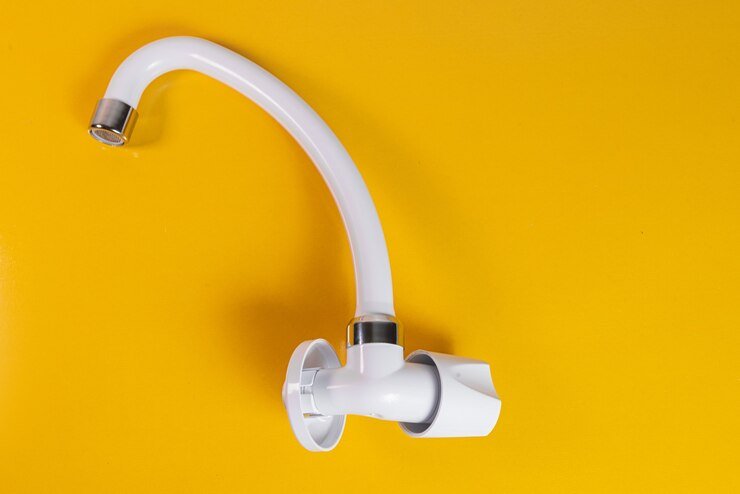
8.2 Why Do Taps Leak?

Taps come in all shapes, designs and sizes, but eventually, most start leaking
and the seemingly simple problem can quickly
spiral out of control.
A leaking tap not only creates a form of noise nuisance
to a homeowner, but in the long run, it equates to the loss of several gallons of water.
Taps can start leaking for several reasons and one of the common causes of tap leaks is the wearing
out of the washers.
Replacing worn-out tap washers instantly
fixes leakage problems
related to them,
but the catch point is to get the right sized washers for the job. The easiest way around this is to go for multipacks that are available
from hardware stores.
Where Are Washers Located on The Tap Structure
The tap features tap washers at several points on the tap structure
and knowing where to find them helps to identify the origin of a leak quickly.
The tap washers on the tap structure
are at:
![]() *The tap base.
*The tap base.
![]() *The movable junctions of a tap - this is especially unique to single model taps, which move left to right.
*The movable junctions of a tap - this is especially unique to single model taps, which move left to right.
![]() *The tap spout.
*The tap spout.
How To Inspect Leaking Taps
The first step involved in fixing a leaking tap is examining
the source of the leak. The leak often originates from the points mentioned above. Just to recap, the leak can either originate
from the base of the tap, the spout, or at any movable juncture
of the tap.
Once you have identified where the leak is coming from, you will need the following
tools in order to repair the tap:
![]()
*Allen key or screwdriver
![]() *Washers
*Washers
![]() *Adjustable wrench
*Adjustable wrench
8.3 Assessing And Proofing The Job

Once you have your tools and have identified the source of the leak, the next step is to evaluate
the job needs.
Whilst fixing tap leaks is a straightforward process, oversight of certain crucial
steps might set the repair process a few steps back.
Firstly, you need to turn off the water supply before going ahead and starting the repair process.
You do not need to shut down the supply of water for the entire house and can do a localised switch
off instead. Underneath
most sinks are stop valves, which can locally turn off the individual taps.
Sometimes, the shut-off
valve might be the penny-type
and you will have to use a screwdriver to get it to turn clockwise. Likewise,
some sinks might not have shut-off valves beneath them - and in this case, the entire water supply would need to get turned off.
Before turning off the water supply, run the water and leave it running.
Go ahead and shut off the water supply, with the water still running,
to make sure that the water gets completely turned off. In the case of working on an upstairs tap, make sure to run a tap downstairs, because of the downhill water flow, to enable water from upstairs to drain.
Last but not least, plug up the sink or cover it up using a cloth so that screws and other movable
parts do not go down the drain.
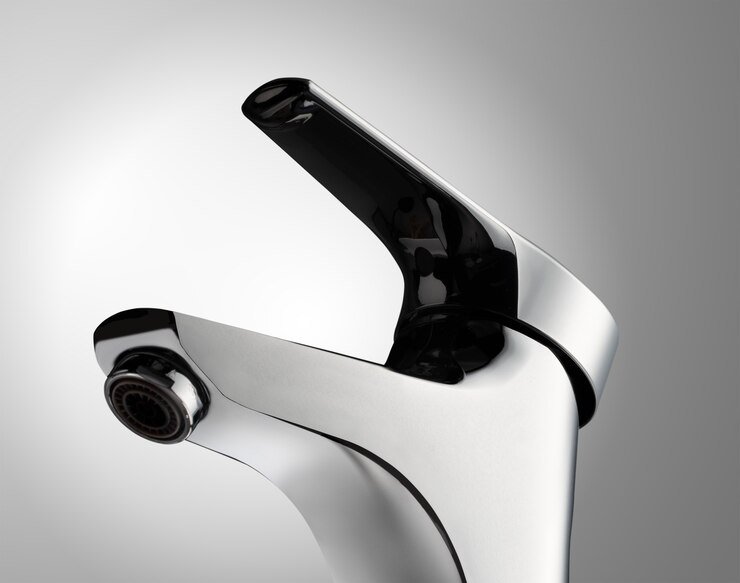
8.4 The Parts Of A Tap
Once again, to reiterate, taps come in different designs,
shapes and sizes.
However, most have a set of similar parts, including:
![]() *Back nut
*Back nut
![]() *Handle
*Handle
![]() *Spout
*Spout
![]() *Cover
*Cover
![]() *Spindle
*Spindle
![]() *Body
*Body
![]() *Gland nut
*Gland nut
![]() *Head
*Head
![]() *Washers
*Washers
![]() *O-ring
*O-ring
![]() *Jumper valve
*Jumper valve
It is important
to note that not every tap will feature the listed parts and some might have only the O-ring, valve seating, jumper valve and washer.
Replacing tap washers should start off the tap fixing process and testing the tap after the replacement should let you know whether or not the leak is fixed.
If replacing the washers does not repair the leaking problem, look into the seating and carry out repairs on it. A reseating tool is what you need to fix up seating valves that are damaged.
8.5 Moving Joints On Taps
The taps in kitchens and some bathrooms
come in the single model,
with right and left swing abilities
Sometimes, these types of valves can develop leaks at the swivel joint. This kind of leak is easily fixable because both the valve and stem are unscrewed
from the tap's base and lifted off to replace
the washer and then everything
is screwed back on.
Valve Seatings That are Damaged
Dishwashers feature descalers
because the lime contained in dishwashers can cause damage to some of their parts. In kitchens that get a hard water supply, the valve settings
of the taps, which are often made using brass, can get corroded due to the water's limescale. The result is that little
burrs develop on the tap seating.
The repair needed in this case requires
the use of a valve reseating tool. It makes sense to get a tap reseating
kit with diverse
sized tools, including
screw inserts and cutting blades,
to accommodate the equally different
sized taps.
To get access to the tap seating to make these repairs,
follow the instructions on how to access the tap below and insert a finger to feel around the inner chamber of the tap. You should feel roughness where the seating
valve has suffered
from limescale corrosion.
The serrated blades
are used to shave off the limescale, leaving a smooth surface finish for the washers to rest upon. It also prevents further
damage to the seating and ultimately, future leaks.
Taps With Ceramic Discs
because they require specific replacement cartridge brands/models. However, it is possible to find universal
replacement parts for ceramic discs.
Taps that use ceramic discs make it easier to fix leaks because they only feature two components that point out the origin of leaks.
The rubber seal is the first of ceramic discs- based tap's components to check, in the event of fixing
leakages. When you have removed the rubber from the tap, check it for wear and if it is worn out, replace
it with a like-sized seal. This should fix the leaking problem
if the rubber seal is the origin.
The tap's cartridge
is the second component to check in the event of fixing a leak on a ceramic discs-
based tap. Check for chips or scratches
and if you see them, the cartridge
needs a complete replacement. The cartridge should get replaced
with a similar-sized one and they often range from 25mm to 40mm in width, at their widest part.
Clean the cartridge
after removing it and then fit it back, in order to test whether it just needed some cleaning to do the trick. If the old cartridge works after cleaning
but looks worn out, you should advise the client to replace
it. Have costs of the replacement cartridge
at hand, or you can suggest that the customer
buys the replacement part for you to fit.
Special Cartridges
Some cartridges have temperature regulation capabilities and they are also
the most expensive.
Such specialised cartridges are often found in commercial buildings, such as public restrooms
and healthcare institutions. Such places also feature mixer taps, which regulate the temperature of hot water. However, it is possible
to find such setups in residential buildings.
These types of cartridges are often brand-specific.
Some taps use the non-concussive model of cartridges
that release water for short periods at the press of a button and then shut off automatically.
Fact
British households
use central heating owing to the law prohibiting
the mixing of hot and cold water from boilers. This is one reason why most
homes in the UK still have two taps
Source: Brightside.me
8.6 Slack Gland
Nuts

When you open up the tap, the first bolt that you will unscrew is the gland nut.
Once you take off the gland nut, you can access all the other components of the tap. However, when the nuts slack, the tap does not stop leaking. However,
once you inspect all of the inner parts and put them back together,
it is natural to tighten
the gland nut and if it was the cause of the leak, this should fix it.
Once you open up a tap and inspect the washers, valve seating and cartridge and nothing seems out of the ordinary;
then consider that the gland nut could be the problem. However,
always go through the assessments as outlined above, in order to rule out every possible origin of a leak before attributing it to the gland nut.
8.7 How To Access The Taps When Fixing Leaks

To access a tap and all of its parts, start by removing
its screw cap.
After the screw cap is out, go ahead and unscrew the underlying
screw.
Next, take out the headgear nut, with the help of an adjustable wrench. Be gentle when using the wrench, because the water pipes are fragile
and you do not want to cause unnecessary damage to them. Use a cloth, before gripping the tap parts with a wrench if they are stiff and difficult to get off. For the tough parts that will not loosen up, use some WD-40 with petroleum
jelly and any other lubricant
and lather it up on to the part. After a few minutes, the oil should have taken effect and the parts will come off faster.
You can also use some lubricating spray, for a quicker effect.
Once the headgear
nut comes off, it leaves the washers
accessible and you can remove them. If they are held in place using bolts or screws, remove the screws or nuts for the tap washers
to come off. Make sure to replace
them with a similar type and size - this is why getting a multipack when buying tap washers is highly recommended.
After replacing the bolts, re-attach
the tap headgear nut as tightly as needed, to prevent leaks.
Tighten the screws
and bolts that need tightening, before you reattach
the tap once again.
Activity 1
Estimated time: 10 - 15 minutes
This module explored how to fix leaks originating from all parts of a tap. Now, most of these parts will need replacing during the repair process.
Look up the costs of replacement washers, cartridges and valve seatings,
in order to have this information on hand when suggesting alternatives to a client.
Also, look up the mechanics of
specialised taps, including the ceramic discs models, mixer taps and taps with concussive cartridges. This will give you headway in getting more familiar with them and be able to fix them appropriately when you encounter
them.
How to Fix A Leaking Toilet Cistern
*Next to a leaking tap, a toilet cistern with a leak issue can drive the best of homeowners crazy with the unnecessary drip noises at night.
*It also contributes towards a preventable increase in water bills. Any leak, whether
a tap leak or a toilet cistern leak, needs fixing sooner rather than later.
*Just as with a leaking tap, more than often, a leaking toilet tank calls for the replacement of its washer.
*Pliers, a screwdriver and a new washer are what you will need to fix a leaking toilet cistern.
Method
*Turn off the water that feeds the toilet and then remove the toilet tank's lid.
*Flush the toilet, to make sure that no water re-enters the bowl. The outlet valve is what you should look for and you will probably
find it in the middle.
*Next, undo the bolts located underneath the cistern, to replace the toilet washers.
The bottom nut is easy to unscrew using your hands, but you will need to use multi-grip
pliers to undo the top ones.
*Once you have the bolts, you can lift the outlet valve, replace the washers and then place back the outlet valve.
*Turn the water feed on, allowing the cistern to fill up and then flush the toilet.
*If changing the washers does not fix the problem, then it might mean getting a new tank outlet kit. Go ahead and remove the cistern outlet kit using the procedure outlined
above and go with it to a local plumbing
supplies/hardware store, to get a replacement.
Fact
Water
efficient toilets using the dual flush system can reduce a household's water usage by up to 40,000 litres annually.
Source: Waterrating.gov.au
8.8 Bathroom Extraction Fan Installation
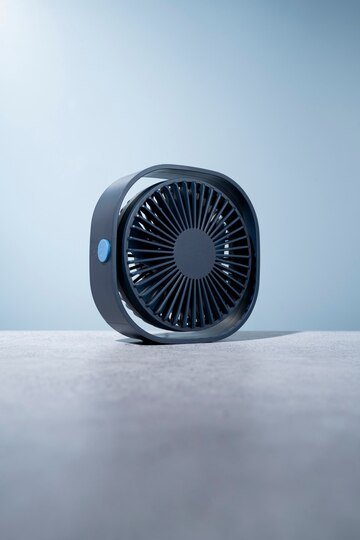
Extraction fans have an essential
function in bathrooms, when it comes
to the removal of bad odours and moisture.
Removing moisture from bathrooms helps in preventing
mildew and mould growth; preventing paint and wallpaper
from peeling and keeping windows and doors from warping.
The tools that you will need to fix or replace
an extraction fan include:
![]() *Tape measure
*Tape measure
![]() *Power drill (with masonry drill bits)
*Power drill (with masonry drill bits)
![]() *Cold
*Cold
chisel
![]() *Insulated pliers
*Insulated pliers
![]() *Bolster chisel
*Bolster chisel
![]() *Insulated wire strippers
*Insulated wire strippers
![]() *Club hammer
*Club hammer
![]() *Insulated screwdrivers
*Insulated screwdrivers
![]() *Plasterboard saw
*Plasterboard saw
![]() *Cable detector
*Cable detector
Get some overalls as well, because the job may end up being relatively messy.
There are generally
two types of extraction fans that you may install,
depending on the client's preference:
Extraction Window Fan
One thing you will need to obtain when
installing extraction window fans is a double-glazed piece of window glass.
Next,
draw up a plan on a sheet of paper outlining the window pane, including the precise diameter
of the hole that you will make on the window to insert the fan. The hole
you make should be slightly larger than the size of the fan, in order to accommodate the fan's housing.
Seal the top of sash windows shut using screws,
to avoid damaging
the fan when raising the lower sash.
For the wiring, you should have a manufacturer's guide to follow to assist you with the installation.
Extraction Wall Fan
For the removal of the wall fan, you will first have to work with the client to identify a suitable wall for its installation.
Next, use the cable detector to check for existing metals or wirings that could be underneath the wall. Also, inspect the exterior wall to see if there could be any obstructions, such as rainwater
pipes and soil.
Make markings on the centre where the fan will go in and then drill a hole. Make sure to use the drilling tool in a slightly downward
slant.
Next, drill several
holes using your 10 mm drill bit. The holes that you drill should be at 35 mm intervals around the edge of the circle.
Knock the waste out using a club and
bolster chisel and smooth out the rough edges using the cold chisel. You might have to carve a groove
to accommodate the wiring and conduit and re-plaster the area afterwards.
Follow the manufacturer's instruction on fitting
the fan and aluminium ducting.
Use decorative caulk for any gaps that need filling up between the wall and fan.
Warnings
Whilst your work ends after the installation or re-installation of bathroom extraction
fans, you should offer sound advice to your clients on the proper use and maintenance of the fans.
Some of the information to pass on to your customers includes:
![]() *Bathroom extraction
*Bathroom extraction
fans need regular cleaning and inspection, to ensure that they are working as required.
![]() *Existing fans that are not easy to access for routine maintenance or show signs of heat damage need immediate replacement. Thermally protected fans come recommended as the best
*Existing fans that are not easy to access for routine maintenance or show signs of heat damage need immediate replacement. Thermally protected fans come recommended as the best
*replacement option.
![]() *For commercial or even residential buildings that have replacement schedules
*For commercial or even residential buildings that have replacement schedules
in place for a significant number of fans, the rate of their general cleaning
and maintenance should
go up.
![]() *Extraction fans should not get used for prolonged
*Extraction fans should not get used for prolonged
periods of time and when you leave the house,
you should turn them off.
Activity 2
Estimated time: 15 - 20 minutes
Thus far, the module has discussed how to go about fixing toilet cistern
issues and installing bathroom extraction fans. Now, when it comes to the installation of toilet tanks, the module has discussed the possibility of having to purchase a new outlet kit to repair a leak issue.
Conduct research on the bathroom
cistern brands/models available.
The information will save a lot of time when out on a job that needs a replacement tank and it gives you a knowledgeable standpoint when advising clients about their options.
Secondly, the module has also discussed the two types of extraction fans available - window and wall extraction fans. Research more about each individual type of fan, as well as the pros and cons of going for either option.
Module Summary
Tap leaks are some of the most common plumbing
issues that every homeowner faces at one point or another. Whilst these problems
appear to be seemingly easy to fix, most homeowners will choose to employ the services of a handyperson to ensure that the repairs are done well.
Going through this module will help you to understand more about how tap and toilet cistern leaks occur and how to fix them and the function of toilet extraction fans.
This module has explored the reason why taps leak - and it always
comes down to the washers.
Replacing worn-out tap washers often does the trick, when it comes to fixing
valve leakages.
The three tools used to fix valve leakages include
an Allen key/screwdriver, an adjustable wrench and replacement washers. Leaking toilet cisterns often also require
replacement tap washers,
but in some cases, a cistern outlet kit is required.
Bathroom extraction fans take the crucial role of making sure that your bathroom stays free from mildew and mould, as well as protect the bathroom
paint or wallpaper from peeling. The two standard types of extraction
bathroom taps available
are window and wall fans.
.svg)