
MODULE 2-Advanced Plastering Techniques
This module covers professional plastering methods used in high-quality finishes for walls and ceilings. Learners will master mixing, application, and finishing techniques for different plaster types, ensuring smooth, durable surfaces.
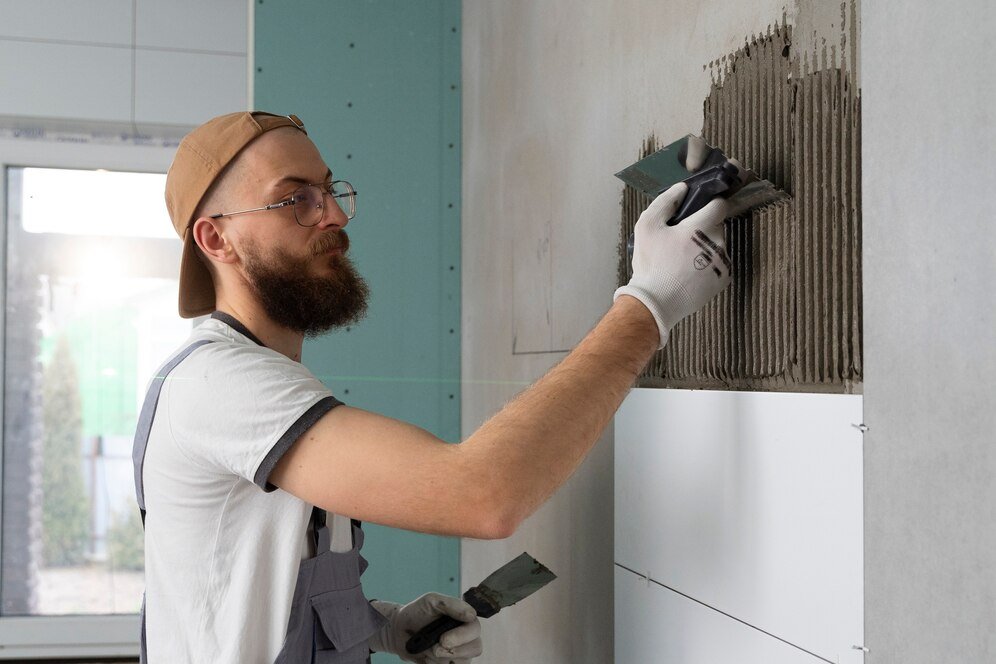
1. Applying Finishing Plasters (Multi-Finish, Board Finish)
Finishing plasters provide the final smooth layer before painting or decorating.
Multi-Finish Plaster
Uses: Versatile plaster for most backgrounds (plasterboard, bonding coat, sand/cement).
Mix Ratio: ~2:1 (plaster to water) for creamy consistency.
Application:
Apply in two thin coats (1st coat scratched for key, 2nd coat smoothed).
Trowel technique: Use firm pressure in arcs for even spread.
Drying Time: 1–2 hours (depends on thickness and room conditions).
Board Finish Plaster
Uses: Specifically for plasterboard surfaces (not for high suction backgrounds).
Mix Ratio: Slightly thicker than Multi-Finish.
Key Tip:
Apply in one pass (no need for scratching, as plasterboard has low suction).
Polish with a damp sponge trowel for ultra-smooth finish.
2. Floating Coats (Sand/Cement, Bonding Coats)

Floating coats create a level base before finishing plaster.
Sand & Cement Float
Mix Ratio: 4:1 (sand to cement) + plasticizer for workability.
Application:
Apply 8–10mm thick with a steel trowel.
Scratch while wet (using a devil float) for better adhesion of finish coat.
Uses: High-suction backgrounds (brick, blockwork).
Bonding Coat (Gypsum-Based)
Uses: For low-suction surfaces (e.g., concrete, dense blocks).
Mix Ratio: Pre-mixed (just add water).
Key Features:
Quick-setting (30–45 mins working time).
Must be covered with finishing plaster (not left exposed).
3. Skimming Techniques for Smooth Surfaces
Skimming is the final thin layer (2–3mm) for a polished finish.
Step-by-Step Skimming Process
Preparation:
Dampen the surface (prevents rapid suction).
Ensure floating coat is fully set but not too dry.
First Coat (Butter Coat):
Apply evenly with a plastering trowel, covering the entire area.
Scratch lightly with a notched trowel for a key (if needed).
Second Coat (Top Coat):
Apply within 15–20 mins (while first coat is still workable).
Use a water spray to keep edges workable.
Troweling & Polishing:
First trowel: Smooth out ridges with firm pressure.
Second trowel (after slight stiffening): Refine with a clean, slightly wet trowel.
Final polish: Use a sponge or plastic trowel for glass-like finish.
Pro Tips for Perfect Skim:

Conclusion
Mastering these techniques ensures professional-grade plastering for both domestic and commercial projects. Practice is key—speed and precision improve with experience.
.svg)