
7.1 Introduction
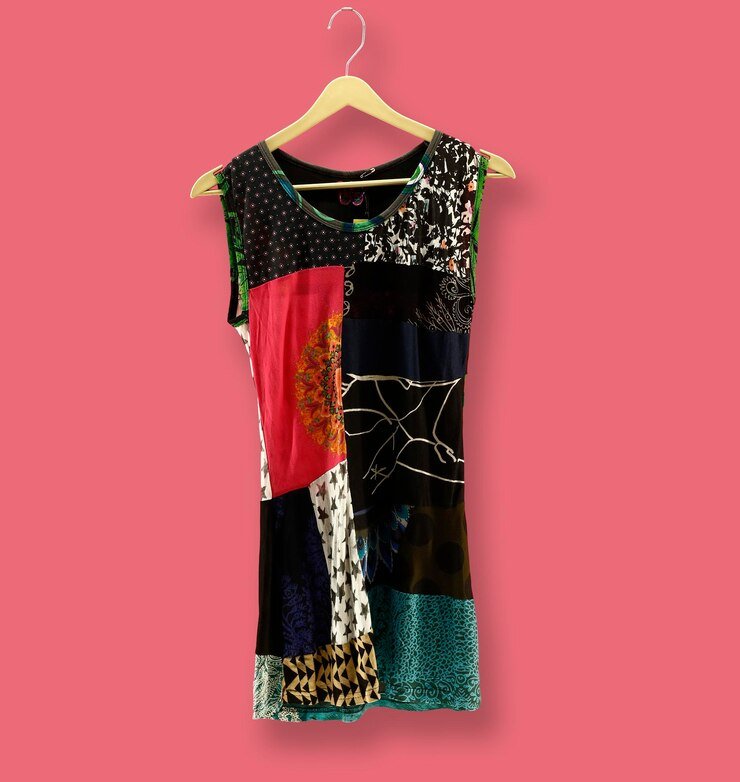
At this point in the course, you should have some basic pattern making and sizing skills, which will help you at every stage of your career in the fashion industry. Before your garment can be duplicated for production, it needs to be turned into a sample for review. Once you have mastered these steps, you can begin constructing your garment, which involves some basic sewing techniques. This module is written to teach you how to follow these next steps and advance you towards constructing your own designs.
As you continue to work your way through this course, you will learn how to lay and cut your patterns and properly fit your garment for production. This module will also provide you with instruction on surface specific techniques like how to sew for velvet, leather, and other detailed fabrics.
Finally, you will learn how to drape a mannequin, which will prepare you for the next module where you will learn about launching designs for mass production.
7.2 Fitting the Toile and Altering the Pattern

After you have crafted the perfect design, it needs to be properly fitted before you can produce it. Depending on the type of garment, there are several methods that you can use to do this. For instance, bespoke clothing will be fitted on the customer in person. However, in high-end design stores, apparel is usually fitted on a mannequin stand.
Fitting the Toilet
For the first fitting, a designer will produce what is referred to as a 'toile', which is a version of the garment made from cheaper fabric. The toile should be close in weight to the final fabric. Many designers use a cheap, lightweight, cotton fabric like calico that comes in a variety of weights. Your toile should contain no fastenings, finished seams, or linings. Once the overall shape and proportion have been established at the first fitting stage, the designer can apply details like belt loops, pocket positioning, and collar size. If you do choose to add these details, you will mark them with a marker tape or marker pen.
When carrying out your first fitting, you should keep the following tips in mind:
Most of the toile should be sewn together with a large machine stitch. However, some pieces of your garment, like the sleeves, can be hand sewn. Mark all the measurement lines that you will need with a pen or thread. These include centre, front, back, waist, hip, and elbow lines.
Pockets can be drawn directly onto the fitting, which makes it easier to find. If you are using pocket flaps, cut out the shapes of the sample fabric directly onto your fitting. All darts or seams on your toile should be pressed and in the same order as your final garment.
Second Fitting
After you have created your toile, you will make any necessary alterations, and it is then that more detailing is added. Once you are happy with the fit of the garment, you can cut out the final fabric, which will produce a shell fitting. Your shell fitting offers you the ability to see how your final fabric works on the body. At this stage, the garment is at a very basic point in construction, the seams are not cleared up, and there is no lining. However, you should be able to see where any small revisions need to be made.
You might need to go through a few toile alterations before reaching a shape development that you are pleased with. Fittings can be time-consuming, but if you want to make a fitted and well- proportioned garment, it is important that you take the time to work through this step correctly.
Altering the Pattern
Alterations are a very important step in the design process that you should never ignore because a poorly fitted garment will not sell. If you have ever been on the receiving end of clothing that fits incorrectly, then you can probably attest to the importance of this step. The alteration phase is tricky, and it may take you some time to learn the odds and ends of pattern corrections. How you alter your garment will depend on the fitting, but you might change sleeve length, reposition the shoulder notch, or adjust the hemline on a skirt.
Cutting and Laying Your Pattern
After you are finished with your final alterations, you can begin laying and cutting your pattern. If you take the time to cut and mark your fabric pieces before laying your pattern, it will guarantee a much more precise garment fit. When you are cutting a pattern, it is important to consider the direction of the grain line. How you cut your garment will significantly impact how the fabric hangs on the body.
You can cut along the grain line in one of three ways:
Straight grain - The most common method for cutting along the grain line is called the straight grain cut. With this technique, the grain line of the pieces is parallel to the selvedge. Also, the yarn used for the warp is a stronger yarn than the yarn used for the weft.
Cross grain - With this technique, you will cut pattern pieces at a 90-degree angle along the selvedge. Most pieces cut using this method are decorative or complex.
Bias cut - Designers often choose the bias cut because it drapes beautifully on the body. A bias pattern is cut at a 45-degree angle on the selvedge and cross grain.
7.3 Preparing the Fabric

Before you cut out pattern pieces, you should carefully examine the fabric and be on the lookout for a few important elements. First, you should observe the textile βibres to see if the fabrics have any special care instructions. You should check to see if the material you are using requires pressing before you cut it.
Here are a few fabric preparation tips that you should keep in mind:
-Cotton or linen fabrics that have not been treated should be pressed with steam to shrink and eliminate creases before cutting.
-Pure wool fabrics will shrink, so you need to steam them with an iron prior to cutting.
The next thing you should consider in the preparation phases is if your fabric has a direction. The direction of a fabric can go in one of two ways, a nap or an angle change. A nap can be found on one or both sides of a fabric and are usually found in velvet, corduroy, brushed cotton, or fur materials. For this method you should cut your pattern in one direction only. Alternatively, some fabrics have a colour change or a shine when they are viewed from a different angle.
Laying your Pattern
At this point in the process, you have your pattern pieces and grain line, so it is important that you piece them together correctly. Once you have decided the direction to place your pattern in, you will lay the grain line parallel to the selvedge.
When you are cutting your pattern, you can follow one of several different layouts:
Double layout - The easiest cutting plan is the double layout, which is constructed with a one side pattern only and marked. The fabric is then folded in half with one side on the selvedge.
Single layout - With this layout, the whole or front of the pattern is copied and indicated with cutting instructions. This cutting plan is most often used when pattern pieces are asymmetric, or the fabric has a pattern.
Crossway layout - This cutting method is used with complex patterns or with shapes that will not βit in certain directions. The crossway layout folds a fabric crossways towards the selvedge on each side.
Marking the Pattern on the Fabric
After you have chosen your cutting plan, you can mark your pattern directly onto the fabric using tailor's chalk. This process will mark your dart endings, pockets, and certain positions and helps avoid cutting your paper pattern when it comes time to cut your fabric. Marking your fabric is an easy process, but you should be careful not to mark on the good side of the material. If you don't want to use chalk to mark your pattern, you can double thread into a sewing needle and sew your points into the fabric. This method, known as thread marking, is used on thin, delicate fabrics where tailor's chalk will not show up.
Another method that is commonly used is laser and hole-punch marking, which is used in fashion design to meet mass production needs. With this marking technique, the end of the dart position is marked with a hole set inside of a dart so that it is not visible on the inside of the garment.
Marking the Pattern on Your Fabric
Fact
There has not been a fur farm in the UK since they were banned in 2003, but it's not illegal to wear fur.
Source: bbc.com
7.4 Garment Construction for Fashion Design

After working your way through the various stages, you have finally reached the point where you can see your vision come to life. Garment construction can be divided into several different areas, and it is up to you to decide what area you want to enter as a designer. You may choose to custom stitch your own garments or enter fashion design for mass production, but either way, you need to know and understand each of these.
The different garment construction manufacturing chains are:
Haute couture and tailoring crafts - These are at the top of the fashion industry and work individually with customers on custom orders.
Industrially produced garments - This is a stark contrast to haute couture and is at the lower end of manufacturing. Garments produced using this method are quick and easy to process using mass produced methods.
Tools for Garment Construction
Before you start any project, you need the right tools for the job.
You will need to collect the following items:
1. Fabric shears
2. Hand sewing needles
3. Tape measures
4. Embroidery scissors
5. Pins
6. Tailor's chalk
7. Machine sewing needles
8. Thimble
9. Point pressing block
10. Needle board
11. Tailor's ham
12. Sleeve board
13. Industrial flatbed machine
14. Over looker
15. Coverstitch
16. Buttonhole
17. Industrial iron
18. Vacuum table
19. Fusing press
Tools
With your tools in hand, you need to make sure you have the perfect thread for the job, which is no problem because there are several threads in many colours and weights. You will find the material you need to spin thread in synthetic, natural, polyester, silk, and wool thread.
Seams
The easiest way to join two pieces of material together in garment constructions is with seams. Your seam allowance faces the inside of the garment and is used to create shape and influence the design of the garment. When it comes to selecting the right theme for your garment, you should consider the different styles, fabrics, and weights that all require a different seam.
You can prepare a seam in one of two ways. The first involves pinning pieces of the material together to hold them in place. You can also place the material together with a hand basting stitch along the stitching line. Now your material should be ready to place in the machine and you can begin the sewing process.
Hand Sewing Techniques
Although sewing machines are highly sophisticated and designed to handle a variety of specific tasks, there are still some garment skills that will require hand sewing. When you are sewing a garment by hand, it is important that you are using the right needle and thread for the job. Also, you should ensure that you have a thimble to protect your finger.
The first step you will take when hand sewing is securing a small knot at the end of the thread. Next, begin sewing with a simple backstitch; pick a small amount of fabric for the starting point, and pull the thread with the knot through your material. You can then repeat another stitch in the same area, which will create a loop. Finally, pass your thread through the loop, to secure a knot, which will complete your stitch and prevent it from falling out.If you have sewn before, you probably recognise this as a basic sewing technique.
However, in the fashion industry, you will work with the following specialised hand sewing techniques:
Basting stitch - The basting stitch uses large stitches to temporarily join pieces of garments together. These stitches are applied with tension and are made with tacking thread in a contrasting colour.
Hemming stitch - The hemming stitch is used for hemming any type of skirt, sleeve, or slacks. These stitches are invisible on the outside and show little to no thread on the inside of the hem.
Blind hemstitching - A blind hemstitch uses threads from the outside of the fabric and makes a smaller stitch within the hem. This stitch is used in woven materials.
Cross-stitching - A cross-stitch hem, also referred to as 'catch-stitch', or 'figure-eight', is commonly used in the fashion industry to complete the hemming lines in knit and jersey fabrics.
Linings
During the pattern cutting process, you may remember that everything was cut without a lining. Now that you are in the garment construction phase, it is time to add linings to your clothing. You should add linings to jackets, skirts, and depending on the material, you might add it to trousers. Your lining should end two centimetres above the hem you are lining and should be cut to allow extra length for a lengthways fold. Next, fold your lining one centimetre over on the hem edge and pin it to the jacket hem below the edge. Finally, there are two stitching methods that you can use for linings, a slip stitch or a prick-stitching method.
Activity 1
Estimated Time: 10-15 minutes
For this activity, you will need to gather some fabric, a needle and thread. If you don't already have the necessary tools, it is a good idea to obtain them now and continue to collect the tools, as you will be using them in the future.
Work your way through the list of stitches and begin practising your techniques. If you are a visual learner and need some inspiration or guidance, you can look to the internet for images on the technique. Spend some time familiarising yourself with these stitches and perfecting your sewing skills.
7.5 Surface Specific Techniques

At this point, you have covered garment construction skills, which taught you how to sew and stitch basic fabrics. However, there are some different techniques that are used for specialised fabrics and materials that are difficult to sew, cut, and finish. A few of these fabrics include lace, sequinned, wool, and leather. Since you will work with these fabrics often, you need to learn the basic constructionmethods you will use.
Felted Fabrics
Woven felt fabrics are compressed and shrunk with heat to produce a condensed appearance. With felted fabrics, the edges do not fray, so you can leave your seams unfinished. Usually, a common stitching choice for light to medium weighted felt fabric is the welt seam or top
stitch. However, you can also use a topstitch, abutted seam, and βlat fell seam.
Lace
Lace can be made by hand or machine with knotting, braiding, looping, or knitting techniques. When you are working with lace, keep in mind that it is fragile and needs to be handled with care. Also, you will need more fabric because most lace is vertical or horizontal in pattern, which means they should be matched up when constructing clothing.
Leather
Leather is made of reptile or mammal skin and is one of the oldest materials used. This material is extracted through a process called tanning. Once the skin is properly tanned, it becomes leather after a variety of finishing processes are completed. When sewing leather, a special leather needle should be used to avoid leaving marks and pinning the skin. Also, make sure that you remember that leather is sensitive to heat and can get permanently creased, so avoid using an iron. In the garment construction phase, it is important to use a different approach with leather.
Keep the following tips in mind:
-Always practise first with scraps of leather
-Use a polyester thread for thicker leather and avoid using cotton threads
-Use a roller, teflon foot, or leather foot on your sewing machine
-When choosing the seam type for a leather garment, always consider the style and weight of a garment
-Plain seams work will work for all thin to medium weight leathers
-For heavier leathers, use a lapped seam to eliminate bulk
Fur
There are two different types of fur that you will come across in the fashion industry. Real fur comes from an animal and contains short underfur and longer hair called guard hair. This type of fur is usually very expensive to buy, and in some countries, it is not popular. The second type of fur is a manufactured synthetic fur fabric, which is much more sophisticated. With this alternative, the fabric is easier to cut and sew because it is available on the metre and not the skins. Also, fur can be processed, coloured, bleached, and even stencilled. There are several methods that you can use to make working with fur a little easier.
For instance
Using a polyester thread and a universal machine needle is a good place to start. If you find the fabric skips, you can switch to a wedge-pointed leather needle.
Sequinned and Beaded Fabrics
Although sequinned and beaded fabrics used to be reserved for special occasions, it is very common to see these materials in all areas of fashion. Beads, sequins, and stones are used now in daywear, eveningwear, and to accessorise the under layer of fabrics. These fabrics are also delicate, so you should take time and extra care when handling them. If you are working with beads and sequins stick with a chain stitch to avoid unravelling. Also, these fabrics are often uncomfortable on the skin, so be sure to line your garments.
Activity 2
Estimated Time: 10-15 minutes
Look for scraps or samples of one or more of the specialised fabrics covered in this module. You may even have one or more of them in your home. Choose leather, lace, sequins or fur and familiarise yourself with the difference in their textures.
You should now practise those stitching skills and attempt to hand sew these fabrics. After working with the different techniques, which method will work best for your specialised fabric?
7.6 Draping on the Mannequin
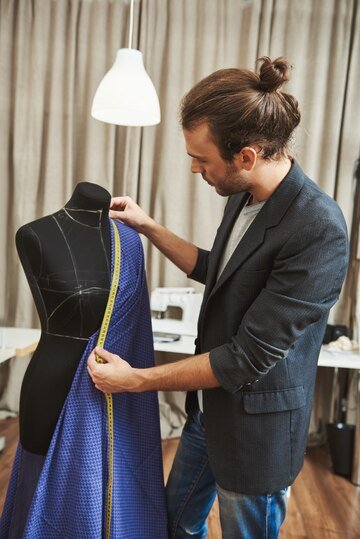
Whether you have chosen to work with a cotton blend or a specialised fabric, at this point, you have successfully cut your patterns and constructed your garment. The next step in the design process is called draping, which is done on a mannequin to shape or mould your fabric. In the 1920's, Madame Alix Gres and Madeleine Vionnet were the first haute couture designers to devote time to draping. Since that time, designers have used the technique to look at their designs and gain further inspiration.
Tools and Equipment
Before you prepare to drape your design you will need certain tools.
Tools required are:
Marker pen
Shears and scissors
Tailor's chalk
Camera
Fine pens
Style tape
Tape measure
Draping material
Grain Line and Draping
Earlier in the module, you learned about the importance of the grain line directions. When you are ready to drape on the mannequin, the direction of the grain will greatly impact how the material hangs on the body. When you are new to draping, you should experiment with several different grain lines, shapes, and\ darts to see how the fabric falls. You should also take time to drape with different materials like jerseys, knits, wool, and silk on the mannequin, so that you have experience with different draping effects. To master the art of draping, you need to work with a variety of fabrics and work with all the different stitches and grain lines you learned.
Balancing the Pattern
Once a garment is draped, it is important to ensure that the pattern is balanced to ensure that the clothing fits comfortable on the body. When you are balancing a pattern, you should ensure that the side seam is hanging straight up and is laying correctly on the body. One way to maintain balance on your pattern is to keep your centre front aligned on the grain. Before you take your balanced drape off the mannequin, make sure that you have marked your garment to indicate the seam positions.
Draping Styles
When you are draping your garment, you can drape it on the mannequin as an actual shape, close to the body, or structured away from the body. Another method you can use is loose draping, which anchors the fabric on certain areas of the body, like the shoulder.
Some of the more commonly used methods in the fashion industry include:
Body contour - This technique was developed in the late 1990s as a method to draw seam edges on the mannequin, to quickly create a pattern. This method will accurately follow the silhouette of the mannequin that you are using and contour around the body for a close-fitting shape.
Loose drape - With a standard loose drape, the length of a muslin is draped loosely on a mannequin to create shapes with the fall of the material. As with anything in fashion design, practise will make perfect and with time, you will get the hang of the technique.
However, the following tips will help you in perfecting your skill:
-Make sure you always use a fabric similar in weight and texture to your final fabric
-Always iron your final fabric before you start draping
-Use the same grain line that you intend to use in the final garment
-Use a mannequin with the right size and shape
-Consider using fine pins that βit into the mannequins nicely
-Concentrate on perfecting your shell before working on your details
-Do not stretch fabric on the mannequin
When your drape is complete, step away from your work and look at it from several angles
MODULE SUMMARY
In the previous module, you learned how to cut patterns, and this module advanced your skills and prepared you for garment construction. The module began with an overview on fitting the toile, and then it moved into alterations. You also learned how to cut and prepare fabric, which covered different grain lines and pattern layouts.
The module also covered garment construction beginning with the tools and equipment you will need for design. You also should have learned about different seamlines and how to do basic and specialised hand stitching techniques. Additionally, the module also covered surface specific techniques including methods for sewing fur, leather, and sequins.
Finally, this module taught you how to drape on a mannequin, which included different draping styles, and some tips to perfect your draping skill. The next module will cover final revisions, and cover the mass production process.
.svg)