
4.1 Introduction
In the field of fashion design, you will cycle through several phases before reaching a completed product, and each new phase is equally important to your final goal. As you continue to train and advance your knowledge in this industry, you will begin to learn how to utilise your creative skills to see your unique designs worn by individuals everywhere.
However, before you reach that phase you need to find out how a fashion designer takes a great idea and turns it into a career. At this point in the course, you should be very familiar with fashion forecasting and trend prediction, which means you are more than prepared for this next section. In this module, you will learn how those skills will take your ideas from concept to the next phase of design.
These next sections were written to teach you how to transform your ideas into a theme, then put that idea into a mood board. You will also learn how to sketch your theme on paper. Once you have completed this course, you will be well on your way to creating your own designs and advancing towards a career as a fashion designer.
4.2 Creating a Mood Board

After analysing the market and current fashion trends, you should have identified your target market and completed your research. Now, you can begin the creative process, which starts with a theme. As a designer, you should have no problem creating an idea after completing your fashion forecasting. In the creative process, this is referred to as the conceptualisation phase. Once you have decided upon a theme for your design, you will create your mood board, which is also called an inspiration board.
What is a Mood Board?
Your design theme can convey an emotion, message, period in history, or anything that inspires you creatively as a designer. Keep in mind that your theme will represent your entire collection, so take plenty of time when making your selection. Once you have decided upon your theme, you will transfer it onto a board, which will convey your feelings, emotions, and the style of your theme. Now you can begin to collect visual references, which you will use as inspiration for your mood board. Your mood board will represent a summary of your theme collection and is a critical design tool that will help to keep you focused and consistent as your line develops.
What to Include on Your Mood Board
If you have a theme in mind for your design already, the chances are good you were inspired by magazines, colour swatches, fabrics, or various other visual references. This is exactly what you want to include on your mood board. In these beginning stages, you will mount these inspiration pieces to a hard board, which you will then give a title, much like a book or film. When creating your mood board, ensure that you are doing plenty of research, which means you should attend galleries, watch films, music videos, and visit the latest fashion shows.
Take pictures of objects and anything related to your theme that relates to how the product makes you feel and how it will look. Although you should gather everything that inspires you, make sure your mood board is not cluttered or messy.
Approach
Before designing your mood board, you need to decide the avenue you want to take and how you want to present your design ideas.
There are two approaches to creating and delivering your theme ideas. Both methods will effectively carry out your theme, and they both have their advantages and disadvantages. Let's begin by looking at the physical approach. The first method involves delivering your message on a physical mood board, which as you can imagine, is a tangible board that you can touch and feel.
Depending on your theme, a physical mood board usually has to be quite large to fit all your images. The good thing about this is you can physically see and touch every visual reference, which limits the use of your imagination. The next method is digital, which means you will create your mood board using a digital program. With this method, your mood board is portable and is much easier to work with. If you choose this approach, there are several programs designed to help you create your board. A few examples include Gomoodboard, Pinterest, and Olioboard.
Creating Your Board
Once you have chosen your approach, it is time to assemble your theme and bring your collection to life. Regardless of the avenue you have selected, the process will be relatively similar. If you are making a digital mood board, the first step will involve scanning images into your computer and uploading them into the computer program you are using. Alternatively, if you have elected to create a physical mood board, you will pin your elements to a large bulletin or foam core board. When creating your mood board, it is important to keep the assembly in mind.
For example
If you choose to assemble your elements in a grid style, you are conveying a conservative theme. However, a collage style will put out a more relaxed message.
Activity 1
Estimated Time: 25-30 minutes
Once you have crafted a theme for your designs, it is your job to bring your vision to life. For this activity, you are going to practise making a mood board.
Begin with a style idea, which can include a new summer wardrobe, a fashion design or even an accessory line.
Next, you should choose an approach for your inspiration board. If you would like to use the physical approach, you should acquire a poster or foam board to pin your visual elements onto. If you would like to use a digital approach, you can use any of the suggestions in this module.
After selecting your approach, you can begin adding visual items to your board. Use your imagination and gather inspiration from magazines, television, fabrics and images. What kind of theme are you trying to convey with the design you chose?
After your mood board is completed, explain how the different visual references you selected worked together to help express your design theme.
4.3 A Look at The Design Process
![]()
After you have laid out your design theme on your mood board, you are ready to begin design development. When developing a design, there are four steps that you will cycle through in the development process.
Colour Stories
The colour story that you use in your design refers to the palette that you will be using in your fashion designs. In previous modules, you learned about the various colour palettes and where they fall on the colour wheel. A colour story refers to a theme or line of colours, which identifies each piece in your collection. You can choose a monochromatic or complimentary colour story, but whichever you choose, displaying the right colour story is crucial to the design process.
In the world of fashion, colours fall into the following four groups:
Staple Colours - These are your classic colours that are used continuously every year such as white, black, beige, and blue. Staple colours are universally appealing and they work across all age groups and seasons.
Seasonal Colours - Some colours are associated with particular seasons. For example, bright and light colours are associated with summer, and darker colours are associated with winter.
Fashion Colours - Since fashion is continuously changing, some colours themes will remain dominant one season and change the next. These colours are referred to as dominant colours.
Accent Colours - An accent colour can be any colour of your choosing, but it is generally used in small amounts to accentuate a garment.
Range Development
As a fashion designer, you must have a solid understanding of range plans. A range plan includes an overview of your collection, which includes your entire design and includes all of the financial parameters. Your plan should outline the specifics of your collection and will include everything from how many styles you will add to the types of fabrics you will utilise.
A typical range plan will usually include some or all of the following information:
-The total number of garments you will be designing
-Flat drawings or illustrations of each of your fashions
-Proportions of each garment
-Specifics on each clothing style
-Different colour stories and fabrics for each garment
-The cost and selling point for each garment
-Order quantities for each style
-Manufacturer details
-Sizes
Fabric and Trim Selection
As you advance in this course, you will learn about different fibres, fabrics, and textiles, but it is important to note that fabric and trim selections will play a significant role in the design process. When you are making your choices, there are a few things that will inβluence your decision, which you should consider.
First, what are the current fashion trends? Consider the modern fabrics and textures and how they suit the direction of your design. Also, make sure each trim and fabric work for the particular garment you are assigning it to. Finally, always consider budget and production when making fabric selections.
Design Considerations
When it comes to garment design, there are some things that you as the designer should consider. You might have an original design idea in mind for a garment, or an apparel collection.
It is important to modify your ideas and keep the following information in mind:
-The needs of your customer and target market
-The image you are representing
-Fashion trends
-The visual appeal and aesthetics of a garment
-Functionality of your garment
-The availability of materials
-Resource and budget limitations
Fact
There is currently no true standard for garment sizing in the apparel industry. What is a size six for one clothing company, may not necessarily be the same size six for another company. Each designer has the authority to create their own interpretation (if the retailer does not specify strict requirements).
Source: apparelsearch.com
4.4 Fashion Design Illustrations
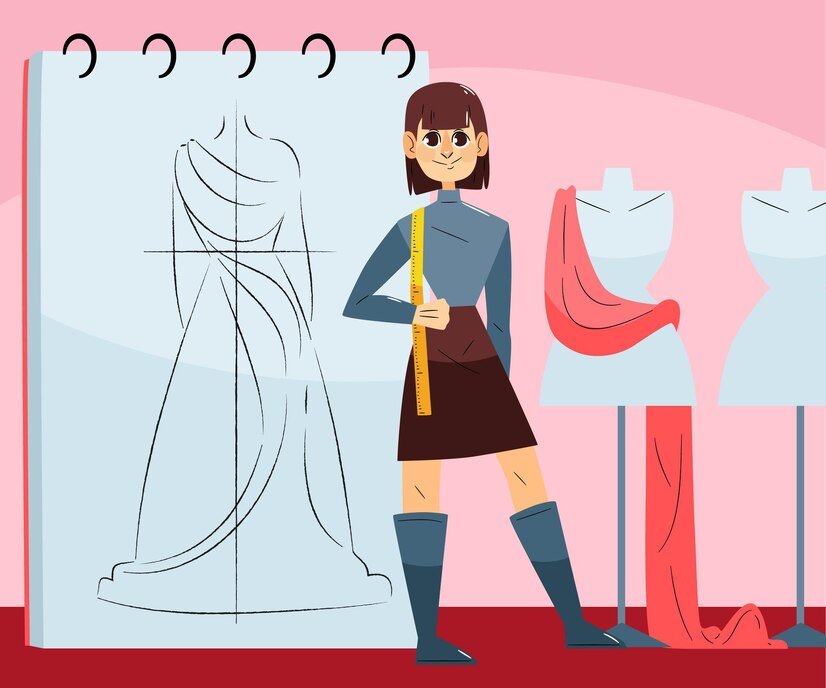
If you have some drawing skills, then they will be particularly helpful as you learn how to begin sketching your designs. However, if you have never sketched before, you can rest assured that with enough practice you can learn this skill over time. After all the research, brainstorming, and preparation, it might seem overwhelming to sit down and sketch out your designs. If you follow a few steps, however, fashion sketching is simple, and you will be on your way to creating a sample garment in no time.
Begin with a Croquis
You should start sketching with the correct materials, which will include a sketchpad, pencil, eraser, and a ruler. Once you have gathered the tools you will need and are in a comfortable position for sketching, you will begin with a croquis. A croquis is a French term, which translates to mean 'sketch', and represents a basic model drawing of pose, which you can trace over repeatedly. You can create your own croquis or find them online or in books. When selecting your croquis, remember to choose a body type that you would like to design for.
Sketch Your Original Design
After you have drawn your croquis, you should trace several copies in a variety of different poses. You can now sketch your original fashion designs, which can include one garment or an entire collection. When sketching your design, ensure that you are adding every last detail and focus on the elements that are unique to your design.
Boldly Illustrate Your Design
Now that you have your original sketch down on paper, you should go back through with a heavier hand and boldly draw your clothing. This is an important step because the purpose of fashion design is to showcase your unique ideas. In this step, you should try and illustrate the textures in your fabrics and emphasise the way you intend for the fabric to hang on your model. Add specific details to make your drawing look bolder and more realistic.
Add Folds, Wrinkles, and Pleats
This is the point in sketching when practise makes perfect, and if you do not have drawing skills it will take a while to catch on. When you are drawing your designs, you want to emphasise the different elements in your design, which may include pleats, hemlines, and folds. Learning how to draw these will help you to illustrate the structure within your garment and will bring your style to life. It might seem difficult, but it really just comes down to drawing with different lines.
The following sketching tips will help you when you are adding details to your design sketches:
-Loose and wavy lines will create a fold within your sketch
-Use circular patterns to show wrinkles
-To draw exact pleats, extract a straight edge
Illustrate Prints and Patterns
As you continue to practise, you will notice that your sketches will get more detailed. So, you should follow your pattern and add any prints or patterns that you have in your design. An example of this might be large βloral patterns or polka dots.
Finalise Your Drawing with Ink, Shading, and Colour
At this stage, all the elements within your design should be on paper, and you can now finalise your drawing by adding shading, ink, and colour. You can now erase any pencil lines that you don't want to keep and use thick black ink for permanent lines. Finally, you should carefully colour in your clothing using the colour story from your mood board.
4.5 Sketching with Flat Schematics
In the fashion industry, you will work with three types of fashion drawing.
These include the following:
Fashion illustration - Sketching or drawing on a croquis for a general fashion design project
Fashion float - A type of fashion illustration that is used for presentation boards or apparel line sheets without a model.
Fashion flat - A garment spec drawing or a fashion technical drawing
Regardless of the type of drawing you are working with, it is crucial that all your illustrations remain true to the garment, fabric, and the figure. When you follow these rules, it will save costly mistakes in the manufacturing phase. Flat schematics, which are also referred to as fashion flats, technical βlats, or just 'βlats,' represent a technical rendering of your fashion design. In your career as a fashion designer, you will utilise flat schematics quite often, so there are a few things you should keep in mind.
Croquis for Flats
Sketching a flat schematic begins with a croquis, which is how all of your sketches will begin, but they differ in a few ways. The model that you use for a flat schematic should be true to actual human anatomy and should contain technical lines on a fashion figure. These include the princess line, bust line, hip, and waistline.
Principles of Flat Schematics
There are three fundamental principles that you should keep in mind when you are sketching technical drawings. These principles will differentiate a flat schematic from a fashion illustration. The first and perhaps the most fundamental difference between the two is accuracy. Ensuring that your design is drawn correctly is the key to technical fashion drawing. Any mistake made in technical βlats could cause a mistake in product development.
The next principle to keep in mind is instructiveness, which simply means that you should ensure your flat is communicating something visually. So, it should be both visually appealing and depict how the garment should be constructed. Finally, technical drawings must be 'flat', and the reason they are flat is because they are depicting the garment in a flattened state, and not how it looks on the body.
Activity 2
Estimated Time: 25-30 minutes
If you began this course with some art skills, then you already have some experience with sketching.
However, if you are not already skilled with drawing, you will need plenty of practice in this area.
Also, there are parts of fashion design sketching like adding pleats, wrinkles and textures that everyone should take some time to focus on.
So, let's begin with your mood board which you created in the previous activity. If you prefer, you can start fresh with a new design or you can select a design from a fashion magazine. The first thing you should do is gather your materials and begin by sketching a croquis.
It might take you some time to get past this first step and that is ok. Make sure you spend plenty of time working on the croquis portion, as this will be the body type that you are fitting. You should also make several copies and poses of the model. Next, you should add your design and practise incorporating the different stages of sketching that you learned in the module, including the different textures and details you were taught.
Garment Sample Stages
As a new designer in your first year, it might feel like you will never reach the production phase of your project. Although there are several stages you must go through; it is important to realise that each and every stage is crucial to the final product. One stage that is important in the fashion design process is garment samples. If you have ever had an ill-fitting garment, then you will understand the reason why you should never underestimate the importance of this step. When you take the time to sample your fabrics, you will eliminate issues before production begins, which will only increase the success of your product.
Garment samples have the following stages:
Muslin - This is the very first concept sample, which is usually sewn on an inexpensive fabric. This sample is usually just a prototype of your design or a test run.
Fit sample - After your first pattern is created, the fit sample is created to ensure the desired fit of your garment.
Sew-by sample - To estimate costs, factories will utilise the sew-by sample because it reflects all of the construction information necessary to produce the garment.
Sales sample - After the sew-by sample; the factory will sew a sales sample to move production costs along and improve the quality of assembly.
Photo sample - The next sample is made to scale for your model for photography purposes, if you don't intend on using product photography, you can skip this sample.
Size run - These are a full series of samples made in every size that your style will be sold in to ensure proper fitting of each βit of your garment.
Pre-production - The last garment sample is a final run through with all the details in place.
MODULE SUMMARY
This module began by teaching you how to create a mood board, which is a very important document that you will use quite often throughout your career. You learned how to take your design and translate it into a theme that conveys an emotion. The also taught you the two different approaches that you could use when translating your design message.
You also learned about what you should include on your mood board, which includes a variety of different visual references. The module also introduced you to the design development process. As a part of that process, you should have learned about colour stories, range plans, and fabric and trim selections. Additionally, the module covered important things to consider in your fashion designs.
As you continued to work your way through the module, you were offered a brief tutorial on fashion sketching and drawing technical Flats.
Finally, the module covered the importance of garment samples and the different stages of garment samples. After completing this module, you should have the skills necessary to begin laying the foundation for your designs. In the next module, you will expand upon the skills you learned here and continue to gain the experience you need for your career as a fashion designer.
.svg)