
5.1 Introduction
The video demonstrates and explains how remove the second solution and start the eyelash
tint.
To continue the treatment - once the second solution has been allowed to act on the lashes for the
allocated time, you will need to remove it thoroughly, before moving on to tint the eyelashes with the
chosen colour.
5.2 Remove the Second Solution
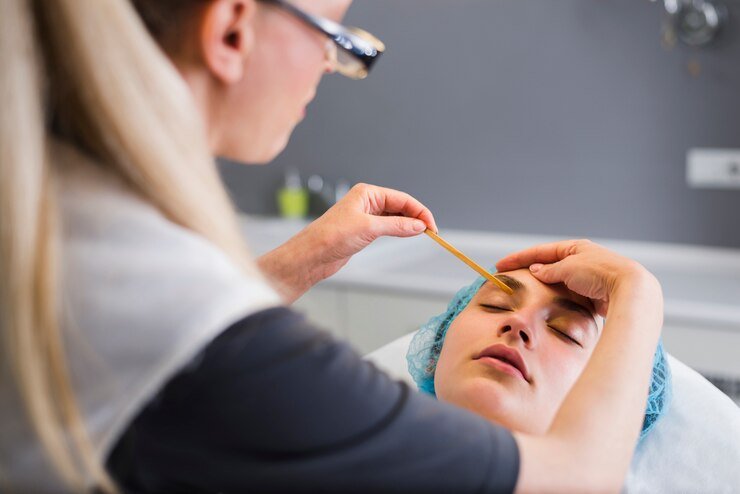
Once the required fixing time has elapsed, let the client know that you are about to remove
the solution.
Touch the client's brow so that they expect your movement and your touch around their eyes.
Start with a DAMP cotton wool bud, to remove the solution, using the same technique as
before, gently rolling the bud up the lash, to remove the product
Move on to use a damp cotton wool pad, to continue gently wiping in an upward motion, to
remove any residue of the solution
The solutions can often be dyed and leave a residual colour mark
Don't worry if this is the case, as this can be cleaned off the silicon later. Simply focus on
removing all visible residue.
Double-check your work in the magnifying light, and, if necessary, use another damp cotton
bud, to remove the last of the solution
Immediately throw away all cotton wool, to minimise any odour
When you are completely happy, move on to the tinting process
5.3 Eyelash Tint

Now that the second solution has been removed, follow the steps listed below, to conduct a
high quality, precision eyelash tint treatment
1. Cut cotton wool pads or select pre-cut pads
Use scissors, to cut cotton wool pads in half across their diameter, cutting a gentle curve into each
half so that the dampened pads can sit beneath the eyes, like half moons. Position the cut pads
beside the client.
2. Apply petroleum jelly/barrier cream
Explain what you are doing as you go: the application of barrier cream will prevent staining on the
skin by the tint, once it has been applied.
Apply the petroleum jelly/barrier cream to the back of your hand
Apply it from your hand onto an orange stick or an eyelash tinting brush
Ask the client to look up, and explain that you'll be putting the jelly/cream underneath their
lashes
Gently push the orange stick across the skin beneath the eye, one eye at a time
If they are nervous, use a cotton bud, as it is softer
Coat the prepared, cut cotton wool pads with a thick layer of the jelly/cream
Ask the client to look up, then position each half moon cotton wool pad jelly-side down onto the
jelly-covered skin
Take your time to position it so that ALL lower lashes rest on top of the cotton wool pad
Ask the client to close their eyes; reposition the cotton wool pad if it moves. Again, ensure that
ALL lashes rest on top of the cotton wool
Only proceed when you are 100% happy that all lashes are on top of the cotton wool pad
3. Mix the tint colour
Explain that you are mixing the tint. Do so by referring to the manufacturer's
instructions, only using the peroxide that you are instructed to use.
Do not mix in advance, as the tint will only be in its active state for between 10 and 15 minutes.
Add a small amount to the tint dish, then add a few drops of peroxide (as instructed), and mix
with an orange stick
Check the consistency: it should be thick enough that it doesn't drip off the orange stick
immediately but not excessively thick
4. Apply the tint
Explain that you are about to apply the tint.
Make sure that you don't spill the tint onto the client's face, or yourself, as it can cause staining.
Position yourself safely so that you can hold the tint dish close to the client's face to minimise the
risk of dripping. Tell the client that you are now applying the tint to their lashes.
With the orange stick or eyelash tinting brush, apply the tint to the client's lashes in a
downward motion, explaining what you're doing
Coat the lashes by gently patting the product into the lashes
Coat the top and bottom, and make sure that you are covering the whole lash, right to the root
Avoid excess contact with the skin — you want to apply the product right up to the lash line, as
an evenly applied line of tint along it creates a stunning look, but be careful not to create
'blobs' or smudges
Once you have done one eye, set the timer for five minutes, and work on the other eye, again
setting the timer for five minutes.
Note - You will then need to begin removing the tint from the first eye (refer to Module 6).
Assignment
Removing the Second Solution and Starting the Eyelash Tint
Estimated time: 30+ minutes
Work your way through this worksheet to see how well you have really done in absorbing the
relevant information.
MODULE SUMMARY
In this module you learnt firstly how to remove the second solution. The module then provided a step
by step guide on how to conduct the eyelash tint treatment, how to correctly mix the eye lash tint
colour and the correct method of application.
In the next module, we will demonstrate how to remove the tint from the client's eyelashes.
.svg)