
10.1 Introduction

Instrument holding and transfer is
one of the basic and crucial functions inside the treatment room.Dentists depend on the assistant
to hand over the correct instruments deftly and carefully. The dental assistant
must learn how to hold and transfer instruments to the dentist with skill and
confidence.The most efficient instrument
transfers involve minimal movement of the hand and the assistant is able to
keep his or her attention on the oral cavity at the same time. Competent
assistants are able to anticipate the dentist's requirements and the duo are
able to work together in a cooperative and effective manner.
The transfer process is
especially important, because it can expedite or impede the dental procedure.Dental assistants can use either
the one-handed or two-handed systems to pass instruments to the dentist, as
well as to receive used instruments from the dentist after usage. Instruments
that have debris or blood on them should be received by covering the working
end with a piece of gauze.
As a dental assistant, you must
be familiar with the different types of instruments used in the dental
treatment room. Some common instruments include the HVE (High Volume
Evacuator), saliva ejector, mouth mirror, scissors, cotton-pliers, air-water
syringe and explorer. Each instrument must be grasped and transferred in a
specific manner, to ensure productivity and minimal movement. The dental
assistant who is able to anticipate the dentist's requirement is an asset to
the dentist and a comfort to the patient.
One of the biggest sources of
anxiety and distress in dental care is the pain, or the anticipation of pain.
Thanks to evolving techniques, modern dentistry is able to offer relatively
pain-free dental care to patients, due to the use of different types of
anaesthetics. Dental clinics use topical anaesthetics, conscious sedation, deep
sedation, or general anaesthesia. Dental assistants should be familiar with the
preparation and administration of the syringes or local anaesthesia.
10.2 Instrument Transfer in the
Treatment Room
Efficient instrument transfer results in reduced stress and
fatigue for the dentist, as well as for the assistant.
The patient's safety and comfort
remain preserved and productivity is increased, by using less time and
movement.The transfer of instruments
between the dentist and the assistant should take place in the transfer zone.
The instruments are handed over by the assistant in the area just below the
patient's nose and near the chin.
The dentist is able to sense the
completion of instrument transfer, without having to move his attention away
from the oral cavity. The pressure should be adequate, so that the dentist is
able to feel the instruments in the hand due to tactile sensation (feeling of
touch). Ideally, the assistant should pass on instruments using the left hand
to a right-handed dentist and vice-versa. Using the single-handed system of
instrument transfer allows the other hand to be free for evacuation and
retraction.
The dental assistant selects the
correct instrument and holds it for transfer, when the dentist signals for it.
The assistant can expect a sign from the dentist, when the dentist holds the
instrument away from the patient whilst still examining the oral cavity. At
this point, the assistant takes away the used instrument and hands over the
required instrument.
Fundamental Rules for Efficient
Instrument Transfer
*The assistant must always place
angled instruments with the working end facing away, on the tray.
*Straight-shank instruments must
be placed on the tray, facing the assistant.
*With respect to hinged
instruments, the beaks must be placed facing towards the dental assistant -
once picked up, the beak must be rotated so that is ready for use on the
mandibular or maxilla arches.
*The instruments must be picked up
and held between the thumb, index finger and middle finger.
*Instruments that are usually held
using a pen-grasp should be picked up by the end that is opposite to the end
that will be used by the dentist.
*Hold the instrument to be passed
parallel to the instrument being passed back from the dentist.
The one-handed transfer
The assistant uses only one hand
to give the selected instrument and receive the used instrument. As soon as the
used instrument has been received, the assistant will rotate the new instrument
into the dentist's hand. The one-handed transfer method involves three
components - approach, retrieval and delivery.
The two-handed transfer
This involves the usage of both
hands for receiving the used instruments and giving over the new ones. The
two-handed method of instrument transfer is commonly used during dental
surgeries, or when both hands are free - forceps, hand-pieces and air-water
syringes are usually handed to and fro using the two-handed instrument transfer
method.
Certain instruments may require
modified instrument transfer methods.
Mouth mirror and explorer
transfer
Mouth mirrors and explorers are
generally used at the beginning of dental procedures, when the dentist needs to
examine the areas that require treatment. The assistant should pick up the
mirror in the right hand and the explorer in the left hand and hand them over
to the dentist - the mirror is passed onto the left hand, whilst the explorer
is handed over to the right hand. The transfer is done simultaneously, when the
dentist signals readiness by holding his or her hands in the correct position.
Cotton-pliers transfer
Cotton pliers are used to hold
small pieces of materials and items. It is best to use the one-handed system of
transfer for transferring cotton-pliers, but remember to hold the pliers near
the working end so that the item is not dropped. Similarly, the assistant
should hold the cotton-pliers close to the working end when the pliers are
returned by the dentist.
Scissors transfer
Whilst transferring scissors,
both the dentist and the assistant must ensure that they are careful. The
assistant must pick up the scissors close to the hinge and working end. The
dentist must move their hand away from the oral cavity and then position the
hand with the thumb and fingers apart, in order to receive the scissors. When
the scissors have been used, the assistant receives the instrument by holding
it near the hinge and working end.
Air-water syringe
The assistant holds the air-water
syringe by covering the nozzle as well as the tip with the palm of the hand.
The assistant should position the handle of the syringe towards themselves, for
easier grasping. The syringe is received in the same manner, with the dentist
covering the nozzle and tip with the palm. Air-water syringes can be
transferred by using the one-handed or two-handed process.
Activity 1
Estimated time: 10 minutes
As a dental assistant, you are
working with a dentist who is left-handed. How will you modify your movements
in order to ensure a smooth transfer of instruments?
10.3 Evacuation of the Oral
Cavity

This
function is usually performed by the dental assistant and involves the removal
of debris, blood, saliva and other fluids from the oral cavity.The process is usually performed
with the help of HVE, or High Evacuation System. To begin with, the most important
step involves deciding on the grasp that works best for the task at hand and
the assistant's comfort. There are several different ways to grasp (ways to
hold the hand-piece), including pen-grasp, thumb-to-nose grasp and the reverse
palm thumb grasp.
The pen grasp implies holding the
instrument like a pen, whilst the modified pen grasp implies a similar grip,
but with the pad of the index finger lying along the working end of the
instrument. The modified pen grip is often recommended for better strength and
control during evacuation procedures.
The palm grasp involves holding
the instrument with the palm and the fingers gripping the handle. The palm is
usually turned up when the assistant is working on the maxilla teeth and the
palm is turned downwards whilst working on the mandibular teeth. The palm-thumb
grasp involves holding four fingers around the instrument, whilst the thumb
points towards the working end. The assistant can use any of the
different grasps explained above, to hold the evacuator. The assistant must
take particular care when placing the tip of the evacuator in the patient's
mouth.
General Guidelines for Placement
of the Oral Evacuation Tip
*Place a cotton roll near the
vestibular area near the tooth - the evacuator tip must be placed on the cotton
roll and not directly on oral tissue.
*Place the evacuator tip carefully
in the mouth, without bumping the gingival tissue, lips, or teeth.
*Position the evacuator tip at
least one tooth distal (away) from the tooth that you want to target.
*Remember to hold the bevel
parallel to the lingual surface of the teeth.
*The evacuator tip should be
positioned away from the hand-piece, so that it does not draw water coolant
away from the bur or disk.
*Hold the tip absolutely still
whilst the hand-piece is being used, otherwise any sudden movement may bump the
tip and injure the patient.
The assistant should generally
avoid placing the tip on the soft palate or the back of the tongue, as this
could cause the patient to gag. The saliva ejector is an oral evacuator that
works on a low volume compared to the HVE. This is used during treatments that
do not involve removal of a high volume of fluids from the mouth (such as
fluoride treatments).
How to Use the Air-Water Syringe
The air-water syringe is able to
rinse the mouth with air and water, as well as evacuate fluids at the same
time.
For example
The dental assistant can dry an
area of the oral cavity or clean the mouth mirror, so that the dentist is able
to enjoy clearer vision. In order to prevent this from happening, the assistant
blows dry air across the surface of the mirror to keep it clean of spray and
debris.
Similarly, mouth props are
devices made of different materials that help patients to keep their mouth
open. Most mouth props are designed with rubber tubing, to provide flexibility
and avoid injury. In order to place a prop, ask the patient to open the mouth
wide, carefully place the prop and ask them to close the mouth. Then ask the
patient if they are comfortable with the mouth prop and adjust it if necessary.
Cotton rolls are flexible and
easy to place in the oral cavity. They are usually placed to isolate an area or
to rest the evacuator tip on. Cotton rolls must be moistened with water before
placing in the mouth, because dry cotton roll will stick to the tissues and
cause irritation to the mucosal tissue. The cotton rolls can be directly placed
in the mouth by the dental assistant or by the dentist.
Guidelines for Effective and Safe
Use of the Air-Water Syringe
*Some dentists prefer water spray
followed by air, as the air-water syringe may sometimes create aerosol.
*When you rinse the patient's
mouth, take care to use the evacuator tip to follow the spray and rinse the
patient in quadrants. The evacuator tip and the air-water syringe should be
rotated, for thorough cleansing.
*At times, when the dentist is
using a mirror for indirect vision, the water spray may cloud the mirror and
distort the image. The assistant must remember to spray air and clear the
mirror.
10.4 Expanded Functions Performed
by the Dental Assistant

In many clinics, dental assistants can perform expanded
functions which are beyond the scope of routine dental assisting. Dental assistants who perform
expanded duties are sought after for their reinforced set of skills. Whilst
performing expanded skills, the dental assistant works on their own and not
under the direct supervision of the dentist.
Some tasks associated with
expanded functions include placing sealants, taking x-rays, placing and removal
of rubber dams, placement of bases and liners, taking dental photographs,
removal of sutures and applying coronal polish.
The scope of these activities
will depend on the dental practice and the standard procedure followed in the
office. In such cases, the dental assistant may sit in the dentist's chair and
set up the tray and unit to work alone on the patient. The assistant will also
place the saliva ejector, HVE, hand-pieces and air-water syringe within reach,
for convenience.
Activity 2
Estimated time: 10 - 15 minutes
What are the general steps that
you would like to follow, in order to ensure cleanliness and hygiene between
patients? How much time do you think those preparations will take?
10.5 Anaesthesia and Sedation
The most
common types of anesthesia used in dental practices include local, general and
topical anesthesia, conscious and deep sedation and nitrous oxide. The dental assistant is not
directly involved in the administering of conscious sedation, topical, or
general anaesthesia.
However, you will be expected to prepare the syringe,
transfer it carefully and care for the patient during recovery. The dentist or
anaesthetist will monitor and recommend the correct dosages and strengths for
the solutions to be used. The types and strengths of anaesthetics used will be
different across procedures and across patients.
How to Prepare the Anaesthetic
Syringe
You will require a sterile
syringe, disposable needle, selected anaesthetic cartridge, needle-stick
protector and gauze moistened with ethyl alcohol.
(In the field of dentistry, it is
common to find that the needle is placed in the syringe before placing the
cartridge).
Procedure:-
*Select the disposable needle and
the anaesthetic prescribed by the dentist for the procedure.
*Remove the sterilised syringe
from the pouch or bag and make a preliminary inspection, to ensure that it is
ready for use. Ensure that the ring or thumb bar is tight.
*Holding the syringe in the left
hand, use the thumb ring to retract the piston rod and place the cartridge in
the barrel of the syringe. The rubber-stopper end or the plunger should go in
first. Avoid touching the diaphragm during this process, as this may lead to
contamination.
*Once you have placed the
cartridge correctly, release the piston rod and, using moderate pressure, push
the piston rod into the stopper until it is fully engaged.
*Remove the protective cap from
the syringe end and press the needle into the syringe. The syringe needle
should be secure, but not overly tight. Now carefully remove the protective
plastic cap from the tip and expel a few drops, to ensure that the needle is
working correctly.
*Replace the cap on the needle and
place the syringe on the tray, so that it is ready for use.
Topical anesthesia
This refers to a numbing gel that
is used to de-sensitise the gum tissue before administration of anesthetic
injection. The dental assistant will apply topical anesthesia with the help of
a cotton roll or swab and leave it on for about one minute, before the dentist
administers the injection. Modern topical anesthesia also comes in the form of
solutions, gels, ointments, sprays and solution. It is helpful to explain the
different types of anesthesia to patients, to help alleviate their fear and
anxiety.
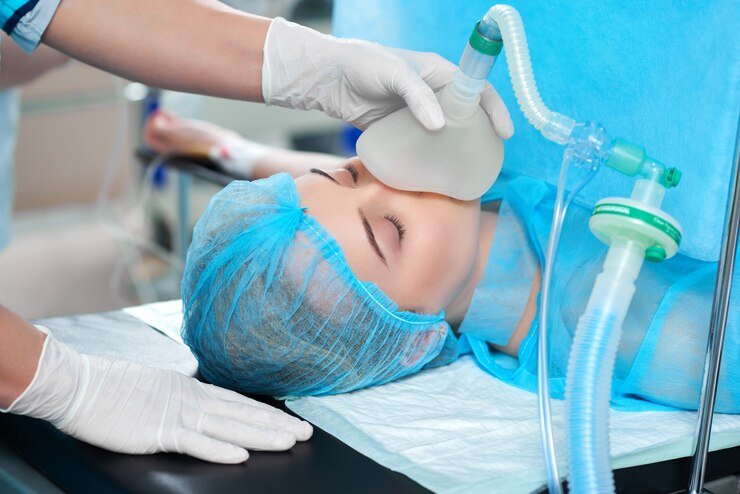
Sedation Using Nitrous Oxide
Nitrous oxide and oxygen together
are used to sedate patients who experience acute fear during dental treatments.
Whilst nitrous oxide will be administered by certified dental professionals, as
an assistant, you can help by educating the patient and talking to them about
the sedation. Nitrous oxide allows the patient to feel relaxed and stress-free
and they may experience a floating sensation.
When used along with oxygen,
nitrous oxide is an extremely safe anaesthetic and is usually administered to
the patient through the nose. The assistant should monitor
vital signs, such as respiration rate, pulse rate and blood pressure rate. You
must also ensure that you record a comprehensive and accurate medical history.
Nitrous oxide can be stored in portable tanks or wall units. It is the duty of
the assistant to ensure that the tubing and tanks are maintained in top
condition, with no tears, cracks, or leaks.
10.6 Precautions for Infection
Control
Dental offices have a duty to protect their staff members, patients and
workers from the risks of cross-contamination.
Inadequate decontamination,
sterilisation and disinfection measures can lead to an increase in risks and
may place the dentist in a vulnerable position for legal action. Standard precautions are used to
protect patients and staff members from known and unknown sources of infection
from fluids, blood, saliva and other secretions.
These precautions include:-
*Hand washing: Dental team members
should complete at least two consecutive hand washes at the beginning and end
of each day, with an anti-microbial hand wash.
*Some dental offices also provide
tools with which you can scrub and clean fingernails. Finish the hand washing
by rinsing the hands with cool water to close pores and dry your hands with
paper towels. Use the paper towels to close the faucet or tap.
Protective barriers: This
includes the use of personal protective equipment, such as gloves, masks and
eyewear, in order to pose barriers to micro-organisms. Protective barriers help
protect staff and patients from splatters of blood, saliva and other body
fluids.
*Masks must be changed, in case
the mask becomes moistened. Masks help to protect the dental team members and
the patients from communicable diseases. Dental staff must also make it a point
to change into their uniforms as soon as they come to work.
*Correct handling of needles and
sharps: Used needles and sharps must be properly disposed of. Dental offices
normally use the services of special waste disposal companies, who provide
containers for medical waste.
Effective sterilisation and
decontamination of instruments: There are different types of sterilisation
techniques, including chemical, dry heat, ultrasonic, chemical vapour
sterilisation and steam sterilisation, amongst others. Dental hand-pieces,
especially, should be sterilised in accordance with manufacturer's
instructions, as they are very expensive.
10.7 Ergonomic Considerations

As a
dental assistant, ergonomics plays a crucial part in the longevity and success
of your career.
Sitting for hours at the
chair-side or leaning over in awkward positions can take its toll on your body
and can leave you feeling exhausted and sore. Failure to follow ergonomic
recommendations can result in backaches, knee pain, or increased risk of missed
work days due to injury and sickness.
Sit in a neutral position with
your back upright, but not arched and spread your weight over the seat of the
stool or chair. Keep your legs slightly separated, with the feet placed flatly
on the base of the chair. Position the chair in such a way that it is close to
the patient and points to the mouth, with the knees pointing to the patient's
head. Keep the thighs parallel to the floor and adjust the height of the chair,
so that the chair is four to six inches higher than the dentist. This will help
to provide a clear line of vision into the oral cavity. The armrest should be
at the height of your abdomen and should be able to provide support when you
lean or reach forward.
The operating zone of the dental
assistant is recommended to be between 2 o'clock to 4 o'clock and should be
within a radius of 20 inches (the operating zone around the patient is divided
into the zones resembling the face of a clock).The tray table should be placed
as close as possible, right next to your thigh, so you are able to reach for
instruments with minimal movement. Newer hand-pieces are lighter and more
flexible in movement, compared to older, heavier models (which would affect the
wrists and hands).
10.8 Interview Considerations and
Tips

Before taking on your first job,
consider the following factors:-
*Qualities desired in an employer.
*Areas of growth available.
*Strengths that you can bring to
the position.
*Overall, what type of dentistry
do you find interesting?
Whilst attending interviews,
dental assistants can expect the following questions to be asked:
*How would you describe yourself?
*What motivates and stresses you?
*Why should this office hire you
and what are your career goals?
*How would you describe your
dentistry and interpersonal skills?
*What would you describe as your
greatest weakness and greatest strength?
*Describe a stressful or difficult
situation and how you handled it.
Practice answering interview
questions with a friend or family member and remember to take along
certificates, radiographs or x-rays that you have taken. Dress well, because
your appearance should reflect your interest in the job. At the end of the interview,
candidates are usually asked if they have any questions for the interviewers.
Some sample questions are
outlined below:-
*I would love to know about the
best dental assistant that you ever had.
*Does the practice consider
providing continued education opportunities?
Avoid asking questions about
salaries and benefits at this point. Also ensure that you read up on
information about the company, before the interview. Remember to thank everyone
and shake hands with everyone present at the interview.
Fact
As a dental
assistant in the UK, you can choose to work full time, part time, on contract,
or as a temporary or permanent worker.
Source: Indeed Recruitment UK
Module Summary
One of the most important
functions of the dental assistant is to hold, transfer and receive instruments
back in the treatment room during procedures. This is no small task and the
assistant's competence can determine the efficiency of the entire dental
process. Instrument transfers can either be performed as one-handed or
two-handed operations. The assistant should generally use their left hand to
transfer instruments to the dentist's right hand, assuming that the dentist is
right-handed. Instruments are generally passed on to the dentist under the nose
and near the patient's chin. Sharp instruments, such as forceps and scissors,
must be carefully and deftly transferred, to avoid injuries and accidents.
Oral evacuation systems help to
remove fluid, saliva, blood and debris from the oral cavity. The oral
evacuation system operates with the help of water and air and the device
eliminates the need for the patient to sit up and empty his mouth of saliva and
fluid every now and then. The saliva ejector is a low volume fluid and debris
evacuator and is used during simpler procedures that do not involve the removal
of large volumes of fluid. Evacuation, rinsing and passing of instruments are
tasks that the dental assistant will perform every day, with each patient.
In addition to these routine
tasks, the dental assistant may also be called upon to learn more complex
tasks, such as placement of sealants, placement of bases and liners and removal
of sutures, depending on the dental practice. These functions are known as
expanded functions and the assistant may develop competence to perform these
tasks without the necessity of direct supervision.
The dentist will decide on the
type and strength of anaesthesia, for each patient who requires it. The dental
assistant is usually responsible for preparation, transferring the syringe and
caring for the patient before, during and after the administration of
anaesthesia. The assistant should also ensure the maintenance and upkeep of all
anaesthesia equipment, including tanks, tubes, hoses and nose pieces.
.svg)