
3.1 Introduction
The main act you will do as a professional in the painting and decorating industry is paint surfaces. This duty will be among your most common duties, so it is important that you understand the importance of how to paint surfaces. Though you might not realise it at first, if you really think about it there are so many different wall surface materials, that it can become a bit overwhelming. In addition, each of these surfaces must be painted a bit differently from the rest, or the end result will not look as it should. Thus, this module focuses on these surfaces and how to paint them, and concludes with some information on proper measurements.
3.2 Wall Surfaces
In your career as a painting and decorating professional, you will come upon many surfaces that you will have to paint. These include floors, ceilings, doors, and exteriors. Also, of course, you will encounter walls. Here are some of the most common types of wall surfaces that you will encounter:
Plasterboard Walls
Walls that are finished with plasterboard and plaster make up approximately 80 percent of the walls in the UK. Plasterboard walls are created by taking studs, and then covering the studs with a layer of noggins. The noggin, or dwang, is a bracing piece that is horizontal against the studs. They are made of steel, aluminium, or wood. Plasterboard is placed over the noggin, which is essentially gypsum plaster between layers of paper. Paint is applied directly upon the plasterboard. Before painting the plasterboard, you should make sure that it is properly secured, and that there is no bounce. If it bounces when pressure is applied, you must further secure the wall to the studs before beginning the painting work.
Plaster Walls
Plaster walls are constructed almost identically to plasterboard, but there is an extra layer of plaster that is applied upon the plasterboard. This can give the wall texture and give it a small amount of strength. Before you paint a plaster wall, make sure to tap on it and listen for a sound indicating that it's hollow. Any areas that are not hollow should be removed. Also, make sure that all plaster walls are completely dry before you begin decorating it.
Brick, Sand and Cement Walls
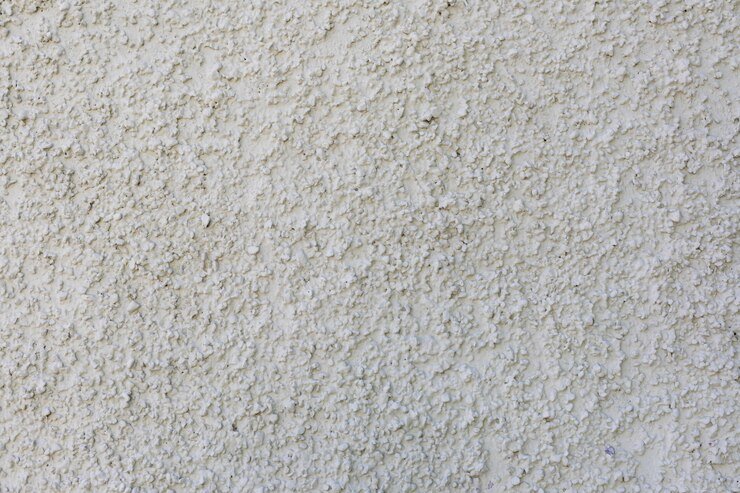
You are more likely to find brick, sand and cement walls as exterior walls, but it is possible that some homes or businesses will have them indoors, too. Brick walls are made of bricks, of course, but some of them will also have plaster exteriors. In this case, the brick wall is built, and then bonding plaster is applied over the top. Plaster skim is then applied over the bonding plaster. This helps to make the wall smooth. Paint is then applied over the top of the dried plaster skim.
Sand and cement walls are constructed in a similar manner. These walls start with a brick and mortar wall, which is then covered with a sand and cement screed. This is a substance that is made of cement and sand that levels and smooths the surface. Again, the paint is applied on top of this surface. Before painting these surfaces, again, make sure that they are sound by tapping and listening for any hollow areas. You should remove any areas that are not sound, and then use a sand and cement filler to repair it.
Lathe and Plaster Walls
Lathe and plaster walls are found in structures that were built prior to the 1950s, but you still might come across these walls during your work. The walls are built of timber studs and lathes, and then filled with plaster. From the back of the wall, you can often see the plaster that has oozed through the back of the lathes. Some lathe and plaster walls also have a browning, or brown coating, on them, which is made of plaster mixed with sand. It is also possible that you will find lathe and plaster walls that are made with metal or cement. You might also find that some lathe and plaster walls are put together with lime plaster, which is an old way of putting walls together. This type of plaster was made of lime, horse hair, and urine, and then spread into the lathes.
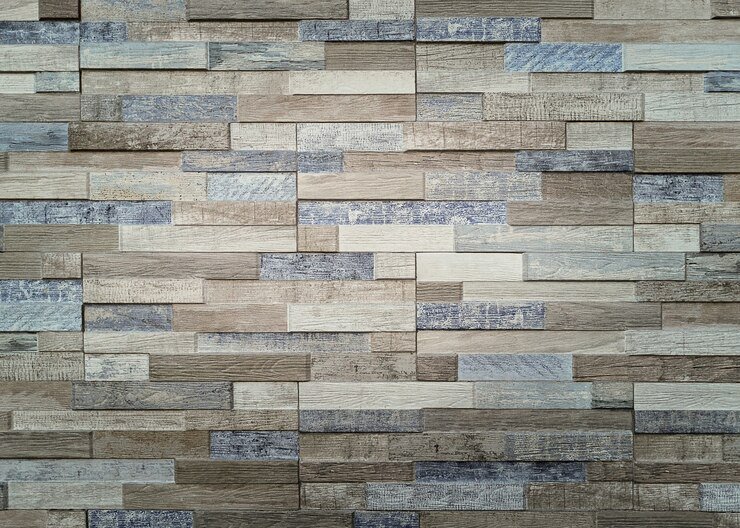
Timber Walls
Timber walls are also fairly common, but before you paint these walls, you must take some time to check for movement and soundness. If the wall moves, you must secure it. If you are painting or staining the wall, you must apply knotting solution to any knots to ensure the paint or stain does not bleed. Examine the wall for rot, and fill any areas with a compatible filler. If the wall is damp, ensure that you dry it before painting or staining.
Brickwork and Breeze block
If you are painting brickwork or breeze block, it is important that you first examine them for condition. They should be completely dry and every brick should be sound. Keep in mind that because of the makeup of these materials, it is best to use spray equipment when painting. This way, you can ensure that the paint gets into the small holes that make up the material.
Activity #1
Estimated Time: 10 minutes
As a professional in the painting and decorating industry, you will be required to paint a variety of wall surfaces on a daily basis. To succeed, it is critical that you understand the different types of wall surfaces that you must paint. Once you understand these different surfaces, you can accurately identify which type of paint, and other materials to use in your projects.
In addition to ceilings, doors, and floors, you will encounter plasterboard and plaster walls, which are two of the most common wall surfaces. Another important part of your job involves understanding how to prepare the different surfaces you are working with. For instance, before painting plasterboard walls, you should check for bounce and ensure that the surface is properly sealed. There are eight more surfaces that you will work with in your career, take some time to commit these to memory. Once you have a firm grasp on all the wall surfaces you will be working with, select two and answer the following questions.
*Where is this material most commonly found?
*What instructions or steps should you follow before painting this surface?
*What are the wall surfaces made of?
3.3 Painting Floors

Here are some flooring types that you can paint:
Hardwood Floors
Hardwood floors can be painted, but it is recommended that you test a small area of the floor to ensure that it's compatible with the paint or stain you choose. Before painting, you must sand away any existing stain or paint, and then ensure that the surface is free from any debris. You will then have to prime the floor, paint the floor with at least two coats of paint, and then seal the floor, as wood is a porous material.
Interior Concrete Floors
You can also paint concrete in the interior of a home or business. However, you must use a latex or oil-based paint that is specifically created for floors. Before beginning, you must test to see if a coating is required, as concrete is porous and will absorb moisture. You should also understand that paint cannot be applied to areas of concrete that collect water. Thus, in some cases, you might have to build up the surface before painting.
Vinyl/Laminate Floors
Contrary to popular belief, it is possible to paint laminate or vinyl floors, but not all of these products will accept paint. So, again, you must test a small area to see if the paint will remain applied. If you are able to paint the floor, only use an oil-based paint that is specifically formulated for floors.
Activity #2
Estimated Time: 10 minutes
Now that you have learned about the many different wall surfaces, flooring types, and even windows that you will be painting, it is important to learn about the various types of paint. As you embark upon your career as a painting and decorating professional, you will use both interior, and exterior paints. There are several commonly found paints used in the industry including gloss, satinwood, and polyurethane paints. You will also use thixotropic, or non-drip, paint, and vinyl, matte, or vinyl satin emulsion paint. Additionally, there are primers, undercoats, anti-condensation, radiator, fire-retardant, and bitumen varieties. The use of these paints varies depending on the project, the surface you are painting, and the chemicals in the paint. To test your understanding of these types of paints, work your way through the following scenarios. You were just hired to remodel a room and are looking for a durable paint to hide a few imperfections in the walls and ceilings, what should you use? You are painting the interior of a home and want a hearty paint that is resistant to dirt but is subtler than a traditional gloss. What should you use?
3.4 Painting Windows & Doors

It is likely you will have to paint windows.
Windows
This is a relatively easy part of the job, but it does take a bit of time. The first thing you must do is use a spray bottle or pressure washer to completely clean the windows and trim. Once clean, you will then have to remove the existing paint or stain with a paint scraper or similar tool. Keep in mind, if you are working with lead paint, you must take precautions to ensure that the paint chips do not fall upon the ground. It is also recommended that you wear a respirator to avoid breathing in dust. Whilst removing the paint, take some time to look at the glazing and the caulking of the window. If these parts of the window are not in good condition, it will likely break away. If the glazing is missing, the windows might become loose, and if the caulking is cracked, water can get into the frame.
Sand the surface of the window, as you must remove all of the old paint or stain. The remaining wood should be very smooth and clean, and appear as bare wood. This will also help the new paint or stain that you will apply to adhere better. Following sanding, make sure to remove all of the dust, as this can make the paint appear textured. If you need to caulk, do it at this point, and note that it will take a few hours to completely dry. If you must re-glaze, you might have to wait a few days or even weeks for it to dry completely. When all of the caulk and glazing are dry, tape the glass around the slats, as you do not want to get paint on it. Also keep a wet cloth on hand to remove any splashing or drips of paint. Prime the wood of the window trim, and then allow it to dry completely. Finally, apply the paint and allow it to dry completely. When it is completely dry, take your tools and remove any excess paint.
Doors
![]()
Types of Door
Painting an Internal Door – 19m 47s
Learn how to paint an internal door in this tutorial
Activity #3
Estimated Time: 10 minutes
Before you begin painting surfaces, you must always properly prepare the area starting with a thorough cleaning of the area. After you have washed the area, you next examine it for any cracks, holes, or damage, and apply the necessary filling material to repair the damage. Keep in mind when choosing a filler, that there are a variety of fillers on the market, so make sure to select the correct one. After cracks and imperfections have been fixed with the appropriate filler, there are still some steps you will need to take before your surface is ready for painting. What steps should you follow when preparing to paint a surface? When preparing specific surfaces, are there additional steps that should be taken?
3.5 Types of Paint on the Market
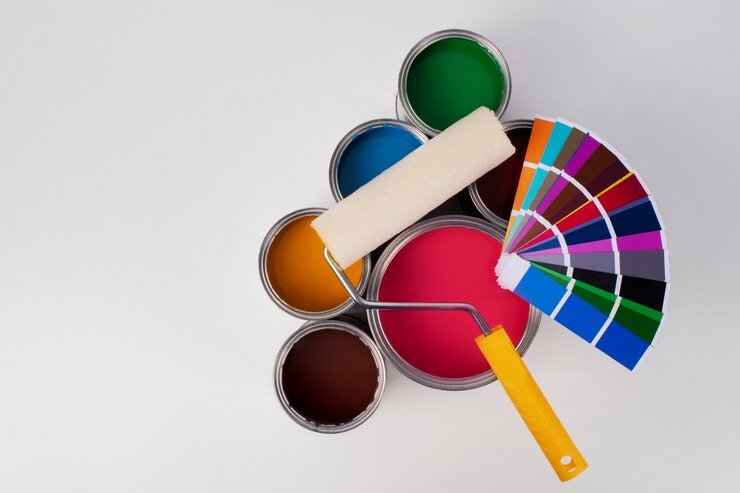
As you get into painting and decorating you will find that you will use a number of different types of paint. The UK paint market is mostly divided into two types of paint, interior and exterior, though you will also find other types of paints out there. Here are the most commonly found paint types on the UK market.
Gloss Paint
Traditionally, gloss paint was oil-based, but these days, there are both oil and water-based gloss paint available. There are a number of different types of gloss paint on the market, such as liquid gloss. This type of gloss paint requires an undercoat, but it has a very glossy finish, it is resistant to dirt, and it's quite hearty. Satinwood is another type of gloss paint. It, too, is highly durable, but it has a subtle sheen that is duller than the traditional gloss paint. You will also certainly see and use eggshell paint in your career, too. This gives a flatter
appearance, though it is not quite matt. Eggshell paint is often used for decorating purposes, such as with skirting and architrave.
Polyurethane gloss is another option, and it has an oil-based gloss finish. This paint has an additional polyurethane resin that is mixed with it, which makes it extra tough and able to withstand more abrasion than the standard glossy paint. Along the same lines, silthane paint is a mixture of polyurethane and silicone, which is even stronger and more durable than polyurethane.
Thixotropic (Non-Drip) Paint
You will also find thixotropic, or non-drip, paint on the UK market. This paint is seen as an alternative to the ordinary gloss paint. It has a consistency similar to jelly, and is applied to surfaces a bit differently, as it is much thicker. It is like a blob of paint that is placed upon the surface, and then spread out with the brush.
Non-drip paint can produce runs and streaks if there is too much used, and it tends to build up in corners. Manufacturers of this type of paint may claim that the paint doesn't require any type of undercoat, but you will achieve a better finish if you use an undercoat. If you use this paint on exterior surfaces, you should always put on an undercoat, as it will ensure that the paint is weather resistant.
Emulsion Paint
Emulsion paint is water-based, and then mixed with resins, such as acrylic or vinyl, to make the paint more durable. The more resin that is added to the paint, the more shiny the finish becomes. These paints range from matt, which is flat paint with no sheen, to full gloss paint, which has the full, glossy sheen that stands out to the eye. Eggshell is a bit more shiny than matt, silk is shinier than eggshell, and satin is shinier than silk, but not as shiny as full gloss paint. The three most common types of emulsion paint for use in homes and businesses are vinyl matt, vinyl satin, and vinyl silk.
Vinyl matt is ideal for hiding imperfections in walls and ceilings, but it isn't as forgiving as other finishes when it comes to durability. Vinyl satin has a soft sheen, and it is good for areas where occasional durability is required. Vinyl silk has a high sheen, and is good for rooms that have a lot of humidity or condensation, such as the bathroom or kitchen.
Other Types of Paint
There are other paints on the market that you should be aware of, too. These include:
Primer - primer can be water or oil-based, and is the material used on a surface before the paint is applied. Primer helps to protect the surface and offers a 'clean' surface for the undercoat. The type of primer you choose should be appropriate for the material you are painting, so make sure to look at that information. There are also some 'all-purpose' primers, which might be appropriate for a number of surfaces.
Undercoat - an undercoat is applied over the primer and is usually an oil-based product. For the best results, the undercoat must be the right colour to provide a good base for the actual paint. As you begin your career, you might require assistance with this, but as you learn more, you can choose undercoat colours easily.
Anti-Condensation - there is also anti-condensation paint available, which is ideal for areas of the home or business that are humid, such as the bathroom. This paint is not foolproof, and you might find that there is still condensation that gathers, but it will not be as much as might have gathered without the paint. These paints often include fungicides, too.
Radiator paint - radiator paint is used for coating pipes and radiators. It is a specialised paint that can stand up to high temperatures. Fire-retardant paint - this special paint has chemicals that help the paint to be resistant to fire. These paints do not completely resist fire, but they are more resistant to flames than other paints.
Bitumen - though bituminous coating is not always considered a paint, it is a type of coating that allows surfaces to become waterproof. Bitumen doesn't actually perform like paint, either. It might crack if it becomes frozen, and it can become sticky if it gets too hot. Usually black in colour, it is thick, which means it will resist water, but doesn't look that great. It is possible to paint over bitumen, but it often doesn't mix well with paint. If you must paint over it, the best paint is aluminium-based paint, which is an uncommon
type.
FACT
80% of the house paints sold in the UK are now water borne, significantly reducing emissions of solvents into the atmosphere and our coatings extend the life of machinery, bridges, and buildings, protecting valuable natural resources such as wood, concrete, and steel from the elements.
Source: coatings.org.uk
3.6 Preparing a Surface for Painting
Before applying paint to any surface, you must properly prepare the surface. This always begins by cleaning and washing the surface, but there is more to it than that. The following will explain what you need to remember as you are preparing surfaces for painting:
Fillers
After the surface is washed, you must examine it for holes, cracks, or other damage. Most of these, if they are small, can be filled with materials called fillers. There are a number of different fillers on the market, all with different features, colours, and uses, so make sure to choose the correct filler for the job. Also, keep in mind that filler shrinks a bit when it dries, so it's always better to overfill than not fill enough.
Base Coat and Smoothing
After you fill all of the holes, cracks, and damage, you then can apply a base cost. Base coats are thick paints that are designed to fill even more holes and damage to the surface. You must use a fluffy roller to apply the base coat, which will give it a finish that is slightly textured. Most of the time you will only require one coat of base coat, but in some cases, two coats are appropriate. When the base coat dries, the surface should be smooth.
Skim Coat
You have previously heard of a skim coat if you are following the course in order. This is a thin coat of plaster that is placed upon a surface to ensure the surface is smooth. A skim coat is not used in all cases, but for areas that are battered or that have an uneven surface, one can use a skim coat to make it smooth. Before applying the skim, apply a coat of polyvinyl acetate, or PVA, as a bonding agent.
Replastering
If you have surfaces that have a lot of loose plaster, large cracks, or holes, you will likely have to replaster the surface. You will have to gain these skills, unless you work with someone who already has experience as a plasterer. When replastering, you must apply two coats: a coarse, basic layer, and then covered with a skim coat.
Specific Material Preparation
Once all of that is done, the surface might be ready to paint. However, there might be a couple of other things that you must do depending on the material. For instance, if you are painting unpainted wood, you must apply knotting to the wood. This stops the knots in the wood from bleeding sap through the layers of paint. After the knotting is applied, you will apply a wood primer, and then an undercoat. For unpainted wood, it is best to apply an oilbased undercoat, and then use an oil-based eggshell or gloss paint. If you are painting wood that is already painted, you can likely just wash it, and then sand it down, if necessary, before painting over it.
If you are painting metal, you should use a metal primer along with an oil-based undercoat and oilbased paint. Eggshell, gloss or emulsion paint is the best for metal. For painting MDF, you must seal it before painting it. There is a special MDF primer on the market, and then you will have to follow that up with an undercoat. Glossy and eggshell are the best choices for MDF. It is possible to paint tile, too, and for tile, clean it with soap and water, and then with white spirit. You should then use a tile or glass primer, followed by paint. There is also tile paint on the market that does not require primer. If you are painting melamine, you will do the same steps, except to use a primer made specifically for melamine.
Module Summary
Painting surfaces will be a large part of your career as you work in the painting and decorating industry. Thus, in order to ensure that you have a good start in the field, it is important that you understand the basics of painting. This module first introduced you to the different wall surfaces that you might encounter, including how these surfaces are constructed. Some of the wall types explained were plaster, brick, and timber. The module also introduced you to different flooring types that you might encounter. It explained the differences between these floor types, as well as how to correctly paint the materials.
You also learned about window painting and the steps that are required to successfully complete this common task. The module explained how to remove the glazing, how to prepare the windows for painting, how to caulk, and then how to correctly apply the paint. You additionally learned about the types of paint that are common on the UK market. In this case, the module introduced gloss paint, non-drip paint, and emulsion paint. It also explained that there are other paints on the market that you might encounter during your day to day work. Additionally, you learned which paints to use based on the material and situation. Finally, the module gave information about how to prepare a surface for painting, along with specific step-by-step
instructions.
.svg)