
5.1 Introduction
Welcome to our final module of the urban garden course. You now know how to prepare for, create and care for an urban garden. Therefore, you may wonder what else you have to learn. In actual fact, there are many more aspects to learn, and this is what this module will teach you.
As you work through this module, you will learn how to create compost and the basics of preserving your garden's crops. We will also cover how to prepare your garden for the winter and how to collect and conserve seeds for the following year.
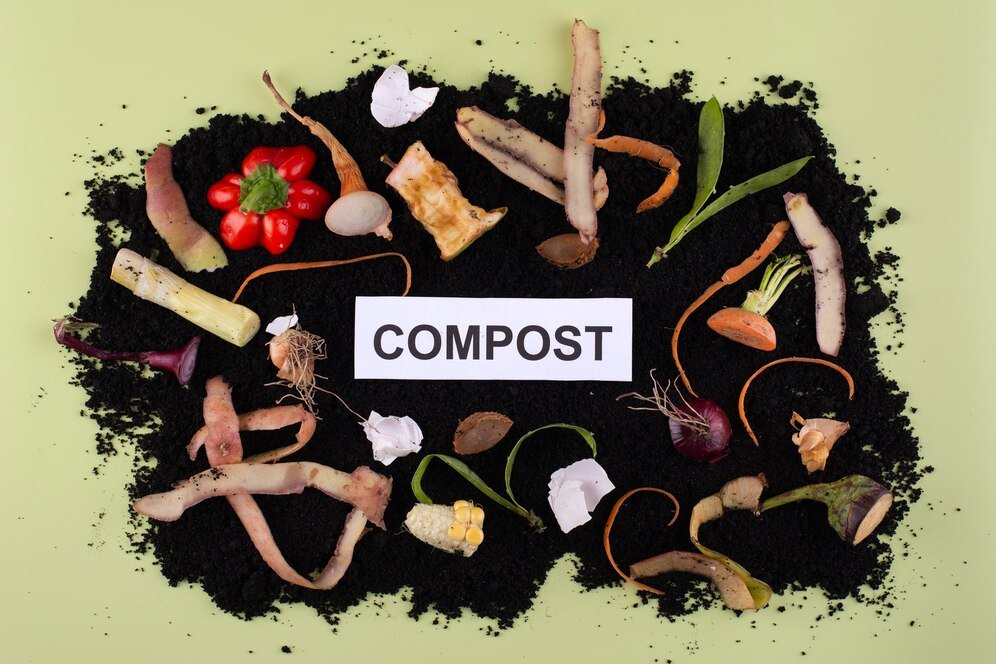
5.2 Composting

Composting is a useful practice for all gardens, and unless, you have a very small space with which to work, the odds are good that you can find a place for a compost heap. Some urban garden areas have a shared compost heap. Composting is done throughout the year, although the RHS recommends that the best time to work on a compost heap is from late summer to
early winter.
Choosing a site for composting
When choosing a site for a compost heap, ensure that it is not subject to a lot of moisture or heat.Moisture and heat can affect the performance of the fungi and bacteria that convert the waste into compost. Also, try to find a shaded or partially-shaded place. It is best to start the compost heap directly on the earth, but, in an urban area, this may not be possible. Therefore, place soil at the base of the compost heap, before starting it. Alternatively, you can simply begin composting with an open heap, but it takes a lot longer for the process of composting to begin. It also takes longer, if you have a compost bin less than a cubic metre in size, so, if possible, use one that is larger than that
Creating the right balance
Getting the right balance in your compost heap is important, in order to create high-quality compost. It is best to get between 25% and 50% green material, and the rest should be brown material. Green composting material may be green in colour, but it can also be other natural materials. Green composting material includes grass clippings, weeds, manure, organic kitchen waste, such as fruit and vegetables, and some pet waste. For the most part, brown composting material is brown in colour.
This includes the following:
1.Wood chippings
2.Straw
3.Paper
4.Dead leaves
5.Cardboard
6.Plant stems
The micro-organisms that work to create the compost will work best, when the correct balance of green and brown composting material is correct. If one material dominates the heap, such as grass clippings, the compost heap could become quite smelly and slimy. Although it is not necessary, you can add lime, or you can add an activator, such as Garotta (compost maker). An activator is not necessary, if you have enough green material in the heap.
Turning the heap
The biggest chore that you must do when creating a compost heap is turning it. The heap must be turned, so that air can be added into the mix. If the heap becomes too compacted due to lack of air, the process could take a long time. In fact, not turning the heap is usually the main reason why composting fails. Turn your compost heap every three to βive weeks. When you turn the heap, check the moisture level, especially if it has not rained.
Collecting the compost
It can take a few months to a year or more to create compost. The compost that is ready to use is dark brown in colour, and it should smell like a damp forest. The texture should resemble soil. Mix this amazing substance in with your soil, and see the great benefit that it brings to your garden's output. Hopefully, you took in as much of the information in this module as possible. To find out how well you have done, complete the following worksheet.
FACT
There are more micro-organisms in a single teaspoon of compost than there are people living on the Earth.
Source: BBC.co.uk
Problems with compost
Although composting is a fairly easy task, there are issues that may occur, including the following. Slimy, wet, or odorous compost - If the compost is wet or slimy or smells, you probably have too little air and too much water in your compost heap. Turn the heap, protect it from rain, and add more brown waste.
Fibrous, dry, and no compost - If the compost is too dry, fibrous or you do not see any rotting, it is likely that there is too little moisture or too much brown material. Therefore, add more green waste, or choose an activator to replace brown material. Flies - A well-managed compost heap should not smell nor should it attract flies. If you do see flies, it could be because they are attracted to kitchen waste that has been added to the heap. To counteract this, cover kitchen waste with garden waste.
Activity 1
Estimated time: 10 to 15 minutes
Composting is an excellent way to get more crops from your garden and to give your plants the nutrients that require to grow.
Think about where you could put a compost bin and how large your bin could be. Bear in mind that this does not have to be directly near the garden.
Once you know where the compost bin can go, start doing some research on buying one. You can also very easily build one, if you are handy with tools.
5.3 Preserving Fruit and Vegetables

If you have a garden producing fruit or vegetables, you will probably βind that you have more produce than you can use. Fortunately, there are a number of things that you can do, in order to preserve your garden's output, including freezing and bottling. Of course, this helps to reduce waste and also ensures that you can enjoy the literal fruits of your labour throughout the winter.
Bottling fruit
Freezing your fruit and vegetables is self-explanatory, but, if you wish to take things to the next level, bottling fruit is a wonderful option. It is a bit of a lengthy process, but it is well-worth it.The fruit that you bottle should be βirm and fresh and free from disease or discolouration. Small fruit, such as strawberries, can be used whole, but any fruit with pips or stones must be cut and the pips or stone removed.
Some fruit, such as peaches and apricots, should also be peeled. This is easy to do, by blanching them in boiling water. Apples and pears should also be peeled, and you can boil them in a solution of sugar and water, to soften them, ready for the jars. The best type of jars are those with rubber seals and a spring clip, but there are many types of bottling jars available. Before using them, each jar must be thoroughly cleaned and sterilised in boiling water, for at least 10 minutes. When adding the fruit, the jars should be hot, and, when placed on top, the lids will create a vacuum and an airtight seal. If there is a βlaw in the lid or rubber seal, the jar will not seal correctly, and the contents should not be eaten.
You can bottle fruit in water, syrup or brine, but most people use syrup, as it preserves the flavour and colour of the fruit. If you choose syrup, add ascorbic acid - which is vitamin C - as it helps to maintain the colour of the fruit. You only require a small amount of vitamin C: about 200 to 300mg per litre of syrup.
The syrup is quite easy to make, and the strength of the syrup depends on how sweet the fruit is and how you choose to pack it. Most syrups are proportioned as 250g of sugar to a pint of water. You can use traditional white granulated sugar, or choose a different type of sugar, for a different flavour.
Over a moderate heat, dissolve the sugar in half of the water, and, when dissolved, boil the solution for one minute, before adding the rest of the water. To successfully βill the jar, you should do it in stages. Firstly, place a bit of fruit, then fill with syrup, to just over the level of the fruit. Shake the jar slightly, from side-to-side, to dislodge air bubbles. Add more fruit and more syrup, a bit at a time, until the jar is full. Leave about 1.25cm from the opening, and then place the lid on, to form a seal.
Next, you have to boil the jars. Take a large stock pot and place either a folded newspaper or tea- towel at the bottom. This keeps the jars from moving around. Add the jars to the pot, cover with warm water, and slowly bring the water to a boil. The jars should be about 5cm below the surface of the water, and it should take about 30 minutes before the water boils. Each fruit has a recommended time during which it should sit in the water, therefore, you might have to look this up beforehand.
To follow are a couple of common bottled fruits and instructions on how long to let them simmer:
Apples - 2 minutes
Cherries - 10 minutes
Currants - 10 minutes
Pears - 40 minutes
Strawberries - 2 minutes
When the time is up, remove the jars from the water, and allow the bottles to completely cool. Before storing, test the jars for a vacuum. To do this, pick up the jar by the lid. If the vacuum was successful, the lid will remain in place. If you are using thin, metal lids, try pressing the centre. If you can depress the lid, it is not correctly sealed.
Bottling vegetables
You can also bottle vegetables, but it is not as easy as bottling fruit. You must use a pressure cooker, instead of a stock pot with water because the pressure must be very accurate. With vegetables, it is best to use a brine, as opposed to a sugar syrup. You can make a brine, by adding 150g of salt to a litre of water.
Only use vegetable that are thoroughly cleaned and peeled, and cut them into pieces. Blanch the vegetables in water, before bottling. You must clean and sterilise the bottles and jars, just like with the fruit jars, and, when filled, the jars should be hot. When you place the jars in the pressure cooker, use a tea towel or newspaper, to keep them standing, and then βill the pressure cooker with 600ml of cold water. Add a bit of vinegar. Then add cloths, to ensure that the jars are not touching each other or the side of the cooker.
Fasten the lid on the pressure cooker, and then turn on the heat, ensuring that the vent of the cooker is open. When the steam has been escaping for about 10 minutes, set the pressure to 0.7kg/cm2.
Cook for the required time as outlined below:
Broad beans - 30 minutes
Peas - 45 minutes
Tomatoes - 20 minutes
For other vegetables, do some independent research. You may also wish to research your particular pressure cooker, as times can vary. When the processing time has passed, remove your cooker from the heat, and allow it to gently cool. When the gauge shows zero, open the valve, and remove the lid. Remember that the jars are still very hot, so use caution. When the jars are cool, check the lids for the vacuum, as per the instructions for bottling fruit.
Use caution when bottling
You will soon see the benefits of bottling the fruit and vegetables from your garden, but you must be cautious. Firstly, the jars will be hot, when you remove them from the stockpot or pressure cooker, so use a glove or a jar-lifting device. You must also use caution, when preparing the fruit and vegetables, as it is easy to get bacteria into the jars. Therefore, ensure that you thoroughly sterilise, and, if anything looks or smells rotten or strange, do not eat it.
Activity 2
Estimated time: 10 to 15 minutes
Now that you know a bit about bottling fruit and vegetables, you should think about the plants that you plan on putting in your garden.
Do you think that you might wish to bottle them? If so, research the proper process, and know what equipment you might need.
Start small, and make one or two batches at a time. Thus, you can perfect your bottling technique, before making more batches.
5.4 Drying Flowers
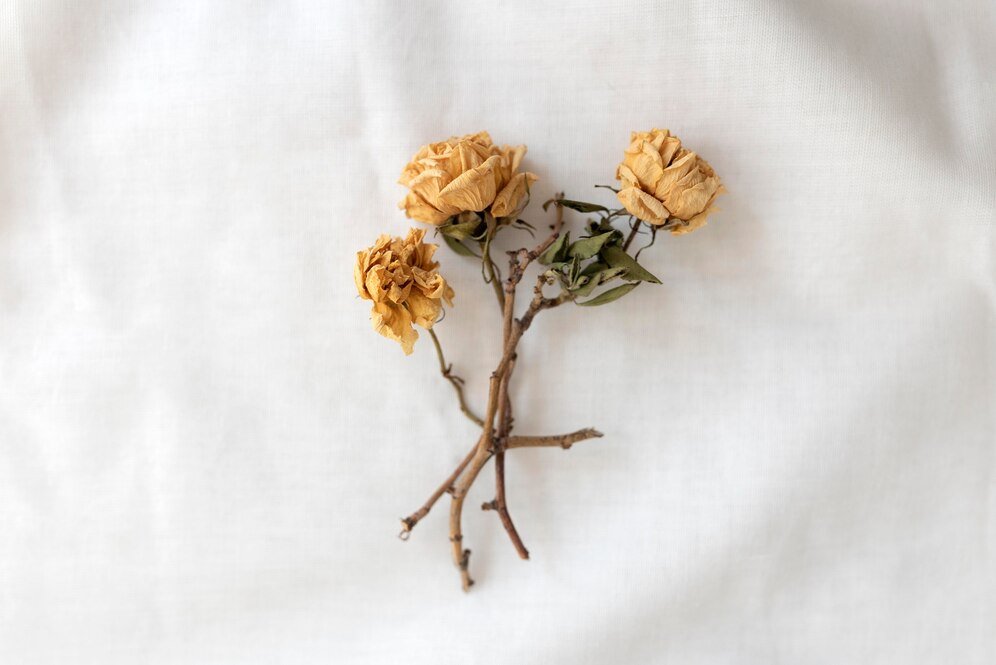
Just because you have an urban garden does not mean that you will only grow fruit and vegetables. In fact, many people will choose not to grow edible plants at all. Instead, they will grow βlowers in their garden. Flower enthusiasts use dry flowers for a number of reasons, and there is a bit of a trend right now in the UK to use dry βlowers in the home, for decoration. Dried flowers make excellent gifts, and if you enjoy crafting, you will find a number of excellent uses for them.
There are three main ways to dry βlowers: air drying, silica gel drying and microwave drying. Regardless of the method that you choose, flowers that you choose to dry should be at the peak of their beauty, for the best results.
Air drying
The most traditional way of drying βlowers is air drying. People have been air drying flowers for thousands of years, and it is extremely easy and almost effortless. There is no special equipment required to dry βlowers by air, and you do not have to put in a lot of work. To air dry a fresh βlower, create a small bouquet, and then hang it upside down, in a place that is dark, cool and dry. It should also have good air circulation and proper ventilation. The drying process does not happen overnight, and the βlower will usually take about a month to fully dry. There are sprays available, to help the dried βlowers keep their shape after drying, but you can get very similar results with simple hair spray.
Silica gel drying
Those people who are drying βlowers on a larger scale might consider using silica gel. There are two main ways in which you can get silica gel: you can buy it online, or you can ask a local florist to give you information about buying silica gel from their source. Once you have got your silica gel, take a glass or plastic container that is large enough to accommodate your flowers, and then fill the bottom with 5 to 7cm of silica. Lay flat flowers face- down in the silica, and lay domed flowers, such as roses, face-up. Cover the entire βlower with silica, and do not allow the petals to touch.
It usually takes between two and seven days for the flower to dry, so check it daily. When the flower is dry, carefully remove it, and brush away any silica, before displaying the flower.
Microwave drying
Before explaining how to dry flowers in the microwave, it is important to note that all microwaves are different, therefore, you might have to experiment, in order to find out what works best for you and your microwave. The easiest way to microwave fresh βlowers is to wrap them in sheets of kitchen roll, and then set the microwave for one minute.
If you are drying flat βlowers, consider placing a plate on them, in order to keep them βlat. Check the flowers, and then repeat, as required. Most flowers do not require more than three minutes in the microwave, before they are dry. Drying βlowers is an easy, fun and affordable hobby, especially for those people who wish to enjoy their urban gardens throughout the year. Do not be afraid to experiment, when drying fresh flowers.
You might find that you have a great talent in creating dry βlower bouquets, to display in your homeor to use as gifts for friends and family.
FACT
The oldest known dried βlowers date back at least 2,000 years. They come from an ancient Roman tomb, and are on display at the British Museum.
Source: Yellowpages.ca
5.5 Preparing your Garden for Winter
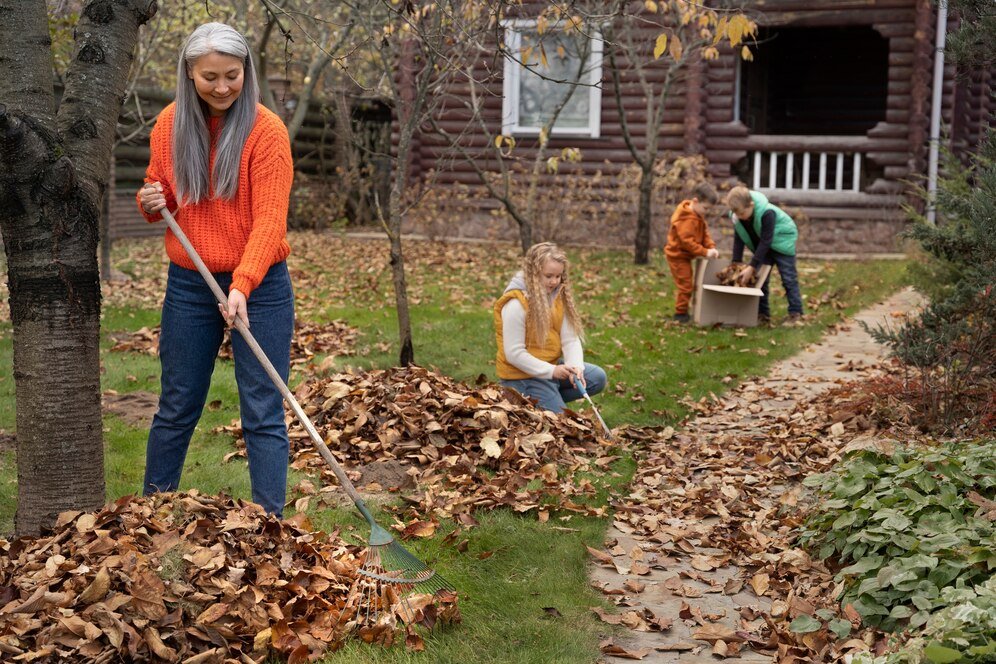
After all of the βlowers have been picked and the vegetables have been harvested, you might think your garden tasks are done for the season. However, that is not quite true. Instead, you have to prepare your garden for winter, to enable you to have a better performing garden the following year, and it will mean less work for you in the spring.
We are lucky that we never have a huge freeze here in the UK, which means that underground activity does not stop simply because nothing happens above the ground. This means that shrubs, trees, bulbs and annuals are still strengthening and growing roots for much longer, before the ground might freeze.
For most of the UK, the best time to prepare your garden for winter is the end of October to the beginning of November.
Make an assessment
Before you start preparing your garden for winter, it is always a good idea to assess how the growing seasons went. Did some plants thrive and others fail? Do you think that a certain plant might grow better in another spot? This is the time to start making a plan for spring, so access the plans that you created earlier in this course, and see what needs to be changed. This will be what you use in the spring, in order to plan your next garden.
Clean up the garden
You also want to clean up your garden before winter, to make less work for yourself in the spring. Pull out all the newest weeds, and remove all of the decaying and dry leaves, to add to your compost heap. You also want to dig up bulbs, to dry and collect seeds, which is what we will discuss in the next section of this module.
You also should prune shrubs and trees in your garden in the autumn, when you prepare it for winter. This helps to encourage healthy growth in the spring. To prune: cut the branch at an angle of about 1/2cm from the branch. If you have shrubs or trees that require protection from frost, use burlap fabric, and wrap it around the plant. You also should mulch once more, as it gives the roots a bit more insulation.
Plant trees, shrubs and bulbs
The late autumn is the best time to plant trees, shrubs and evergreens. This is also when you should plant bulbs, such as daffodils and tulips. Apply mulch to the areas where the bulbs or other plants are planted, as this will help to keep the ground insulated throughout the winter.
5.6 Collecting and Storing Seeds

There are many shrubs, trees, perennials, annuals and herbs that leave their seeds behind, at
the end of the gardening season.
You can harvest these seeds, and keep your garden going strong for many years to come.
Harvesting your own seeds is a fun hobby, but you must plan ahead.
To follow are a few tips:
1.Although it is a bit different for every plant, a good rule of thumb is to collect βlower seeds approximately two months after they flower.
2.Seed heads ripen quickly, therefore, you have to watch carefully, to avoid missing them.
3.If you are picking berries, to use as seeds for the next season, ensure that you get them before the birds do.
4.Only pick seeds from healthy, vibrant plants. This helps to ensure that the plants in the next season are just as healthy.
5.Only use fully ripened seeds. If the seeds are immature, they will not germinate, which means that they will not grow.
Plants from which to collect seeds
There are many different plants that produce seeds that you can collect.
These include:
1.Capsules, such as poppy
2.Berries, such as blackberries
3.Pods, such as sweet peas
4.Exploding seed heads, such as caper spurge
Collecting plant seeds
Again, each plant might have different requirements with regards to seed collection.
Below is a good overall guide:
Collect seeds as soon as the seed heads ripen. You will probably see the seed heads change colour. Ensure that you choose a dry day, as you do not want the seeds to get wet. Pick other seeds directly from the plant. You might have to research how to do this and even where the seeds are located on the plant. If you want seeds from fleshy fruit, such as berries, mash the fruit in a sieve, and then rinse away the remaining pulp. Allow the seeds to dry for several days.
Take all of your collected seeds, and lay them out to dry. This might be on a garden bench, in an airing cupboard or even on a warm window sill. If seed pods do not easily open when dry, you might have to use force. You do not need the seed head, only the seeds encased within it.
After getting the seeds out of the pod/seed head, clean the seeds well, by pulling off any material that might be left from the pod. If you do not do this, you might find mouldy seeds, when you are ready to plant in the spring.
Storing your seeds
Most seeds can be stored throughout the winter, for planting in the spring. Therefore, you must safely store your seeds until that time. You may also find that you have extra seeds that you wish to save.
To follow are some tips:
When seeds are thoroughly dry, place them in labelled paper packets, and then in an airtight container. You may also consider putting some silica gel in with the seeds, as this helps to fight any remaining moisture. Keep the seeds in a cool, dry place. Warmth and humidity can promote rotting and Many people keep their seeds in a refrigerator. If you do this, make sure that the temperature is at about 5°C. This ensures that the seeds will remain viable for several years.
Issues with seed collecting
When collecting seeds, some gardeners find themselves facing issues. For instance, you might find that some of your plants are sterile and do not set any seeds. You also might find that some plants have both male and female plants, and there will not be seeds on the male plants.
You might also find that some seeds that you collect are simply not good seeds. Unfavourable weather conditions, disease, pests and even genetics can make some seeds bad to use. In addition, some seeds look good, but they fail to germinate. This means that the seed was not viable. This usually depends on the storage of the seed. The seed might have been stored for too long or in unfavourable conditions, or it may have simply been a bad seed from the start. The RHS has information on its website in relation to seed collection and storage.
Activity 3
Estimated time: 10 - 15 minutes
Once again, refer to what you have planted in your garden or what you wish to plant in your garden.
Do some research, to see which of the plants you can collect seeds from. Flowers, such as foxgloves, sunflowers and cornβlowers are all easy to access for beginners. Edible plants, such as peppers, beans and tomatoes are also easy to access and save.
Do you have any of these in your urban garden? Make a list, and then research how to correctly collect and store these seeds. We have given you a step by step guide in this module.
MODULE SUMMARY
This module covered several concepts, including how to create compost, how to care for a compost heap and how to deal with issues created within compost heaps. We also covered how to bottle your fruit and vegetables, as well as how to dry βlowers from your garden.
We also explained what you should do, in order to prepare your urban garden for winter and how to get an early start on your spring gardening tasks.
Finally, we covered seed collection and storage and how to deal with any problems that you might encounter when doing so. We have now reached the end of our course on urban gardening. With this course in hand, you have everything that you need to start, create, grow and harvest a garden. You can use the information found within this course to create Flower gardens, vegetable gardens or any type of garden that you can think of. We wish you luck in your gardening ventures and hope that your first urban garden yields excellent results.
.svg)