
4.1 Introduction

By now, you should have got to the point of planting your urban garden. Whether you are using containers and raised beds or boxes or you have dug a small area in the soil, you know how to plant and start the garden. However, that is just the beginning. This module will take you through the proper care of your garden, including focusing on weeding, pest control, tackling disease and how to make your garden more abundant. We will also discuss other issues, such as transplanting.
4.2 Tackling Weeds in a Garden
If you have a garden, even a very small garden, you are going to get weeds. Technically, a weed is simply a plant that is growing in a place where it does not belong. Sometimes, weeds are simply seedlings that you may not wish to grow in a particular place; at other times, they might be invasive and harming the growth of wanted plants. Either way, you want to get them out of your garden. Although you can never totally stop the growth of weeds, there are ways to stop them from growing.
Bare soil
One of the most common places for weeds to grow is in bare soil. This is the same soil that you are using to grow your vegetables, fruits or flowers. The best way to prevent or at least limit the weeds in your garden is to put down a good, thick layer of mulch. Ideally, you should place about 8cm of mulch on top of the soil each spring. This might be manure, bark clippings or even leaf mould.
Not only does mulch help to prevent weeds, it also helps to keep moisture in the soil. If you have an area that is not being used, such as, if you have prepared the soil but are not ready to plant, you can place plastic over it or even an old carpet.
Weeds in pots
If you are using pots for your urban garden, you will still deal with weeds. Algae, moss and other weeds are common in garden pots, and, in some cases, these weeds spread very quickly. The problem with these weeds is that they take water that your garden plants really need. You can pull these weeds right off the pot or use a small trowel, to scrape the weeds away. You can slow weed growth by placing mulch over the surface or you can use grass clippings, pebbles or even shells, to give an ornamental look.
4.3 Different Types of Weeds
As with plants that you might put in your garden, weeds are either perennials or annuals. Depending on the types of weeds with which you are dealing, you handle each of them in different ways.
Annual weeds
To deal with weeds that are annuals, you should dig them out of the soil with a hoe. Just ensure that you do not get too deep, especially if you have plants in the area. You do not want to damage the root systems or bring up any unterminated seeds that you have planted.
The following are some common UK annual weeds that you might find in your garden:
Chickweed
Chickweed is a problematic weed because it grows large and quickly. This weed thrives, when you have great soil in your garden - which, of course, is a good sign - but you want to remove the weed as quickly as possible. If you do not do so, it will quickly begin to take nutrients, light and water from your garden plants. You can remove these by hand or with a hoe.
Annual nettle
Annual nettle is a relative of the stinging nettle, and this also grows quickly and drops seeds, so it spreads with little effort. Like chickweed, the annual nettle favours fertile, rich soil. It is most often seen from late spring into summer. Since this is a nettle, you must wear gloves because it will sting.
Shepherd's purse
If you see rosettes of leaves that tend to grow throughout the year, it is probably shepherd's purse. This weed drops seeds that are heart-shaped after white βlowers bloom.These seeds can remain dormant for decades, therefore, if you see shepherd's purse, remove the plants quickly, and then watch the area for more.
Groundsel
Groundsel is a problematic annual weed because it simply does not stop producing seeds. These seeds fall all year long, therefore, you have to keep up with removing the seedlings. Removing the seedlings with a hoe works well, but groundsel weeds that are larger require deeper digging or removal by hand. Also, the seeds spread easily, thanks to the wind, therefore, do your best to remove the seedlings before they get large enough to produce seeds.
Hairy bittercress
Hairy bittercress is commonly seen in container plants, and the βlowers can propel the seeds up to a metre away. Therefore, as soon as you see hairy bittercress, quickly pull it up. This weed is a member of the mustard family and is very common in the British Isles.
4.4 Perennial weeds
Perennial weeds will also appear in your garden, and they require a bit more work.
For instance
You have to really get deep with perennials, and you might consider a garden fork or even burn them out. Of course, you do not want to do the latter, if you have already planted your garden. The most important thing with perennial weeds is to ensure that you pull up all of the roots.
To control perennial weeds, you can use mulch or lay plastic or carpet over the area. Of course, make sure you do not cover any of your garden plants. You might also consider a commercial weed killer containing glyphosate. Apply this to the foliage of the weed, and it will then seep into the plant. This goes all the way through the plant, including the roots, but it takes a bit of time.
If you choose to apply a weed killer, ensure that you thoroughly read the package, in order to understand the application instructions. You may also wish to cover other plants in your garden during the application process because weed killer will also kill other plants.
Common Perennial Weeds
To follow are some common perennial weeds that you might see in your garden:
Ground elder
Ground elder is a nasty weed that forms rhizomes, or stems, under the surface of the soil and around flowers in the garden. You must have patience, when dealing with ground elder because, although it comes out very easily, it spreads very quickly. Therefore, it takes an effort to completely clear it from a garden.
Field horsetail
The field horsetail is another rapidly-spreading weed, and it loves soil that is compact. Regularly taking the hoe to field horsetail eventually weakens it, but it will not totally eradicate it. You might consider using mulch in areas where field horsetail grows.
Hedge bindweed
The stems of hedge bindweed easily overtake βlowers and shrubs, therefore, it is important that you quickly get this weed out of your garden. Use a weed killer on this, or use a pole, to encourage the plant to grow up. Once it does, apply the weed killer, and thus you will not kill other plants.
Japanese knotweed
You will recognize Japanese knotweed by its zig-zag stems. This plant grows very quickly, and the stems spread out wide. It is very difficult to totally eradicate it, therefore, you will probably have to use both mulch and weed killer, in addition to pulling it up.
Dandelion
The dandelion is one of the most recognisable weeds that you will see in your garden, and, although it often appears on the lawn, it also appears amongst the flowers and vegetables. Mulch helps to keep it under control, as does pulling it out of the ground, but you have to ensure that you pull out the entire weed.
Activity 1
Estimated time: 10-15 minutes
Learning to identify common weeds will really help you to keep them out of your garden. Spend about 10 to 15 minutes researching some of the most common weeds in your area and how to identify them.
You should also look at how to eradicate them from your garden. Also look for photos, and then, as you are out over the next few days, take some time to look around. Do you see any of these weeds?
4.5 Common UK Garden Pests
In addition to weeds, you will have to keep your garden protected from garden pests. There are many garden pests in the UK, and it is important that you know what you are up against. However, remember that not all creatures that you find in your garden are bad. There are many that are quite good, including ladybirds, moths, butterflies, ground beetles and lacewings. Therefore, as you take a look at the common garden pests in the UK, do your best not to eliminate these creatures in the process.
To follow are a few of the most common garden pests that you might encounter:
Aphids
Aphids are extremely common throughout the UK. There are more than 500 aphid species in the UK. These insects range from 1 to 7mm, and are usually light in colour, therefore, you can usually see the adults on your plant's leaves and stems. Almost all plants can be affected by aphids, therefore, it is important that you know how to recognise them. Most of the time, you can see aphids, and they are found especially around flower buds, shoot tips and under leaves. Aphids shed their skin, therefore, you might also see this on the leaves of your plants. Additionally, if you see that a plant's leaves are curling up or that the plant is not growing as quickly as other plants, it might be due to an aphid infestation.
There are a number of other insects, such as ladybirds, that eat and control aphids, therefore, you certainly do not want to kill these helpful insects. Usually, by midsummer, the aphid populations are under control, if you have the helpful insects in place. There are also pesticides that can be used on aphids, but you have to be very careful because they can kill the helpful insects.
Vine weevils
Vine weevils are beetles that also attack a number of garden plants, but plants grown in containers are at the greatest risk. Vine weevils can be devastating to gardens, and they do damage all year long. The adults eat the stems and leaves in the spring and summer, whilst the larvae eat the roots during the autumn and winter. If vine weevils attack your plants, they can easily die. Strawberries, rhododendron, hydrangeas and evergreens are likely to be attacked by vine weevils.
You can see the adult vine weevils. They are about 9mm long and are dark in colour, with muted yellow markings on their wings. If they are present, you will notice irregular notches out of the leaves during the summer months. The larvae are white with brown heads and are usually seen around the roots of affected plants. It is difficult to stay on top of a vine weevil infestation because, when you stop, the vine weevil population begins to grow again. Fortunately, they are not too difficult to get rid of.
You can, in fact, pick the weevils off the plants by hand, especially at night:
1.Use a torch, and place down newspaper or even an upside-down umbrella.
2.Place the umbrella next to the plant, and shake it.
3.The weevils will fall into the umbrella and, thus, away from the plants.
There are also sticky barriers that you can place around pots, and you should try to encourage the natural enemies of vine weevils, such as toads, frogs, hedgehogs and birds. There are pesticides available, to tackle vine weevils, but you should not use them on any edible plants.
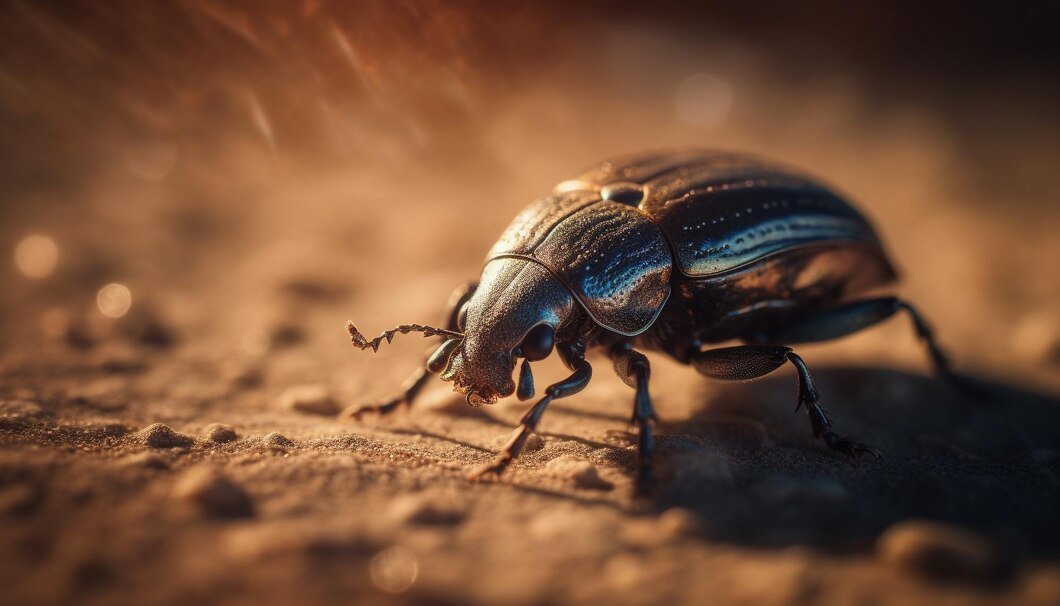
Rosemary beetle
The rosemary beetle is found primarily on herbs, including rosemary, sage, lavender and thyme. These beetles are about 8mm in length and are metallic green in colour. Most rosemary beetles do not bother plants too much in the late summer, but, by early autumn, they begin to eat the leaves of the plants. They also lay eggs, which hatch within a couple of weeks. They also eat off plants.
Since rosemary beetles are easily seen, you can collect and remove the larvae and the adults from the plants. Try the umbrella trick mentioned above, or place a newspaper under the plants, before gently shaking, to remove the insects. You can also use pesticides, but it is best to apply them in the early autumn or spring. You should never put pesticides on plants, when they are in βlower, because the pesticides can kill the pollinating insects upon which your garden relies.
Slugs
Slugs attack almost all of the plants in a garden, and a tell-tale sign is holes in the leaves of your plants. There are many species of slugs throughout the UK, and most of them feed at night. You might see slime trails in the morning, when you check your plants, and that can alert you to how big the slug infestation is.
The most common plants that slugs attack include:
Tulips
Dahlias
Hostas
Sweet peas
Lettuce
Peas
Beans
Celery
Larger slugs also feed on decaying organic matter, such as dead leaves, but this can be to your advantage, if you are making a compost pile, which we will discuss in the next module. Slime trails are one sign of slugs - they look like thick, shiny, silvery lines on leaves and stems. You will probably also see irregular-shaped holes in the leaves.
Unfortunately, you will never fully eradicate slugs from your garden, but you can keep them at bay. One way to do this is to introduce nematodes to your garden, which are available from garden centres and placed directly in the soil through water. As slugs feed at night, you can take out a torch, and inspect your plants for snails. Pull them off, and then move them elsewhere. There are also slug traps and pesticides that can help to control slug populations that have got out of control.
FACT
In 2016, more people in the UK searched for information on removing slugs from their garden than any other pest. This is likely due to the fact that it was a rainy year.
Source: RHS.co.uk
Activity 2
Estimated time: 10 - 15 minutes
At this point, you should have a very good idea of what type of plants you plan on putting into your urban garden.
Take that list and research which garden pests commonly attack those plants.
Find out how to identify the pests, how to identify signs of the pests, and moreover, how to eradicate these pests and save your plants.
4.6 Common UK Garden Diseases

In addition to fighting weeds and insects, you must also contend with garden diseases. Not every garden will be affected by disease, but many will be. Therefore, it is important that you understand how to identify and remedy some of the most common UK garden diseases.
Honey fungus
Honey fungus is the name of a number of fungi species that spread underground. This fungus attacks the roots of perennial plants, ultimately killing them. This is the most destructive of all fungal diseases in our gardens. It attacks many different common garden plants, although some have resistance - these include hydrangeas, roses, pears and apples.
You can suspect that honey fungus has entered your garden, if you notice that the upper parts of your plants have died, but the lower parts still seem alright. You may also notice that the leaves of the affected plants are small and pale in colour, compared to other plants. Plants affected by honey fungus will not usually βlower, they may crack near the stem base, and you might even see mushrooms growing up around these plants. There are no over-the-counter chemicals that can effectively eradicate honey fungus, and getting rid of it is difficult. You have to dig up the affected plants and burn them. Throwing them into your compost bin will only spread the problem.
Rust
Rust diseases are also extremely common fungal diseases in the UK, and, in this case, the leaves of the plants are affected. Rust may also appear on βlowers, stems and fruits. The spores that are produced by rust diseases vary in colour, but they all produce pustules. Symptoms of rust include pale coloured spots on the leaves, which eventually form into pustules.
These pustules might be yellow, brown, orange or black in colour, although many are a rusty brown colour, which is how this disease gets its name. Leaves that are severely affected by rust turn yellow and fall from the plant, and, in some cases, the plant will die. When it comes to rust, it is best to look at the type of plant affected, but, generally speaking, people try to stop it, by removing the affected leaves. However, this is only effective if just a couple of leaves are affected.
At the end of the growing season, affected plants should be removed. There are fungicides for rust that you can put on ornamental plants and βlowers, but not on plants that are edible, such as fruits or vegetables. Fortunately, rust does not easily spread, therefore, if you remove the affected plant(s), you can stop it.
Blight
Blight is another common disease in the UK, and it is quite serious. However, it is only specific to potatoes and tomatoes and a couple of ornamental plants. Blight spreads very rapidly and is most common in wet weather. Plants affected by blight usually collapse and eventually decay.
Both potato and tomato plant leaves will rot away, when affected with blight, and the leaves will look wet. They will soon collapse, shrivel up and then turn brown in colour. You may also see a white fungus growing around the edges of the leaves, and/or brown lesions. Fortunately, it is possible to forecast blight activity, therefore, you can possibly harvest early. If that is not an option, you can pick off the affected leaves.
This will not stop the disease, but it can slow it down long enough to harvest the potatoes or tomatoes. If more than 25% of the plant is damaged, the plant may be lost. At the end of the season, all plants affected by blight should be destroyed. Do not place these plants in a compost bin. Also, do not plant potatoes or tomatoes in the same place for at least four years; instead, practice crop rotation.
Powdery mildew
There are many plants that are affected by the disease known as powdery mildew, and you can easily recognise it. As you may expect, powdery mildew appears as if white powder has been put onto the plant. The mildew often appears on the plant stems and leaves, but it may also appear on the fruit of flowers. In addition to the white powdery appearance of this fungus, you may also see distorted or stunted growth. Also, some plants may turn brown.
Some of the plants that are most commonly affected by powdery mildew include:
Grapes
Peas
Cucumbers
Blackcurrants
Courgettes
Apples
Rose
Phlox
Azaleas
Every autumn, you should destroy any infected leaves, which will help to reduce the chances of the fungus spreading in the following spring. Mulching and watering also help to protect plants from powdery mildew, and pruning out infected plants can also help. Fungicides are available to eradicate powdery mildew, although use caution, when applying them to vegetable or fruit plants.
Activity 3
Estimated time: 10 - 15 minutes
Just as you did with regards to pests, take some time to look into the diseases to which your chosen garden plants are susceptible.
Learn how to identify these conditions and then how to remedy the situation.
4.7 How to Transplant Plants from One Area to Another
Before ending this module, it is important to know how to transplant. Transplanting is often done with seedlings, but it is also possible to transplant large, adult plants. The best time to transplant is when the roots are fitting the pot, tray or other container. This indicates that a plant requires more room in which to grow and spread its roots.
However, you have to be careful, when transplanting outdoors, as seedlings are much more susceptible to frost. Therefore, make sure that the final frost of the year has passed, before transplanting. We will usually talk about transplanting vegetable plants, but you can also use similar methods, in order to transplant other plants. It is always a good idea to do a bit of research before transplanting, as some plants do have specific transplanting requirements that lead to successful growth.
When transplanting, your goal is to minimise any damage to the root, which will slow the growth of the plant. In extreme cases, this damage can kill the plant. Transplanting is traumatic to the plants, so ensure that you use some type of fertiliser every time. A high phosphorus fertiliser is best, but make it half-strength. Apply about 250ml to each plant.
Bare root transplanting
There are some vegetables, such as cabbages and leeks, that take a long time to mature and take up a lot of space, if planted in their final spot from the beginning. Therefore, many people initially plant them away from the garden, and then, when they are young plants, do a bare root transplant. This means knocking the soil from the roots. Bare root transplanting is common, when taking young plants, such as tomatoes, from seed trays.
To do this, follow these steps:
1. Water the seed trays well, approximately 24 hours beforehand. This ensures that the plant will be easy to lift from the tray.
2. Ensure that the plant is ready and large enough to be transplanted. For instance, a cabbage should have at least βive to seven leaves.
3.If the plant has been grown in a cold frame or under cloches, make sure that it is well- ventilated, a couple of weeks beforehand. If you buy the plants from a retail shop, this has usually already happened.
4.If you are not planting the seedlings immediately, keep them damp and shaded, such as with a newspaper, until you are ready to plant.
5.When you plant, use a trowel, to dig a hole that is large enough to accommodate the roots.
6.Place the plant in the hole, up to the point at which its true leaves are growing. Fill the hole with water a number of times, allowing it to drain each time, before filling it in.
7.Fill the hole with soil, and ensure you firm the soil up. To test this, attempt to pull a plant out by one of its leaves. If the leaf tears, it is solidly planted.
8.For at least a couple of weeks, unless you deem it to be necessary, avoid shading, trimming or heavy watering, unless it is a drought condition.
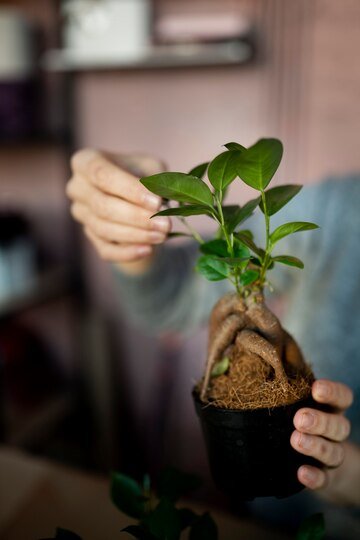
Pot transplanting
You can also easily transplant a plant from one pot or container to another or from a pot to the ground. In fact, plants that are transplanted in this way are often transplanted with few problems, as the roots are not disturbed. To carry this out water both the plant and the site where you will transplant, the day before you plan to do it. Dig the hole for the plant, ensuring that it is large enough to accommodate the root ball. Carefully dig up the plant, to transplant, then place it in the hole. Plant it firmly, and try to place it into the new spot no deeper than it was in its container. Ensure that you keep the plant well- watered, for at least two weeks following the transplant.
Potential transplanting issues
There are some common problems that affect plants that are transplanted.
These include the following issues and solutions:
Drought - Plants may wilt or shed leaves following a transplant, and this is a sign of drought. Therefore, ensure that you water these plants more frequently.
Discoloured foliage - If you see discoloured foliage, it is likely that the transplant does not have enough nutrients. In this case, water with a liquid fertiliser or specialised plant feed.
Plants do not have a good yield - In this case, it is likely that the plant sustained too much trauma, when being transplanted. Usually, the next year yields better results. It is also possible that the plant has a disease or has been attacked by pests.
Failure to grow - Apply a good fertiliser and keep an eye on the plant.
Loss of leaves - Usually, this is due to garden pests, such as snails or slugs. Birds may also cause this.
Death - If a plant dies, you must think back, to think what went wrong. Sometimes, this occurs during transplanting, especially if the plant is weak from the start.
FACT
The optimal time to transplant is from late-winter to mid-autumn. This is when the risk of frost is low.
Source: RHS.co.uk
Module Summary
In this module, we gave you information on how to care for and get more out of your urban garden, by correctly caring for your plants. We began this module by explaining how to keep weeds out of your garden and how to effectively control weeds. You also learnt about the different types of weeds and why they are dangerous to your plants.
.svg)