
1.1 Introduction

You might believe that living in urban areas, anywhere from London to Aberdeen, means that you cannot grow plants or βlowers or even fruits and vegetables. However, this is simply not true, and this course can help you do it. We have designed this course specifically for urban dwellers, who are interested in creating a green space in which they can not only grow food for themselves and their family, but also create lovely, colourful spaces, filled with green plants and eye-catching flowers.
Whatever your urban gardening goals, with this course, you can turn those goals into reality. This module gives you an introduction to urban gardening and teaches you how to start your own urban garden.
1.2 A Brief History of Urban Gardening

Whether you call it urban gardening, urban farming or even urban agriculture, you might be surprised to hear that this concept has not just been around for centuries but for millennia. The first instances of urban agriculture, which date back at least 2,500 years, come from opposite sides of the globe: Egypt and Peru.
The ancient Egyptians had waste collection areas, where people would make an ancient type of compost. They would use this compost, in order to improve the yield of their urban gardens. On the opposite side of the world, in Peru, we know that the people of Machu Picchu also had water collection areas, which were then used to water the urban farms. These were built on stepped vegetable beds, which were created in order to get the most sun possible.
If we fast forward to the 19th Century, we know that the Germans created what they call 'allotment gardens', which were meant to address poverty. Here in the UK and in Canada and the US, 'victory gardens' were created during World War I and World War II. These gardens were created to lessen the pressure of producing food and to support people's efforts during the wars. Millions of kilos of food were created worldwide this way. In Britain, the initiative during World War II was called the 'Dig for Victory' campaign.
Today, things are very different, compared to how things were during the world wars. We have the logistics in place that ensure that we can get produce from anywhere in the world. We also have technology that allows us to grow tropical fruits, such as lemons, in greenhouses in places such as Edinburgh, and to farm fish in warehouses in places such as London. This is the new urban version of farming, and this is exactly what we are going to explore as this module and this course progress.
FACT
At the start of World War II, there were approximately 3.5 million private gardens and 819,000 allotments in the whole of Britain. Thanks to the 'Dig for Victory' campaign, by 1943, there were close to 5 million private gardens and 1,675,000 allotments.
Source: Yara.co.uk
1.3 Considering your Space Options
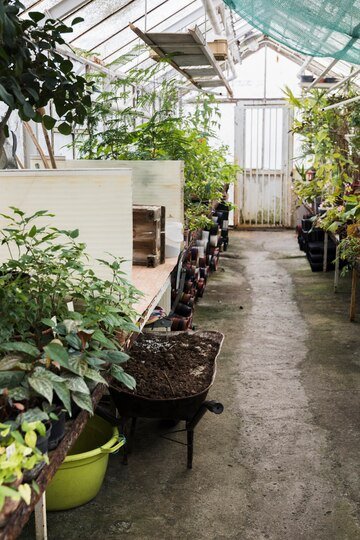
When it comes to urban gardens, you might think that you do not have the necessary space or an appropriate area in which you can grow plants. However, in most cases, this is just not true. If you are creative enough, there are many options for growing, even if you live in an extremely populated area.
Container Growing
One of the most popular methods for urban gardening is container growing. There are many benefits of container gardening, including helping to avoid some of the most common soil issues that gardeners encounter. With container gardens, you use special soil, which is adapted to whatever you are growing. Other benefits of container gardening are that containers can fit into odd areas, such as across a balcony, and they are easy to move as necessary; depending on the season and the sunlight.
Example of a container garden layout
Trellis Growing
Another option is to use a trellis to grow plants. Depending on the area you have available, you can choose small or large trellises. When using a trellis, most people choose specific plants, put them in a pot, and then the plant grows up the trellis. Keep in mind that only certain plants work with a trellis.
Examples of trellis plants:
Roses, honeysuckle, wisteria and clematis.
With regards to food plants, good trellis options are beans, tomatoes, courgettes and melons. When choosing plants for a trellis, make sure that the trellis is large enough to support the fruit or vegetable that grows on it.
Elements of trellis growing
Vertical Gardens
Another option that urban gardeners have is a vertical garden. These gardens are one of the many vertical options and typically comprise a large wall-hanging that has pockets. Each pocket contains a single plant, such as specific herbs. Attach these wall hangings to walls or fencing. You can even hang them indoors, if you do not have access to an outdoor wall.
Vertical gardening inspiration
Balcony Gardens
If you have a balcony, you can definitely turn that area into an urban garden. If you already have items on the balcony, you can also incorporate plants. Balconies are excellent areas for hanging baskets, which are popular options for growing plants of all kinds. If you wish to utilise even more balcony space, consider also incorporating vertical gardening.
Small Herb Gardens
If you have a windowsill in your home, you can incorporate a herb garden. This is actually a good place for people who are new to gardening of any kind to start. Herbs are typically easy to grow, and if you have a sunny windowsill, growing herbs is extremely easy. Consider thyme, basil, rosemary or mint, to introduce yourself to gardening.
Picture Frame Gardening
A picture frame garden is a type of vertical garden, but on an even smaller scale. This type of urban garden includes a large frame, usually made of wood, which has areas throughout that can accommodate plants. Generally, these plants are succulents or sedums, but some people also use them to grow herbs.
Flower Box Gardens
Choosing a flower box garden is another option. Many urban dwellers have access to flower boxes, and, although they are intended to give a splash of colour, it is also possible to grow herbs and other food plants in them.
Indoor Gardens
Some people live in dwellings that do not have any outdoor space at all. In this case, it is still possible to create a garden - you just have to do it indoors. By using natural light from the windows and adding a couple of grow lights, you can create a thriving garden inside your home, even if there is no green space to be seen.
Community Areas
Finally, if none of the above options are possibilities for you, there are also community areas found throughout the whole of the UK in which you might find a space for urban gardening. There are community gardens in every major city in the UK and in many other UK cities and towns. If you do a bit of research, you will find these areas in your local neighbourhood, especially if you live in a crowded urban area.
Activity 1
Estimated time: 10-15 minutes
Now that you know about all of the different options that you have for an urban garden location, take a look at your personal situation. What are your options?
Take a look at your home and its surrounding area, and consider where you could squeeze in a few plants. You might have to incorporate more than one of the above options.
For example, you might have a small balcony, on which you can put a couple of pots, and you might also wish to add a trellis or two. If you need more space, use a vertical garden, or incorporate an indoor garden.
1.4 Considering Light
Now that you have some ideas about where you are going to put your urban garden, the next thing that you should do is consider light.All plants require light, preferably sunlight, in order to grow. When discussing urban gardens, there are four main ways in which we describe sunlight.
These are based on how much direct sunlight the area receives and are as follows:
Full sunlight: six or more hours of direct sunlight each day
Partial sunlight: four to βive hours of direct sunlight each day
Partial shade: two to four hours of direct sunlight each day
Shade: less than one hour of direct sunlight each day
There are a number of things that can affect the amount of sunlight that an urban area receives.
For example
Tall buildings can affect the amount of light that your garden receives, although it might only affect it at certain times of the day.
In order to work out how much sunlight your garden area receives, you must monitor the area throughout the day. To do this, go outdoors to your chosen urban garden area, and take notes about the sunlight. It also helps to draw a few diagrams and take notes on which areas receive sunlight in the morning, which receive it in the afternoon and which receive it later in the day.
Depending on where you live in the UK, you should do this for several days. This gives you a good idea as to what you can expect throughout the growing season. It also helps you to decide which plants can thrive in your chosen urban garden space. We will discuss this in more detail in Module 2.
1.5 Considering your Supplies
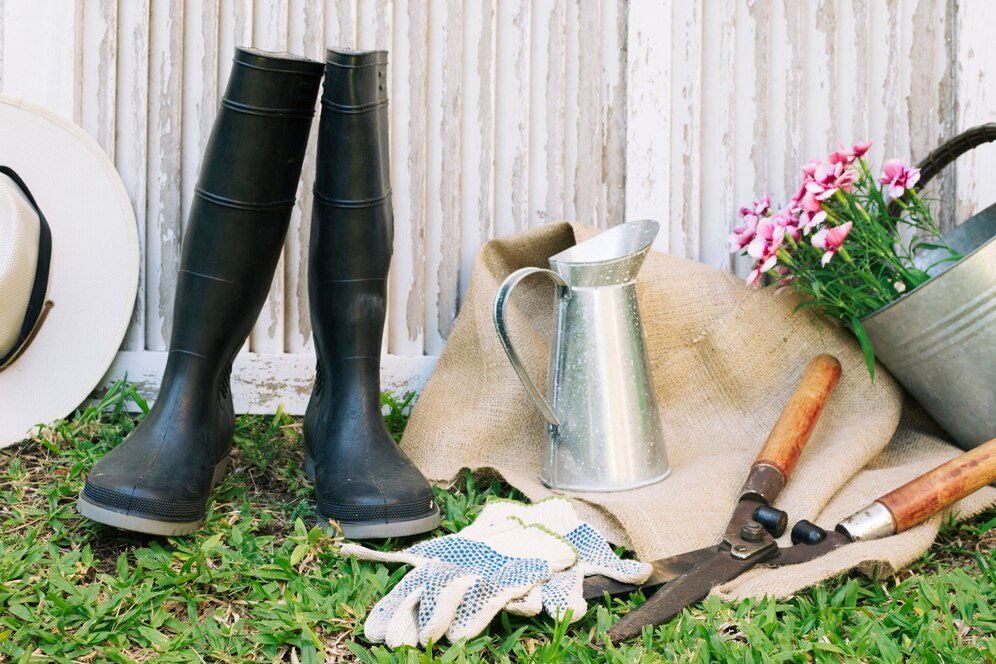
Now that you have an idea of where you wish to place your urban garden, you must gather the right tools. Each of the main tasks that you will perform in your garden - cutting, digging, cultivating, watering and carrying - have different tools that make your gardening life easier.Which tools do you need? It depends on what you plan on planting in the garden, although it is always good to have options.
For instance
If you choose to install garden boxes for a vegetable garden, you will require a hoe.
If you are planting bulbs for βlowers, you will require a trowel.
You do not have to buy every tool in the garden shop, but the following items might be helpful:
Digging Tools
There are a number of digging tools on the market that you should consider for your urban garden.
Trowel
A trowel is a type of small shovel that is used to dig out weeds and make small holes in the soil, for bulbs or small plants. Trowels are one of the tools that gardeners use the most, therefore, you want to ensure that you are buying a high-quality tool. Look for one with a stainless steel blade and a comfortable handle.
Garden shovel/spade
A spade is another digging tool to add to your urban garden collection. Again, look for a spade that is made of stainless steel and has a strong wooden handle. Poorly made handles will break very easily, even in a small garden.
Large shovel
When you dig holes for large plants, trees or shrubs, you require a larger tool. Large shovels typically have a rounded edge, with a sharp point at the tip.
Cutting Tools
There are also a number of cutting tools to collect for your garden. These tools help to keep plants well-trimmed and pruned, which ultimately improves the quality of your garden. Bear in mind that all of these tools should be oiled regularly, to prevent them from rusting, and sharpened when necessary.
Hand pruners/clippers
It is always a good idea to have hand pruners or clippers available. These tools are perfect for removing seed pods, trimming off dead flower and leaves, cutting back stems or removing small branches.
There are two main types of clippers: scissor/bypass models and anvil models:
Scissor models are those whereby two blades bypass each other, as the clippers are used.
Anvil models have one stationary blade and one movable blade.
Where possible, choose a scissor/bypass model because anvil models tend to adversely affect the stems of your plants.
Loppers
A lopper is a cutting tool that cuts branches that are less than an inch in diameter but too large for a pruner to cut. It has a long handle and two blades and is operated by using both hands.
Pruning saw
If you have branches that are too thick for a lopper, a pruning saw is ideal. With a bit of effort and patience, these tools are generally able to get through thick tree limbs.
Watering Tools
Watering your plants is essential, and there are a few different types of watering tools that you should have on hand.
Watering hose
A watering hose is ideal for larger urban gardens, and you might consider more than one, if you have a large space. There are many different types of watering hoses on the market, including expandable hoses, which help to save space. When choosing a hose, ensure that you have the right connectors, including tap adapters and nozzles. Also, bear in mind that hoses come in varying sizes, so ensure that you choose one that is long enough.
Hose reels
To keep your hoses tidy, you might also consider a hose reel. Some hose reels are installed on a wall, but others are portable, on a movable cart or trolley.
Spray gun
A spray gun is a device that attaches to a hose and helps you direct the water to a specific area. These guns can be very simple or come with a variety of sprays, so look at the different options available, before you buy.
Watering can
For small urban gardens, a watering can might be the only watering tool that you need. You can bill the watering can from the tap, and then carry the watering can to the plants that require water.
Rain gauge
A rain gauge is a convenient tool that allows you to measure how much rain has fallen in a particular area. This allows you to look at how much rain water your plants have got and then water them accordingly. You have to be careful about over-watering, when working with any type of garden.
Carrying Tools
There are also a variety of carrying tools that you should have for your urban garden. The basics include:
Picking bag
A picking bag is worn on the body - you can pick produce directly off the plant and put it in the bag. This allows you to hold a lot more than you could in your hands or arms. A wheelbarrow is convenient, when placing mulch, spreading compost or even during the initial spread of top soil.
Activity 2
Estimated time: 10 - 15 minutes
Take an inventory of any gardening tools that you already have, and then make a list of the tools that you might need.
We have given you a full list of all the tools that you might need for a garden; however, do not go out and buy your tools just yet.
Keep the list near you, and, as you move through the next module in which we will discuss different plants, you will have a better idea of what you should buy.
1.6 Other Gardening Supplies
In addition to digging and cutting tools, you also require the following gardening supplies:
Gardening gloves
When gardening, protecting your hands is important, so you should get a good pair of gardening gloves. There are a few different types of gardening gloves on the market, including leather, cotton, disposable, rubber and elastane.
Glove types:
Leather gloves are large and bulky and might not βit you as well as you might like. However, they offer excellent protection, when dealing with thorny plants, such as roses. Cotton gloves are inexpensive and lightweight. They keep your hands cool, dry and clean. However, cotton gloves do not protect against sharp objects, they easily get wet, and chemicals easily seep into them.
Disposable gloves are great when no other gloves are available, but they are not the best option for someone who is serious about urban gardening. However, keeping a box of disposable gloves is a good idea, as they keep your hands clean, if you have to do a quick gardening job.
Rubber gardening gloves are excellent at keeping your hands clean, but they do not allow the skin to breathe, so expect sweating. These are the best choice for working in damp soil. Elastane gloves are similar to cotton gloves, but half of the glove is covered in a stretchy, rubbery, waterproof material. These are excellent for those people who are seeking out a flexible glove that can be used in any garden condition.
Fertiliser
Fertilisers help plants grow, but, if you have high quality soil, you might not even need a fertiliser. There are two main types of fertiliser: inorganic, which is man-made, and organic, which comes from plants or animals.
Types of fertiliser:
Inorganic fertilisers are synthetic.
They are usually faster-acting and more concentrated than organic fertilisers. Some inorganic fertilisers include Miracle Gro, Growmore,
Sulphate of Ammonia, Phostrogen and Sulphate of Potash.
Organic fertilisers are derived from animals or plants, and they are slower acting than inorganic fertilisers.
Examples of common organic fertilisers include fish bone, seaweed, poultry manure, hooves or horns, nettle feeds and liquid comfrey. Compound fertilisers contain a mixture of nutrients and might be organic or inorganic. Generally speaking, these fertilisers are created with a particular plant type in mind. Straight fertilisers only contain one nutrient, and most gardeners use them to provide a certain nutrient, when necessary.
For instance, a plant might require magnesium fertiliser, if the leaves are beginning to turn yellow. Controlled release fertilisers are those that are coated with a material, such as synthetic resin. When water enters into a fertiliser granule, the fertiliser leaches out into the soil. Slow release fertilisers are those that degrade slowly. These fertilisers are dependent on the temperature of the soil and are often made of organic materials.
FACT
Applying 1 kg of nitrogen as fertiliser can result in 22 extra kilos of cereal grain when compared to crops that are not fertilised. Though you likely won't grow cereal grains, you can see the difference that using fertiliser can make.
Source: Yara.co.uk
Plant Markers
When you first plant your garden, it might be difficult to know which plants are which. Young plants are often similar looking, and, if you plant seeds, you will not see anything at all, except for disturbed soil. Therefore, it is important to choose plant markers, in order to keep track of what you have planted.
There are commercial plant markers available, or, if you are feeling creative, you can make your own. Just ensure that the name of the plant is on the marker, before putting it into the ground.
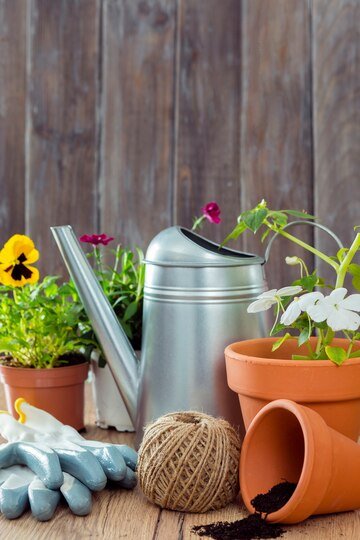
Containers
If you are new to the world of urban gardening, you will probably be surprised by the vast number of containers that are on the market. Even if you use raised garden beds, a trellis or any other type of garden, you will require a container at some point. Materials from which garden containers are made range from wood, fibreglass and pottery to plastic, polyethylene and resin. The best material is based on your own personal preferences and your budget.
The most important aspect is that the container must have drainage holes. Without these holes, the plants will die. If your chosen container does not have holes in the bottom, you can drill a few in, before filling the container with soil. When considering the size of the containers that you require, it is important that you take into consideration the size of the plant, as it grows.
For instance
If you plant a large beefsteak tomato plant, it βits well inside a small container, when first planted. However, the fruit of this plant is large and heavy, so a small container cannot accommodate its size and weight.
Other plants that should be planted in deep, large pots include:
Turnips
Beets
Parsnips
Carrots
Swiss chard
Cabbages
Broccoli
Smaller pots accommodate herbs, including basil and parsley, but ensure that you keep the herbs well-trimmed, so that the plants remain manageable.
Other plants to put into smaller containers include:
Radishes
Scallions
Salad greens
Shallots
Chilli peppers
If you find that you choose a container that is too small for your chosen plant, you can always repot the plant, when it outgrows the container. Repotting instructions are found in a later module.
Potting Soil
You also need potting soil, before planting any type of urban garden. Potting soil is available at any local garden store and at many retail stores that sell gardening supplies.
Potting soil is important because it does three main things:
1.It holds in moisture and nutrients around the root of the plant.
2.It allows for air βlow, which helps to eliminate rot.
3.It supports the plant and gives the roots a place to anchor the plant.
When looking for potting soil, there are a couple of rules to bear in mind. Firstly, generally speaking, the potting soil that you choose should be fluffy and light. It should have ingredients, such as pine bark or peat moss, and some might have fertiliser. If you choose a potting soil with fertiliser, ensure that you do not add too much additional fertiliser, as it can overwhelm the plants.
Also, do not add too much additional fertiliser, if the potting soil has any type of moisture retaining properties. If you do so, you might have to alter the watering schedule that you use. Potting soil comprises three basic parts: pine bark, peat (or an alternative) and either vermiculite or perlite, which provides space for air to get through. We will go into further detail in regards to what to look for in the chemical makeup of soil in a later module. For now, simply remember that the soil comprises these three parts.
Vermiculite or perlite are part of potting soil. Both are volcanic materials and help to lighten up the potting soil mix, ensuring that it is not too heavy or dense. Vermiculite holds a lot of moisture, and it can also hold on to fertiliser. Perlite does not add any nutritional beneβit, and it might also collect chemicals, such as fluoride, if the water you use contains chemicals. If too many chemicals are collected by the perlite, it can burn the leaves; however, this is not usually an issue, when it comes to the case of outdoor plants.
You will also find that some potting soil mixes contain small pieces of polystyrene, but you might notice that, over time, the pieces rise up to the top of the pot and then blow away in the wind. There is a difference between the quality and the weight of potting soil. If you pick up a potting soil pack and it is heavy, it means that the soil is wet or that it has a lot of sand. In either case, this is not good.
If the soil is wet, it can start to break down, become compacted and could carry disease, such as root rot. Some manufacturers add sand to potting soil, as 'βiller,' which might make it more affordable. However, unless you are growing some speciβic plants, adding sand is not usually a good idea. The only time that sand might be a good addition to potting soil is if you live in an area that has a lot of wind. In this case, the sand can help to add weight and hold the plants in the container.
Activity 3
Estimated time: 10 - 15 minutes
Consider spending some time in a local garden store and browsing the different potting soil choices.
Read the labels, and take note of the ingredients. When you get home, do some research about what potting soil is best for the plants that you plan on putting in your urban garden.
Can you get away with buying only one type of soil or compost, or do you have to buy more than one type? This is important to know, before you start planting.
Module Summary
This module introduced you to the world of urban gardening.We gave you a brief history of the urban garden and then gave you information about the different types of urban gardens that people often create. Of course, this is dependent on the space that you have available. This module also informed you how to determine how much light your chosen urban garden location has and how you can use that information, to choose plants that can thrive in those light conditions.
The rest of the module focused on the supplies and tools that you will need, in order to get started on your urban garden. Bear in mind that these are only the basics, and there could certainly be other tools that you may require, depending on your available space and which plants you choose for your garden. Bear all of this information in mind, as the next module refers to this information, as we continue to delve into urban gardening.
.svg)