
Module 7- Basic Masonry Repairs: A Comprehensive Guide
Masonry repair is an essential skill for maintaining the structural integrity and appearance of brick and stone structures. Over time, all masonry is subject to deterioration from weather exposure, settling, and material fatigue, making periodic repairs necessary to prevent more extensive damage. Proper repair techniques can significantly extend a building's lifespan while preserving its aesthetic value.
Common Types of Masonry Damage
Understanding the various forms of masonry deterioration is crucial for effective repairs:
Mortar Joint Deterioration: The most frequent issue, where mortar crumbles or erodes due to weathering, freeze-thaw cycles, or poor original workmanship. This typically appears as cracked, powdery, or missing mortar between bricks or stones.
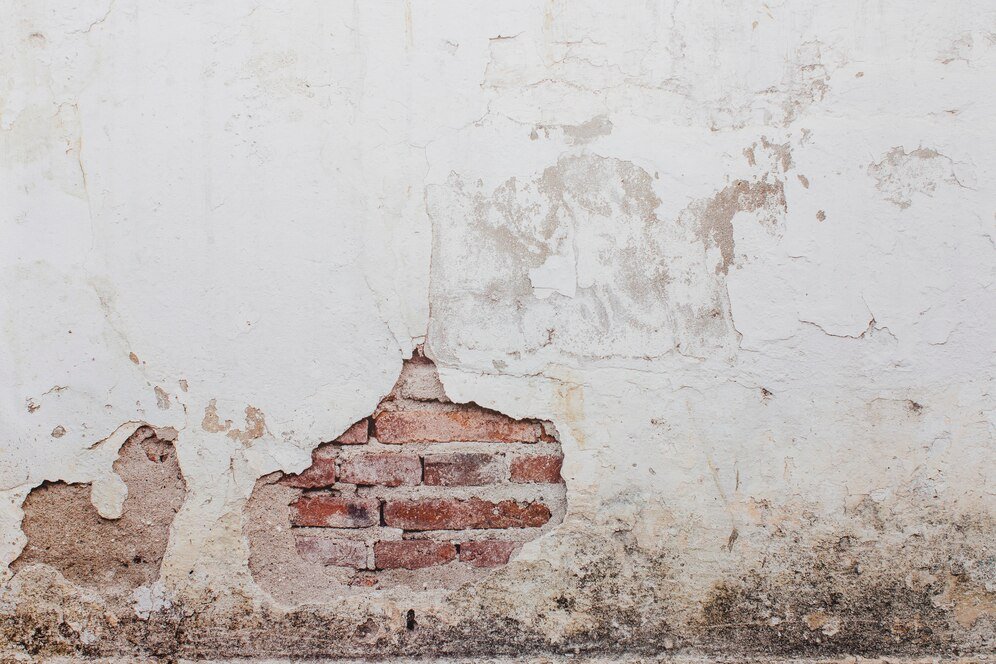
Spalling: Occurs when the face of bricks or stones flakes off due to water penetration and subsequent freezing. This is particularly common in older, softer bricks or improperly fired units.
Cracks: Can appear in mortar joints or through masonry units themselves, caused by foundation settling, thermal expansion, or structural stress. Hairline cracks may be cosmetic, while larger cracks often indicate serious structural issues.
Efflorescence: A white, powdery salt deposit on the surface caused by water moving through the masonry and evaporating, leaving salt crystals behind. While primarily cosmetic, it indicates moisture problems.
Bulging or Leaning Walls: Serious structural issues often requiring professional intervention, caused by foundation problems, wall tie failure (in cavity walls), or lateral pressure.
Essential Repair Techniques
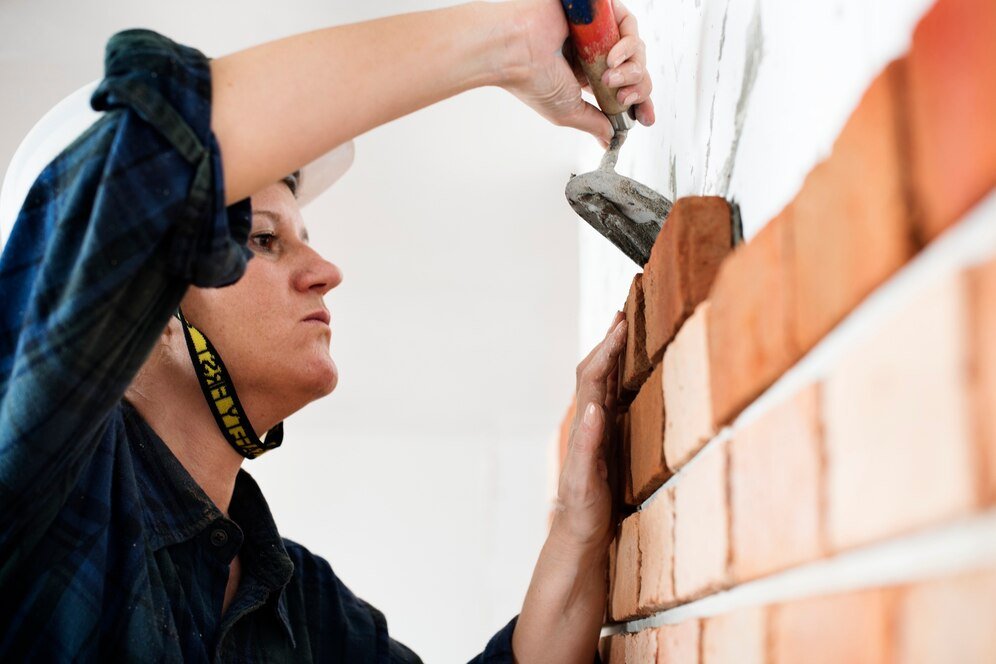
Repointing (Tuckpointing):
The process of removing deteriorated mortar and replacing it with new mortar
Proper technique involves raking out joints to a minimum depth of 20mm (about twice the joint width)
Mortar should match the original in composition, color, and texture for both structural and aesthetic reasons
Special care must be taken with historic buildings to use appropriate lime-based mortars
Brick Replacement:
Damaged bricks must be carefully removed without disturbing surrounding units
Matching replacement bricks should be sourced for color, size, and texture
The new brick is "buttered" with mortar on all sides before insertion
Final pointing should blend seamlessly with existing work
Crack Repair:
Small cracks can often be filled with mortar or specialized masonry caulk
Larger structural cracks may require stitching with helical bars or complete rebuilding
It's essential to address the underlying cause of cracking before repair
Cleaning and Surface Repair:
Gentle cleaning methods (low-pressure water, soft brushes) remove dirt and biological growth
Spalled areas can sometimes be patched with specialized masonry repair compounds
Severe spalling requires brick replacement
Materials and Tools for Basic Repairs

The right materials are crucial for successful, lasting repairs:
Mortar Selection: Must match the original's composition (lime content is particularly important for older buildings)
Replacement Units: Should match existing masonry in size, color, and absorption characteristics
Essential Tools:
Mason's chisels and raking tools for joint preparation
Pointing trowels and jointers for mortar application
Brick hammers and bolster chisels for unit removal
Brushes for cleaning and finishing
Step-by-Step Repair Process
Assessment: Thoroughly examine the damaged area to determine the extent and cause of deterioration
Preparation: Remove loose material and clean the area; protect adjacent surfaces
Mortar Mixing: Prepare small batches of mortar matching the original in composition and color
Application: Dampen the repair area (to prevent rapid moisture loss from new mortar) and apply repair materials
Finishing: Tool joints to match existing work; clean excess mortar
Curing: Protect repairs from rapid drying and weather extremes during the curing period
Preventative Maintenance
Regular maintenance can prevent many common masonry problems:
Annual inspections to catch early signs of deterioration
Proper drainage to prevent water pooling near masonry
Vegetation control to prevent root damage and moisture retention
Timely repointing before serious deterioration occurs
Appropriate cleaning methods that don't damage the masonry
When to Call a Professional
While many basic repairs can be DIY projects, professional help is needed for:
Structural movement or significant cracking
Extensive repointing on historic buildings
High or hard-to-reach areas
When the cause of damage isn't clear
Specialized restoration work requiring matching historic materials
Conclusion
Basic masonry repairs are a vital part of building maintenance that, when performed correctly, can preserve structures for generations. The key to successful repairs lies in understanding the materials, using proper techniques, and addressing the underlying causes of deterioration. Whether working on a historic home or modern structure, careful attention to detail in matching existing work ensures both structural integrity and visual continuity. Regular maintenance and timely repairs not only enhance a building's appearance but also prevent minor issues from developing into major, costly problems. For masonry professionals and conscientious homeowners alike, mastering these basic repair techniques is an invaluable skill in preserving our built environment.
.svg)