
19.1 Getting Started
Microsoft PowerPoint is one of the most popular presentation software applications, and with good reason too.
Why is it important to be familiar with using PowerPoint and what are the associated benefits? What are the innovative features of the recent PowerPoint versions?
1. Creating professional presentations is no longer the prerogative of qualified computer professionals alone. The layman is able to use the features of PowerPoint and manipulate colour, shapes and text to create excellent presentations. New features like the 'eyedropper' allow users to select the colour combination that the cursor is pointing at. It will also store the RGB colour combination for later use. In addition, recent versions of PowerPoint come with improved charts, designs and layouts that can be effectively used to create better presentations.
2. In the latest version of PowerPoint, PowerPoint 13, you can search and insert videos as well as images directly into your slide quicker than before. Earlier, resizing and formatting images to fit into slides used to be a time-consuming task. This is no longer so; you can use the new feature called 'smart guides' that consists of little red arrows that help you position objects in the slide by adjusting distances and alignment.
3. Improved control during presentations: The 'presenter view' feature offers users enhanced control during presentations. You are able to navigate movement between slides more easily and quickly compared to earlier versions of PowerPoint. Moreover, if you use a tablet that allows the usage of digital ink, you can even take notes directly onto slides. You can also use your fingers to zoom in and out of slides.
4. Improved audience outreach: The new PowerPoint 2013 allows presenters to use the new feature called 'presenter online'. This allows participants to view the presentation in their browsers online as well as to download the presentation (earlier versions had the 'broadcasting' feature which allowed only viewing).
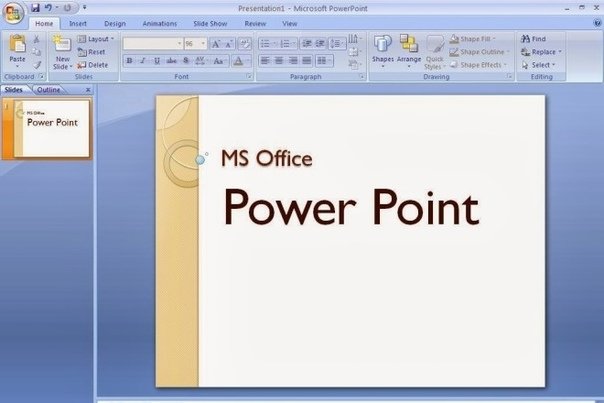
Start by choosing between a bland presentation and a template. When you start a new PowerPoint file it will give you the option of either a blank presentation or ready-made template. A blank presentation will let you create your own preferred styles. This is good if you have the time to do so; a template can give you a uniform style that saves time, but may not offer the same level of customisability.
You can edit aspects of your template, so choose something that suits what you want. One can also apply themes to projects at a later time, once you have added content. Click on the 'design' tab and select your theme. This selected theme will then be applied to the project, to undo it simply press CTRL + Z or optionally choose a blank theme if you wish to restart again.
You are able to access templates from 'File' tab. Click 'New' and then browse all templates that are available. You can also download additional templates from online sources.
19.2 Creating Title Slides
A title is the point in a presentation where you first connect to your audience.
This should be easy to read and will give a brief overview of your topic and presentation. Some presenters will include the name or group name in or near the title.
Add new slides for content. Press CTRL and M to start a new slide. One blank slide will be added after the slide you are currently on. The slide will contain a title and text box. One can use them to insert objects onto the slide using the Insert tab.
Since titles may remain on display throughout the presentation, they often work as billboards for your company.
Some important information that your title should contain includes: The title and subtitle (optional), your name, contact details of your organisation and the company logo.
When you add text to a box, simply click and drag to make whatever size one would like. Then adjust later by grabbing one corner with the cursor, then click and drag it again. It is possible to click on any text box and type to begin adding text to a presentation. Format text in the same way you would with Microsoft Word, formatting options are available in the Home tab.
How to Navigate Presentations
Use the frame on the left-hand side window to scroll through slides. Click any of them and it will open the slide so it can be edited. Click the outline tab to see a basic outline of your current presentation. Each slide is labelled by the title.
Navigating Presentations
Previewing your Presentation
One can get a basic feel quite quickly for your presentation by pressing F5 to begin a slide show. Click the mouse to advance slides, then use the preview slide show to find out how long the presentation is, how well your information flows, etc.
Previewing a Presentation
Adding Transition Between Slides
Once you have content in your slides, you can start adding effects to help make your presentation more attractive for the audience. Select any slide then click the Transitions tab. You will then see a list of common transitions, click the arrow at the end of the list to open a full list of available transitions.
When one picks a transition, the choice may affect how the slide appears in the presentation. For example, if you add a transition to Slide 2, it will affect how Slide 1 will transition into Slide 2. You are able to see previews in the slide editing window when you click each transition.
It is advisable not to use excessive transitioning between slides as it may prove confusing for the audience to follow.
Transitioning Between Slides
Adding Backgrounds
A plain white background is always going to look uninspired; if the presentation is on a plain background, then they will not be fully absorbed by your work. By using simple subtle backgrounds, you can add a level of innovation to each project that you create. Creative and well-designed presentations stand out in audience memory.
Right-click on a blank portion of the slide and select Format Background, or you can click Design tab - click the arrow icon next to the Background setting.
One can choose a solid colour, gradient fill, picture background or pattern fill. Selecting each one will give you a display of several options like picture location, colour, gradient settings, etc. Experiment with them until you have found the background that fits the needs of your desire.
As default, background will only be applied to the slide you are currently on. You must click 'Apply to All' for the background to apply to every slide in the presentation. Make sure your text is readable and compatible with the chosen background.
Adding a Background
Adding Images
Add pictures, diagrams or other visual material to help your audience grasp what it is you are trying to convey. Images break up the text and give the reader a little variety when they are paying attention to your presentation.
Click the Insert tab to reveal a large number of options that can help you insert objects. Click the 'PICTURE' button and insert a picture file from your computer. It is also possible to click Photo Album to add an entire album's worth of photos into your slide presentation.
Use your Charts button to insert easy-to-read charts that can help the audience understand your text and data. Once you have chosen the chart type, Excel will open and let you enter data or copy from a spreadsheet. You can use the shapes button to insert pre-made shapes or create your own. These shapes can outline important text or create arrows or other visual indicators.
The audience should not feel distracted from your main message by an overdose of designs and colours. The text and content should be clear and readable.
Adding Images
19.3 Design Tips to Create Stunning Presentations in PowerPoint

1. Try to avoid using the standard, stock templates that come with the PowerPoint software. A different and innovative design template is the best starting point for a good presentation.
3. Share only one idea per slide. The presentation must act as an effective aid to your ideas and suggestions. Avoid inserting too many bullet points into one slide. Sharing one idea per slide helps develop the idea and explain its importance to the audience.
4.Choose your font type based on legibility and clarity rather than appearance alone. It's best to stick to a simple, traditional typeface so that your audience is able to read the content easily. Use strong contrast between the background and text colour to improve clarity. For example, if you are using a light background, choose a dark colour for the fonts so that the text stands out. Keep font sizes standard instead of making them too big or too small.
5. Use a single colour to highlight important words and phrases in your presentation. Avoid using more than 5 colours in one slide. A harmonious palette of colours can help enhance your presentation and draw the reader's eyes to important content.
6. Speakers load a new slide and wait for it to come on before they explain it. This pattern can prove extremely boring for the audience if continued throughout the presentation. To engage the audience with a more contiguous flow,change slides even when you are in mid-sentence. Keep changing slides to keep the pace going; you should only ensure that each slide should not contain too much information.
7. You can also try using a little light music to accompany your slides. Just click on INSERT->AUDIO->AUDIO-in-my-PC and then select the music file that you want. Keep the music soft and unobtrusive.
Activity 1 - Practise Creating Title Slides in Microsoft PowerPoint
Estimated time: 10-15 minutes
You just learned about some of the features in Microsoft PowerPoint, which is another program within Microsoft Office. You learned how to utilise the program to create professional presentations, which could include text and slide screens.
Take some time to review what you have learned, then locate a version of PowerPoint for practice. Next, open a new presentation and try creating title slides. How do you create a new title slide? Are there any tips or formatting tricks you should consider when adding text to your slides?
19.4 Adding Links
You can add links to slides so people can access email addresses or slides quickly

This is always useful if you are distributing a presentation or want people to easily view pages that you have used for reference. To add links, all you need to do is place the cursor in the text box and click 'hyperlink' button on the Insert tab. Choose to link a file on your computer, web address or email. You can even refer to a different slide in the same presentation.
To embed a video - You can do this when you are inserting reports or video files that relate to your presentation. Video files will automatically play when the slide appears. Simply click the video button on the Insert tab, browse your computer video files and select the one you need.
19.5 A Note on Font Size
Using small fonts will make it hard to read, so opt for a larger size that doesn't entail flamboyant symbols.
Be consistent and subtle while maintaining legibility and clarity. Using minimal colour or stylistic accent to make your slide show stand out will avoid looking too garish. Use a template as a guide if you are not sure what to do.
Always proofread your work and check for grammatical errors. Other people will notice your mistakes much sooner than you do and glaring omissions could lower your credibility. Request a colleague to proofread your work before you actually present it to your audience. Timing, talking points and accurate statistics or data will back up your points that you are trying to put out there. Don't read off the slides as you are presenting them to the audience as this is a redundant exercise - the text is already in front of them to read. Your talk should give them something extra that is not on the slide.
19.6 Properly Align all Objects

Properly align objects in your slides so that they appear harmonious.
You can try to do this manually, but that can prove challenging. You need everything to be in the middle of the slide.
Tips to align multiple objects:
. Select objects by holding down Shift and click on all.
. Then select Arrange in the options bar and choose Align or Distribute.
. Then all you have to do is choose the alignment you prefer.
Activity 2 - Enhancing your PowerPoint Slides
Estimated time: 10-15 minutes
In the previous activity, you learned how to create new title slides within PowerPoint. Hopefully, you practised working with some of the formatting tricks that are built within Microsoft PowerPoint and learned the ways in which you can make a professional presentation.
In this next activity, you will continue your practice with PowerPoint but will focus on adding features to your presentations. On your computer, open PowerPoint once again. You should have a saved slide, which you can use again for this project. Now, practise adding images and some of the other design tips you have learned in this module. How did you go about doing this?
19.7 Formatting the Quick Access Tool Bar
You can use the Quick Access Toolbar to unlock features that are used the most.
Including ones that are usually hard to find. There are a handful of features that we have mentioned that you can use to build better content in PowerPoint. This will result in quicker creation of aesthetic and informative presentations.
Alignment, Distribution, Font, Shape and Other are some of the most vital to use.
Format the Quick Access Toolbar with useful, but hidden, features.
The quick access toolbar is a place to put your most frequently used features (and features that are buried in the menus). There are a handful of features that I think are essential to building better content in PowerPoint. You might not even know that some of these features exist. So why not pull them front and centre for easy access?
19.8 Trouble with Fonts and Commands?
There could be one plain and simple reason.
You may be experiencing incompatibility between different versions of PowerPoint. This could be at the root cause of problems associated with fonts and commands.
Use the inbuilt compatibility checker to see where you stand. PowerPoint 2013, 2010 and 2007 all use the same types of files. They use the same media plug-ins and generally won't have too many issues between them. Microsoft website has an FAQ section for all other error messages to help you troubleshoot.
Font size is a commonly experienced problem in preparing slides. This could occur if you are trying to use a Mac and PC. You can easily fix this by making text boxes large enough to accommodate any change in size of font.
.svg)