
2.1 Introduction
So far, we have focused on typing theory, now we delve into crucial practice. It goes without saying that the more practice you put into something the better you will be. Each of the exercises in this module will gradually build your typing aptitude and crucially rewire your brain to connect information about the physical location of keys and the desire to type a certain letter.
Feel free to repeat exercises and even make up your own, the more foundational practice you put in the better you will be at touch typing and the faster you will improve. In addition to learning new information about the location of the keys these exercises are vital to unlearning old habits; you need to undo the hunt and peck skills to build new associations in your brain.
2.2 The Basic Setup

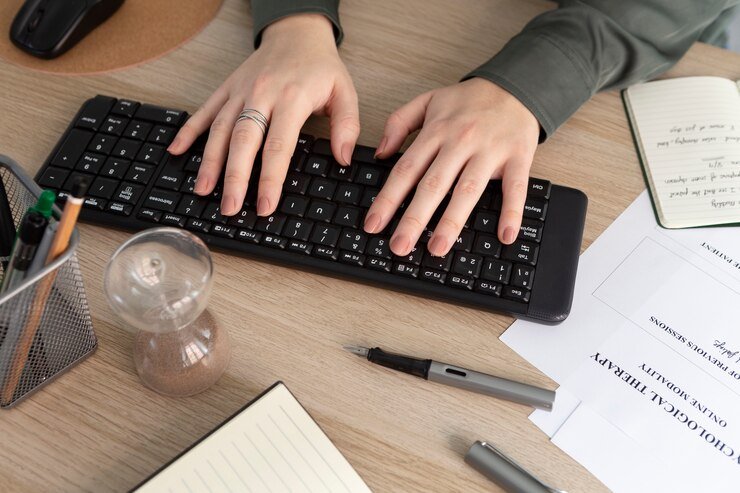
Before you even begin typing, you need to make sure you have the correct posture for working at the keyboard.
Sit Comfortably
Sit in a chair with your feet flat on the ground, your pelvis tilted diagonally forwards, your back straight, and your hips pushed to the back of the chair. Your knees should be equal to your hips, you may need a footrest
Posture
Push your tailbone out behind you (as if poking your backside out), this helps your body find a comfortable posture as it lengthens your spine and opens your shoulder blades. If you find it difficult to sit up straight without a backrest, use cushions to support your back to stay as straight as comfortably possible.
Place Hands Correctly
Sit close to your desk with your elbows relaxed and your forearms, wrists and hands horizontally straight. You may find it more comfortable to use your keyboards feet to adjust its angle from your body. Do not use wrist rests as these can increase the risk of repetitive strain injuries, instead your wrists and hands should float just above your keyboard.
Place Computer Screen Correctly
Your computer monitor should be tilted slightly upward, with the top of the screen in alignment with your eyes. You should not have to strain your neck to look at the screen.
Movement
In order to keep the oxygen and blood flowing round your body it is important to take regular breaks from your computer, at least every hour. It is easy to get sucked into the computer, so remember to get up, stretch, go for a walk or have something to eat. Be sure to move your fingers, wrists and hands to keep them happy.
Fact
Repetitive Strain Injuries cost UK industry up to £20 billion annually through lost productivity.
Source: repetitivestraininjury.org.uk
2.3 Key Drills

The following exercises will help you develop familiarity with your keyboard by building muscle memory. With practice they will build up your automatic awareness of keys positions. Look at your keyboard now and locate the home row (but only look at the beginning of eachexercise). You may notice that your F and J keys have bumps on them. This helps you locate the home row by feel alone when you are touch typing. Move your fingers to the key to be pressed then allow them to come back to rest 'floating' over the home row.
2.4 Exercise 1: The Home Row
The home row (beginning with A,S,D,F) is the foundation of touch typing. Always start with your fingers on the home row and return them there when not typing. Look at your keyboard now and locate the home row (but only look at the beginning of each exercise). See the bumps on the F and J keys to help you find the row without looking - touch them now! The keys will be distributed to different fingers on each hand.
For the first exercise we will focus on the left hand.Place the fingers of your left hand with your index finger over the F key, your middle finger on the D key, your ring finger on the S key, your little-finger on A, and your thumb on the spacebar. Now open a separate word or text document and copy out the following series of letters, using only the fingers assigned to each key.
Keep your eyes focused on the screen, not on the keyboard. Move your fingers back to hover over or lightly touch the home row after pressing each key in the drill
1A) The Left Hand: The F & D keys
Use only your left hand's middle and index fingers for the D and F keys, respectively.
f ff fff ffff fffff d dd ddd dddd ddddd f d ff dd fff ddd ffff dddd fffff ddddd
d f d f df fd df fd dfd fdf dfd fdf dfdf fdfd dfdf fdfd dfdfd fdfdf dfdfd fdfdf
dddf fffd dddf fffd ddff ffdd ddff ffdd ffddff ddffdd ffddff ddffdd
ddfdff ffdfdd ddfdff ffdfdd dfdfdf fdfdfd dfdfdf fdfdfd dfdfdfdfdf fdfdfdfdfd
ddfdff ffdfdd ddfdff ffdfdd dfdfdf fdfdfd dfdfdf fdfdfd dfdfdfdfdf fdfdfdfdfd
1B) The Left Hand: The A & S keys
Use only your left hand's little and ring finger for the A and S keys.
a aa aaa aaaa aaaaa s ss sss ssss sssss a s aa ss aaa sss aaaa ssss aaaaa sssss
a s a s as sa as sa asa sas asa sas asas sasa asas sasa asasa sasas asasa sasas
aaas sssa aaas sssa aass ssaa aass aassaa ssaass aassaa ssaass
aasass ssasaa aasass ssasaa asasas sasasa asasas sasasa asasasasas sasasasasa
aasass ssasaa aasass ssasaa asasas sasasa asasas sasasa asasasasas sasasasasa
1C) The Left Hand: The A, S, D & F Keys Together
For this exercise you will use all of your left hand's fingers: the index finger for F, the middle finger for D, the ring finger for S and the little finger for A.
a s d f aa ss dd ff aaa sss ddd fff aaaa ssss dddd ffff aaaaa sssss ddddd fffff
aaa sss ddd fff aaa sss ddd fff aaa sss ddd fff aaa sss ddd fff aaa sss ddd fff
asdf fdsa asdf fdsa asdf fdsa asdf fdsa asdf fdsa asdf fdsa asdf fdsa asdf fdsa
asadfd fdfsas asadfd fdfsas asadfd fdfsas asadfd fdfsas asadfd fdfsas asadfd fdfsas
asasdfdfasasdfdf asasdfdfasasdfdf asasdfdfasasdfdf asasdfdfasasdfdf asasdfdfasasdfdf
1D) The Right Hand: The J & K Keys.
For this exercise you will use only your right hand's index and middle fingers for the J and K keys, respectively.
j jj jjj jjjj jjjjj k kk kkk kkkk kkkkk j k jj kk jjj kkk jjjj kkkk jjjjj kkkkk
j k j k jk kj jk kj jkj kjk jkj kjk jkjk kjkj jkjk kjkj jkjkj kjkjk jkjkj kjkjk
jjjk kkkj jjjk kkkj jjkk kkjj jjkk kkjj jjkkjj kkjjkk jjkkjj kkjjkk
jjkjkk kkjkjj jjkjkk kkjkjj jkjkjk kjkjkj jkjkjk kjkjkj jkjkjkjk kjkjkjkj jkjkjkjkjk kjkjkjkjkj
jjkjkk kkjkjj jjkjkk kkjkjj jkjkjk kjkjkj jkjkjk kjkjkj jkjkjkjk kjkjkjkj jkjkjkjkjk kjkjkjkjkj
1E) The Right Hand: The L & ; Keys
l ll lll llll lllll ; ;; ;;; ;;;; ;;;;; l ; ll ;; lll ;;; llll ;;;; lllll ;;;;;
l ; l ; l; ;l l; ;l l;l ;l; l;l l;l; ;l;l l;l; ;l;l l;l;l ;l;l; l;l;l; ;l;l;l l;l;l; ;l;l;l
lll; ;;;l lll; ;;;l ll;; ;;ll ll;;ll ;;ll;; ll;;ll ;;ll;; ll;l;; ;;l;ll ll;l;; ;;l;ll ll;l;;ll ;l;l;l l;l;l;
;l;l;l l;l;l; l;l;l;l; ;l;l;l;l l;l;l;l; ;l;l;l;l l;l;l;l;l; ;l;l;l;l l;l;l;l;l; ;l;l;l;l ll;l;; ;;l;ll ll;l;;
;;l;ll ll;l;;ll ;l;l;l l;l;l; ;l;l;l l;l;l; l;l;l;l; ;l;l;l;l l;l;l;l; ;l;l;l;l l;l;l;l;l; ;l;l;l;l l;l;l;l;l; ;l;l;l;l
1F) The Right Hand: The J, K, L & ; Keys Together
For this exercise you will use all of your right hand's fingers: the index finger for J, the middle finger for K, the ring finger for L and the little finger for ;
j k l ; jj kk ll ;; jjj kkk lll ;;; jjjj kkkk llll ;;;; jjjjj kkkkk lllll ;;;;;
jjj kkk lll ;;;; jjj kkk lll ;;; jjj kkk lll ;;;; jjj kkk lll ;;; jjj kkk lll ;;;; jjj kkk lll ;;;
jkl; ;lkj jkl; ;lkj jkl; ;lkj jkl; ;lkj jkl; ;lkj jkl; ;lkj jkl; ;lkj jkl; ;lkj jkl; ;lkj jkl; ;lkj
jkjl;l ;l;kjk jkjl;l ;l;kjk jkjl;l ;l;kjk jkjl;l ;l;kjk jkjl;l ;l;kjk jkjl;l ;l;kjk jkjl;l ;l;kjk
jkjkl;l;jkjkl;l; jkjkl;l;jkjkl;l; jkjkl;l;jkjkl;l; jkjkl;l;jkjkl;l; jkjkl;l;jkjkl;l; jkjkl;l;jkjkl;l;
1G) Both Hands: The G & H Keys
So far we have covered all of the home row keys apart from G and H. In this exercise, keep your fingers of both hands in the home row positions you have been practising and use your left index finger to reach the G key and your right index finger to reach the H keys.
g gg ggg gggg ggggg h hh hhh hhhh hhhh gg hh ggg hhh gggg hhhh ggggg hhhhh
g h g h gh hg gh hg ghg hgh ghg hgh ghgh hghg ghgh hghg ghghg hghgh
gggh hhhg gghh hhgg gghh hhgg gghhgg hhgghh gghghh hhghgg gghghh hhghgg gghghh hhghgg
gghghh hhghgg gghghh hhghgg
ghghghghgh hghghghghg ghghghghgh hghghghghg ghghghghgh hghghghghg
1H) Both Hands: The Entire Home Row
Now to add all of the practice so far together. Keep each of the fingers of both hands in their proper places.
To recap:
The left hand's fingers are as follows: the index finger is used for both the F and G keys, the middle finger for the D key, the ring finger for the S key, and the little finger for the A key. The right hand's fingers are as follows: the index finger is used for both the H and J keys, the middle finger for the K key, the ring finger for the L key, and the little finger for the ; key.
asdfghjkl; ;lkjhgfdsa asdfghjkl; ;lkjhgfdsa asdfghjkl; ;lkjhgfdsa asdfghjkl; ;lkjhgfdsa
aassddffgghhjjkkll;; aassddffgghhjjkkll;; aassddffgghhjjkkll;; aassddffgghhjjkkll;;
aaa sss ddd fff ggg hhh jjj kkk lll ;;; ;;; lll kkk jjj hhh ggg fff ddd sss aaa
aa as ad af ag sa ss sd sf sg da ds dd df dg fa fs fd ff fg ga gs gd gf gg
hh hj hk hl h; jh jj jk jl j; kh kj kk kl l; lh lj lk ll l; ;h ;j ;k ;l ;;
a; sl dk fj gh a;sldkfjgh ;alskdjfhg a;sldkfjgh ;alskdjfhg a;sldkfjgh ;alskdjfhg
as;ldfkjgh hgjfkdls;a as;ldfkjgh hgjfkdls;a as;ldfkjgh hgjfkdls;a as;ldfkjgh hgjfkdls;a
Home Row Conclusion
As you worked your way through the exercises you will have noticed it getting easier and quicker. Gradually your brain accepts the new information and wires up the relevant neurons. If you found it at all difficult and frustrating or you found yourself wanting to look that is ok. Simply rest for now, go to sleep (this is when your brain processes new information), and try the home row drills tomorrow.
2.5 Exercise 2: The Top Row
The top row (beginning with Q,W,E,R) will be easier for you to master after having practised the home row. As before, always start with your fingers on the home row and return them to this position when you finish typing on the top row. So, each time you press the key it is a movement - up, press, back - learning this movement is the key to mastering this row and these keys Remember to keep your eyes fixed to the screen when typing.
Exercise 2A) The Left Hand (The R & E Keys)
For this exercise you will use only your left hand's middle for the E key and index finger for the R key.
r rr rrr rrrr rrrrr e ee eee eeee eeeee r e rr ee rrr eee rrrr eeee rrrrr eeeee
e r e r er re er re ere rer ere rer erer rere erer rere erere rerer erere rerer
eeer rrre eeer rrre eerr rree eerr rree rreerr eerree rreerr eerree
eererr rreree eererr rreree ererer rerere ererer rerere ererererer rerererere
eererr rreree eererr rreree ererer rerere ererer rerere ererererer rerererere
Exercise 2B) The Left Hand (The W & Q Keys)
For this exercise you will use only your left hand's ring finger for the W key and your little finger for the Q key.
w ww www wwww wwwww q qq qqq qqqq qqqqq w q ww qq www qqq wwww qqqq wwwww qqqqq
q w q w qw wq qw wq qwq wqw qwq wqw qwqw wqwq qwqw wqwq qwqwq wqwqw qwqwq wqwqw
qqqw wwwq qqqw wwwq qqww wwqq qqww wwqq wwqqww qqwwqq wwqqww qqwwqq
qqwqww wwqwqq qqwqww wwqwqq qwqwqw wqwqwq qwqwqw wqwqwq qwqwqwqwqw
wqwqwqwqwq
qqwqww wwqwqq qqwqww wwqwqq qwqwqw wqwqwq qwqwqw wqwqwq qwqwqwqwqw
wqwqwqwqwq
Exercise 2C) The Left Hand: The R, E, W & Q Keys Together
For this exercise you will use all of your left hand's fingers: the index finger for R, the middle finger for E, the ring finger for W and the little finger for Q, and of course the thumb for space
q w e r qq ww ee rr qqq www eee rrr qqqq wwww eeee rrrr qqqqq wwwww eeeee rrrrr
qqq www eee rrr qqq www eee rrr qqq www eee rrr qqq www eee rrr qqq www eee rrr
qwer rewq qwer rewq qwer rewq qwer rewq qwer rewq qwer rewq qwer rewq qwer rewq
qwqere rerwqw qwqere rerwqw qwqere rerwqw qwqere rerwqw qwqere rerwqw qwqere rerwqw
qwqwer erqwqwerer qwqwererq wqwerer qwqwerer qwqwerer qwqwere rqwqwerer qwqwere
rqwqwerer
Exercise 2D) The Right Hand: The U & I Keys
For this exercise you will use only your right hand's index finger for the U key and the middle finger for the I key.
u uu uuu uuuu uuuuu i ii iii iiii iiiii u i uu ii uuu iii uuuu iiii uuuuu iiiii
u i u i ui iu ui iu uiu iui uiu iui uiui iuiu uiui iuiu uiuiu iuiui uiuiu iuiui
uuui iiiu uuui iiiu uuii iiuu uuii iiuu uuiiuu iiuuii uuiiuu iiuuii
uuiuii iiuiuu uuiuii iiuiuu uiuiui iuiuiu uiuiui iuiuiu uiuiuiui iuiuiuiu uiuiuiuiui iuiuiuiuiu
uuiuii iiuiuu uuiuii iiuiuu uiuiui iuiuiu uiuiui iuiuiu uiuiuiui iuiuiuiu uiuiuiuiui iuiuiuiuiu
Exercise 2E) The Right Hand: The O & P Keys
For this exercise you will use only your right hand's ring finger for the O key and the little finger for
the P key.
o oo ooo oooo ooooo p pp ppp pppp ppppp o p oo pp ooo ppp oooo pppp ooooo ppppp
o p o p op po op po opo pop opo opop popo opop popo opopo popop opopop popopo opopop popopo
ooop pppo ooop pppo oopp ppoo ooppoo ppoopp ooppoo ppoopp oopopp ppopoo oopopp ppopoo
oopoppoo popopo
opopop popopo opopop opopopop popopopo opopopop popopopo opopopo pop popopopo popo popop
popopopo
oopopp ppopoo oopopp ppopoo oopoppoo popopo opopop popopo opopop opopopop popopopo
opopopop popopopo
Exercise 2F) Both Hands: The T & Y Keys
Now you've covered all of the top row keys, only T and Y remain. In this exercise, use your left index finger to reach the T key and your right index finger to reach the Y key - remember to return them to the F and J (home keys on the home row) when they have pressed the correct key.
t tt ttt tttt ttttt y yy yyy yyyy yyyy tt yy ttt yyy tttt yyyy ttttt yyyyy
t y t y ty yt ty yt tyt yty tyt yty tyty ytyt tyty ytyt tytyt ytyty ttyy yytt
ttyytt yyttyy ttytyy yytytt ttytyy yytytt ttytyy yytytt ttytyy yytytt ttytyy yytytt
ttty yyyt ttyy yytt ttyy yytt ttyytt yyttyy ttytyy yytytt ttytyy yytytt ttytyy yytytt
ttytyy yytytt ttytyy yytytt tytytytyty ytytytytyt tytytytyty ytytytytyt tytytytyty ytytytytyt
Exercise 2G) Both Hands: The Entire Home Row
Now put it all together.
To recap:
The left hand's fingers are as follows: the index finger is used for both the T and R keys, the
middle finger for the E key, the ring finger for the W key, and the little finger for the Q
The right hand's fingers are as follows: the index finger is used for both the Y and U keys, the
middle finger for the I key, the ring finger for the O key, and the little finger for the P
qwer tyuiop poiuyt rewq qwertyuiop poiu ytrewq qwertyuiop poiuytrewq qwertyuiop poiuytrewq
qq wweerrtty yuuiioopp qqwwe errttyyuu iioopp qqwwe errttyyuui ioopp qqwweer rttyyu uiioopp
qqq www eee rrr ttt yyy uuu iii ooo ppp ppp ooo iii uuu yyy ttt rrr eee www qqq qq qw qe qr qt
wq ww we wr wt eq ew ee er et rq rw re rr rt tq tw te tr tt yy yu yi yo yp uy uu ui uo up iy iu ii io
op oy ou oi oo op py pu pi po pp
qp wo ei ru ty qpwoeiruty pqowieuryt qpwoeiruty pqowieuryt qpwoeiruty pqowieuryt
qwpoeriuty yturieowpq qwpoeriuty yturieowpq qwpoeriuty yturieowpq qwpoeriuty yturieowpq
2.6 Exercise 3: The Bottom Row
Now we move onto the bottom row, beginning with Z,X,C,V.
Start with your fingers on the home row like before. Keep your eyes on the screen as you type. By now you should be developing a good sense of where the keys are without looking.
Exercise 3A) The Left Hand (The V & C Keys)
For this exercise you will use only your left hand's middle finger for the C key and index finger for the V key.
v vv vvv vvvv vvvvv c cc ccc cccc ccccc v c vv cc vvv ccc vvvv cccc vvvvv ccccc
c v c v cv vc cv vc cvc vcv cvc vcv cvcv vcvc cvcv vcvc cvcvc vcvcv cvcvc vcvcv
cccv vvvc cccv vvvc ccvv vvcc ccvv vvcc vvccvv ccvvcc vvccvv ccvvcc
ccvcvv vvcvcc ccvcvv vvcvcc cvcvcv vcvcvc cvcvcv vcvcvc cvcvcvcvcv vcvcvcvcvc
ccvcvv vvcvcc ccvcvv vvcvcc cvcvcv vcvcvc cvcvcv vcvcvc cvcvcvcvcv vcvcvcvcvc
Exercise 3B) The Left Hand (The X & Z Keys)
For this exercise you will use only your left hand's ring finger for the X key and little finger for the Z key.
x xx xxx xxxx xxxxx z zz zzz zzzz zzzzz x z xx zz xxx zzz xxxx zzzz xxxxx zzzzz
z x z x zx xz zx xz zxz xzx zxz xzx zxzx xzxz zxzx xzxz zxzxz xzxzx zxzxz xzxzx
zzzx xxxz zzzx xxxz zzxx xxzz zzxx xxzz xxzzxx zzxxzz xxzzxx zzxxzz
zzxzxx xxzxzz zzxzxx xxzxzz zxzxzx xzxzxz zxzxzx xzxzxz zxzxzxzxzx xzxzxzxzxz
zzxzxx xxzxzz zzxzxx xxzxzz zxzxzx xzxzxz zxzxzx xzxzxz zxzxzxzxzx xzxzxzxzxz
Exercise 3C) The Left Hand: The V, C, X & Z Keys Together
For this exercise you will use all of your left hand's fingers: the index finger for V, the middle finger for C, the ring finger for X and the little finger for Z.
v c x z vv cc xx zz vvv ccc xxx zzz vvvv cccc xxxx zzzz vvvvv ccccc xxxxx zzzzz
vvv ccc xxx zzz vvv ccc xxx zzz vvv ccc xxx zzz vvv ccc xxx zzz vvv ccc xxx zzz
vcxz zxcv vcxz zxcv vcxz zxcv vcxz zxcv vcxz zxcv vcxz zxcv vcxz zxcv vcxz zxcv
vcvxzx zxzcvc vcvxzx zxzcvc vcvxzx zxzcvc vcvxzx zxzcvc vcvxzx zxzcvc vcvxzx zxzcvc
vcvcxzxzvcvcxzxz vcvcxzxzvcvcxzxz vcvcxzxzvcvcxzxz vcvcxzxzvcvcxzxz vcvcxzxzvcvcxzxz
Exercise 3D) The Right Hand (The M & , Keys)
For this exercise you will use only your right hand's index finger for the M key and middle finger for the , [comma]key.
m mm mmm mmmm mmmmm , ,, ,,, ,,,, ,,,,, m , mm ,, mmm ,,, mmmm ,,,, mmmmm ,,,,,
, m , m ,m m, ,m m, ,m, m,m ,m, m,m ,m,m m,m, ,m,m m,m, ,m,m, m,m,m ,m,m, m,m,m
,,,m mmm, ,,,m mmm, ,,mm mm,, ,,mm mm,, mm,,mm ,,mm,, mm,,mm ,,mm,,
,,m,mm mm,m,, ,,m,mm mm,m,, ,m,m,m m,m,m, ,m,m,m m,m,m, ,m,m,m,m,m m,m,m,m,m,
,,m,mm mm,m,, ,,m,mm mm,m,, ,m,m,m m,m,m, ,m,m,m m,m,m, ,m,m,m,m,m m,m,m,m,m,
Exercise 3E) The Right Hand: The . & / Keys
For this exercise you will use only your right hand's ring finger for the .[full stop] key and little finger for the / [slash] key.
(NOTE: some keyboards can have other keys mapped for the last key on this row)
. .. ... .... ..... / // /// //// ///// . / .. // ... /// .... //// ..... /////
/ . / . /. ./ /. ./ /./ ./. /./ ./. /./. ././ /./. ././ /././ ././. /././ ././.
///. .../ ///. .../ //.. ..// //.. ..// ..//.. //..// ..//.. //..//
//./.. ../.// //./.. ../.// /././. ./././ /././. ./././ /././././. ./././././
//./.. ../.// //./.. ../.// /././. ./././ /././. ./././ /././././. ./././././
Exercise 3F) The Right Hand: The M , . & / Keys Together
For this exercise you will use all of your right hand's fingers: the index finger for M, the middle finger for , the ring finger for . and the little finger for /
m , . / mm ,, .. // mmm ,,, ... /// mmmm ,,,, .... //// mmmmm ,,,,,....../////
mmm ,,, ... /// mmm ,,, ... /// mmm ,,, ... /// mmm ,,, ... /// mmm ,,,...///
m,./ /.,m m,./ /.,m m,./ /.,m m,./ /.,m m,./ /.,m m,./ /.,m m,./ /.,m m,./ /.,m
m,m./. /./,m, m,m./. /./,m, m,m./. /./,m, m,m./. /./,m, m,m./. /./,m, m,m./. /./,m,
m,m,././m,m,././ m,m,././m,m,././ m,m,././m,m,././ m,m,././m,m,././ m,m,././m,m,././
Exercise 3G) Both Hands: The B & N Keys
Now you have covered all of the bottom row keys, only B and N remain. In this exercise, use your left index finger to reach the B key and your right index finger to reach the N keys - returning them home after use.
b bb bbb bbbb bbbbb n nn nnn nnnn nnnn bb nn bbb nnn bbbb nnnn bbbbb nnnnn
b n b n bn nb bn nb bnb nbn bnb nbn bnbn nbnb bnbn nbnb bnbnb nbnbn
bbbn nnnb bbnn nnbb bbnn nnbb bbnnbb nnbbnn
bbnbnn nnbnbb bbnbnn nnbnbb bbnbnn nnbnbb bbnbnn nnbnbb bbnbnn nnbnbb
bnbnbnbnbn nbnbnbnbnb bnbnbnbnbn nbnbnbnbnb bnbnbnbnbn nbnbnbnbnb
Exercise 3H) Both Hands: The Entire Bottom Row
To recap:
The left hand's fingers are as follows: the index finger is used for both the B and V keys, the middle finger for the C key, the ring finger for the X key, and the little finger for the Z The right hand's fingers are as follows: the index finger is used for both the N and M keys, the middle finger for the , key, the ring finger for the . key, and the little finger for the /
zxcvbnm,./ /.,mnbvcxz zxcvbnm,./ /.,mnbvcxz zxcvbnm,./ /.,mnbvcxz zxcvbnm,./ /.,mnbvcxz
zzxxccvvbbnnmm,,..// zzxxccvvbbnnmm,,..// zzxxccvvbbnnmm,,..// zzxxccvvbbnnmm,,..//
zzz xxx ccc vvv bbb nnn mmm ,,, ... /// /// ... ,,, mmm nnn bbb vvv ccc xxx zzz
zz zx zc zv zb xz xx xc xv xb cz cx cc cv cb vz vx vc vv vb bz bx bc bv bb
nn nm n, n. n/ mn mm m, m. m/ ,n ,m ,, ,. ./ .n .m ., .. ./ /n /m /, /. //
z/ x. c, vm bn z/x.c,vmbn /z.x,cmvnb z/x.c,vmbn /z.x,cmvnb z/x.c,vmbn /z.x,cmvnb
zx/.cv,mbn nbmv,c.x/z zx/.cv,mbn nbmv,c.x/z zx/.cv,mbn nbmv,c.x/z zx/.cv,mbn nbmv,c.x/z
2.7 Exercise 4: The Number Row
This exercise introduces you to the final row on the keyboard, the number row, which also includes symbols. If you are typing a lot of numbers, such as doing data entry, then you may be better off using a number keypad on the right of your keyboard as this is quicker for pure numerical entry.
For now concentrate on the number row and later you can progress to the number keypad if it works for you better that way!
4A) The Left Hand: The 3 & 4 keys
Your left index finger will press the 4 key, left middle finger on the 3 key (rest your hands at 'home' as always).
4 44 444 4444 44444 3 33 333 3333 33333 4 3 44 33 444 333 4444 3333 44444 33333
3 4 3 4 34 43 34 43 343 434 343 434 3434 4343 3434 4343 34343 43434 34343 43434
3334 4443 3334 4443 3344 4433 3344 4433 443344 334433 443344 334433
334344 443433 334344 443433 343434 434343 343434 434343 3434343434 4343434343
334344 443433 334344 443433 343434 434343 343434 434343 3434343434 4343434343
4B) The Left Hand: The 1 & 2 keys
Your left ring finger will press the 2 key, left little finger the 1 key.
1 11 111 1111 11111 2 22 222 2222 22222 1 2 11 22 111 222 1111 2222 11111 22222
1 2 1 2 12 21 12 21 121 212 121 212 1212 2121 1212 2121 12121 21212 12121 21212
1112 2221 1112 2221 1122 2211 2211 1122 112211 221122 112211 221122
112122 221211 112122 221211 121212 212121 121212 212121 1212121212 2121212121
112122 221211 112122 221211 121212 212121 121212 212121 1212121212 2121212121
4C) The Left Hand: 1, 2, 3, 4
For this exercise you will use all of your left hands fingers: the index finger for4, the middle finger for 3, the ring finger for 2 and the little finger for 1
1 2 3 4 11 22 33 44 111 222 333 444 1111 2222 3333 4444 11111 22222 33333 44444
111 222 333 444 111 222 333 444 111 222 333 444 111 222 333 444 111 222 333 444
1234 4321 1234 4321 1234 4321 1234 4321 1234 4321 1234 4321 1234 4321 1234 4321
121343 434212 121343 434212 121343 434212 121343 434212 121343 434212 121343 434212
1212343412123434 1212343412123434 1212343412123434 1212343412123434
1212343412123434
4D) The Right Hand: The 7 & 8 Keys
For this exercise you will use your right-hand index finger for the 7 key and the middle finger for the 8 key.
7 77 777 7777 77777 8 88 888 8888 88888 7 8 77 88 777 888 7777 8888 77777 88888
7 8 7 8 78 87 78 87 787 878 787 878 7878 8787 7878 8787 78787 87878 78787 87878
7778 8887 7778 8887 7788 8877 7788 8877 778877 887788 778877 887788
778788 887877 778788 887877 787878 878787 787878 878787 78787878 87878787
778788 887877 778788 887877 787878 878787 787878 878787 78787878 87878787 7878787878
4E) The Right Hand: The 9 & 0 Keys
Your ring finger will be on the 9 key, left little finger on the 0 key.
9 99 999 9999 99999 0 00 000 0000 00000 9 0 99 00 999 000 9999 0000 99999 00000
9 0 9 0 90 09 90 09 909 090 909 9090 0909 9090 0909 90909 09090 909090 090909 909090 090909
9990 0009 9990 0009 9900 0099 990099 009900 990099 009900 990900 009099 990900 009099
99090099 090909 909090 090909 909090 90909090 09090909 90909090 09090909 9090909090
09090909
4F) The Right Hand: The 7, 8, 9 & 0 Keys Together
For this exercise you will use all of your right hand's fingers: the index finger for 7, the middle finger for 8, the ring finger for 9 and the little finger for 0.
7 8 9 0 77 88 99 00 777 888 999 000 7777 8888 9999 0000 77777 88888 99999 00000
777 888 999 000 777 888 999 000 777 888 999 000 777 888 999 000 777 888 999 000 777 888 999
000
7890 0987 7890 0987 7890 0987 7890 0987 7890 0987 7890 0987 7890 0987 7890 0987 7890 0987
7890 0987
787909 090878 787909 090878 787909 090878 787909 090878 787909 090878 787909 090878
787909 090878
7878909078789090 7878909078789090 7878909078789090 7878909078789090
7878909078789090 787890907
4G) Both Hands: The 5 & 6 Keys
Use your left index fingers to reach the 5 key and your right index finger to reach the 6 key.
5 55 555 5555 55555 6 66 666 6666 66666 55 66 555 666 5555 6666 55555 66666
5 6 5 6 56 65 56 65 565 656 565 656 5656 6565 5656 6565 56565 65656
5556 6665 5566 6655 5566 6655 556655 665566 556566 665655 556566
665655 556566 665655 556566 665655 556566 665655 6555665 6 5 655 66655
5656565656 6565656565 5656565656 6565656565 5656565656 6565656565
4H) Both Hands: The Entire Number
Left hand: the index finger is used for both the 4 and 5 keys, the middle finger for the 3 key, the ring finger for the 2 key, and the little finger for the 1 key.
Right hand: the index finger is used for both the 6 and 7 keys, the middle finger for the 8 key, the ring finger for the 9 key, and the little finger for the 0 key.
1234567890 0987654321 1234567890 0987654321 1234567890 0987654321 1234567890
0987654321
11223344556677889900 11223344556677889900 11223344556677889900
11223344556677889900
111 222 333 444 555 666 777 888 999 000 000 999 888 777 666 555 444 333 222 111
11 12 13 14 15 21 22 23 24 25 31 32 33 34 35 41 42 43 44 45 51 52 53 54 55
66 67 68 69 60 76 77 78 79 70 86 87 88 89 90 96 97 98 99 90 06 07 08 09 00
10 29 38 47 56 1029384756 0192837465 1029384756 0192837465 1029384756 0192837465
1209348756 6574839201 1209348756 6574839201 1209348756 6574839201 1209348756
6574839201
2.8 Exercise 5: Capital Letters and Shift Key
By now you should be familiar with all the key's positions.
In the following exercises you will be using capital letters in addition to the letters you have been learning.
Exercise 5A) Capital Letters with the Left Hand
Use just your left hand with the key configuration you learned in the previous exercises.
Press the shift key with the index or middle finger of the opposite (right) hand to make capital
letters.
Take it slow and do not worry about speed, you are gradually wiring the brain not racing!
AA Aa AA Aa AA Aa AAA AAA AAA AaA AaA AaA SS Ss SS Ss SS Ss SSS SSS SSS SsS SsS SsS DD Dd
DD Dd DD
Dd DDD DDD DDD DdD DdD DdD FF Ff FF Ff FF Ff FFF FFF FFF FfF FfF FfF GG Gg GG Gg GG Gg
GGG GGG
GGG GgG GgG GgG QQ Qq QQ Qq QQ Qq QQQ QQQ QQQ QQQ QQQ QqQ QqQ QqQ WW Ww WW
Ww
WW Ww WWW WWW WWW WwW WwW WwW EE Ee EE Ee EE Ee EEE EEE EEE EeE EeE EeE
RR Rr RR
Rr RR Rr RRR RRR RRR RrR RrR RrR TT Tt TT Tt TT Tt TTT TtT TtT TTT TtT TTT TtT ZZ Zz ZZ Zz
ZZ Zz ZZZ ZZZ
ZZZ ZzZ ZzZ ZzZ XX Xx XX Xx XX Xx XXX XXX XXX XxX XxX XxX CC Cc CC Cc CC Cc CCC CCC CCC
CcC CcC CcC
VV Vv VV Vv VV Vv BB Bb BB Bb BB Bb BBB BBB BBB BBB BbB BbB BbB
Exercise 5B) Capital Letters with the Right Hand
Use just your right hand with the key configuration you learned in the previous exercises.
Use the shift key to make capital letters pressing it with the index or middle finger of the left hand.
LL Ll LL Ll LL Ll LLL LLL LLL LlL LlL LlL KK Kk KK Kk KK Kk KKK KKK KKK KkK KkK KkK JJ Jj JJ Jj
JJ Jj JJJ JJJ JJJ JjJ
JjJ JjJ HH Hh HH Hh HH Hh HHH HHH HHH HhH HhH HhH PP Pp PP Pp PP Pp PPP PPP PPP PpP
PpP PpP
PpP PpP OO Oo OO Oo OO Oo OOO OOO OOO OoO OoO OoO II Ii II Ii II Ii III III III IiI IiI IiI UU Uu
UU Uu
UU Uu UUU UuU UUU UuU UUU UuU YY Yy YY Yy YY Yy YYY YYY YYY YyY YyY YyY YyY MM Mm
MM Mm
MM Mm MMM MMM MMM MmM MmM MmM NN Nn NN Nn NN Nn NNN NNN NNN NnN NnN
NnN
2.9 Exercise 6: The Symbol Keys
For this exercise you will be using the numbers keys combined with the shift key to type symbols.
As before hold down the shift key with the opposite hand to that which you are currently typing with.
6A) The Left Hand: $ & £
Press shift with your right hand. Your left index finger will press on the 4($) key, left middle finger on the 3(£) key.
$ $$ $$$ $$$$ $$$$$ £ ££ £££ ££££ £££££ $ £ $$ ££ $$$ £££ $$$$ ££££ $$$$$ £££££
£ $ £ $ £$ $£ £$ $£ £$£ $£$ £$£ $£$ £$£$ $£$£ £$£$ $£$£ £$£$£ $£$£$ £$£$£ $£$£$
£££$ $$$£ £££$ $$$£ ££$$ $$££ ££$$ $$££ $$££$$ ££$$££ $$££$$ ££$$££ ££$£$$ $$£$££ ££$£$$ $
$£$££ £$£$£$ $£$£$£ £$£$£$ $£$£$£ £$£$£$£$£$ $£$£$£$£$£
££$£$$ $$£$££ ££$£$$ $$£$££ £$£$£$ $£$£$£ £$£$£$ $£$£$£ £$£$£$£$£$ $£$£$£$£$£
6B)The Left Hand: @ and !
Your left ring finger will be on the 2(@) key, left little finger on the 1(!) key.
! !! !!! !!!! !!!!! @ @@ @@@ @@@@ @@@@@ ! @ !! @@ !!! @@@ !!!! @@@@ !!!!! @@@@@
! @ ! @ !@ @! !@ @! !@! @!@ !@! @!@ !@!@ @!@! !@!@ @!@! !@!@! @!@!@ !@!@! @!@!@
!!!@ @@@! !!!@ @@@! !!@@ @@!! @@!! !!@@ !!@@!! @@!!@@ !!@@!! @@!!@@
!!@!@@ @@!@!! !!@!@@ @@!@!! !@!@!@ @!@!@! !@!@!@ @!@!@! !@!@!@!@!@ @!@!@!@!@!
6C) The Left Hand: !, @, £' $
For this exercise you will use all of your left hand's fingers: the index finger for4, the middle finger for 3, the ring finger for 2 and the little finger for 1
! @ £ $ !! @@ ££ $$ !!! @@@ £££ $$$ !!!! @@@@ ££££ $$$$ !!!!! @@@@@ £££££ $$$$$
!!! @@@ £££ $$$ !!! @@@ £££ $$$ !!! @@@ £££ $$$ !!! @@@ £££ $$$ !!! @@@ £££ $$$
!@£$ $£@! !@£$ $£@! !@£$ $£@! !@£$ $£@! !@£$ $£@! !@£$ $£@! !@£$ $£@! !@£$ $£@!
!@!£$£ $£$@!@ !@!£$£ $£$@!@ !@!£$£ $£$@!@ !@!£$£ $£$@!@ !@!£$£ $£$@!@ !@!£$£
$£$@!@
6D) The Right Hand: The & and * Keys
For this exercise you will use your right-hand index finger for the & key and the middle finger for the * key.
& && &&& &&&& &&&&& * ** *** **** ***** & * && ** &&& *** &&&& **** &&&&&
***** & * & * &* *& &* *& &*& *&* &*& *&* &*&* *&*& &*&* *&*& &*&*& *&*&* &*&*&
*&*&* &&&* ***& &&&* ***& &&** **&& &&** **&& &&**&& **&&** &&**&& **&&**
&&*&** **&*&& &&*&** **&*&& &*&*&* *&*&*& &*&*&* *&*&*& &*&*&*&* *&*&*&*&
&&*&** **&*&& &&*&** **&*&& &*&*&* *&*&*& &*&*&* *&*&*& &*&*&*&* *&*&*&*&
6E) The Right Hand: ( and ) [brackets!]
Your ring finger will be on the ( key, left little finger on the ) key.
( (( ((( (((( ((((( ) )) ))) )))) ))))) ( ) (( )) ((( ))) (((( )))) ((((( )))))
( ) ( ) () )( () )( ()( )() ()( ()() )()( ()() )()( ()()( )()() ()()() )()()( ()()() )()()(
((() )))( ((() )))( (()) ))(( (())(( ))(()) (())(( ))(()) (()()) ))()(( (()()) ))()(( (
(()()) ))()(( (()()) ))()(( (()())(( )()()( ()()() )()()( ()()() ()()()() )()()()( ()()()() )()()()( ()()()()() )()()()( ()(
6F) The Right Hand: The &, *, ( and ) Keys Together
For this exercise you will use all of your right hand's fingers: the index finger for &, the middle finger for *, the ring finger for ( and the little finger for ).
& * ( ) && ** (( )) &&& *** ((( ))) &&&& **** (((( )))) &&&&& ***** ((((( )))))
&&& *** ((( ))) &&& *** ((( ))) &&& *** ((( ))) &&& *** ((( ))) &&& *** ((( ))) &&& *** ((( )))
&*() )(*& &*() )(*& &*() )(*& &*() )(*& &*() )(*& &*() )(*& &*() )(*& &*() )(*& &*() )(*& &*() )(*&
&*&()( )()*&* &*&()( )()*&* &*&()( )()*&* &*&()( )()*&* &*&()( )()*&* &*&()( )()*&* &*&()( )()*&*
&*&*()()&*&*()() &*&*()()&*&*()() &*&*()()&*&*()() &*&*()()&*&*()() &*&*()()&*&*()()
&*&*()()&*&*()()
6G) Both Hands: The % & ^ Keys
Use your left index finger to reach the % key and your right index finger to reach the ^ key, alternating between the shift key as you switch over.
% %% %%% %%%% %%%%% ^ ^^ ^^^ ^^^^ ^^^^ %% ^^ %%% ^^^ %%%% ^^^^
%%%%% ^^^^^%%%^^ ^^^% %%^^ ^^%% %%^^ ^^%% %%^^^%% ^^%%^^ %%^%^^
^^%^%% %%^%^^ ^%^%% %%^%^^ ^^%^%% %%^%^^ ^^%^%% %%^%^^ ^^%^%%
2.10 Exercise 7: Words and sentences
Until now you have simply been drilling specific keys, learning where they are and mapping your brain. Like learning simple sounds when a baby first communicates it feels odd but it is important to get the foundation knowledge, and to undo any hunt and peck tendencies! Now you are going to start making sense and building your key knowledge into words. During this phase you will gradually find your speed building up!
Be patient: accuracy and consistent practice are key to mastering this; you wouldn't pressure a toddler to sprint right after they have learned to walk!
Exercise 7A) All the letters
This is a classic text, used for verifying typing speed and accuracy.
It includes all the letters and makes sense:
the quick brown fox jumps over the lazy dog.
The quick brown fox jumps over the lazy dog.
The Quick Brown Fox Jumps Over The Lazy Dog.
Exercise 7B) Dracula
Increasing complexity with text which needs a bit more thought, so your brain forgets typing and focuses more on the words
“More than a few of the members of the S. P. C. A., which is very strong in Whitby, have tried to befriend the animal. On 11 July at dawn entered Bosphorus. Boarded by Turkish officers. Backsheesh. All correct. Under way at 4 p. M. I am here to do Your bidding, Master. I am Your slave, and You will reward me, for I shall be faithful. I have worshipped You long and from afar. “
Activity: Retest your speed
Estimated time: 10 minutes
In order to see progress, you are going to retake the test from module 1 to see how you have improved. If you completed all the exercises in this module and have slept since learning all the key locations your speed and accuracy should have improved. 1, 3 or 5 minute typing test - take test.
Take the test a couple of times to feel familiar with the environment and methods - focus on moving through the text and if you get a letter wrong just keep going and follow the on screen 'instruction' for which letter to type next (blue highlight).
2.11 Finding Ways to Practise

Like all skills the mastery is in the practice.
If you have gone from a fast hunt and pecker to a slow touch typist this is actually a huge improvement. The foundations have been set for touch typing prowess. All you need to do now is find ways to practise. Look for opportunities in your job or hobbies to type more. Why not listen to a podcast or video that you enjoy and transcribe it? How about chatting to a friend on Skype and typing up everything said? Copy out documents or notes from books and start journaling in type. All of these methods are opportunities to practise. Daily practice will really speed up your progress and improve your skills and accuracy. Test yourself frequently and record your improvement, it will be rapid but cannot be rushed. It will take you a few weeks, maybe a month, to get the high speeds and snappy fingers that will impress your colleagues. Keep practising!
Fact
With approximately 25 hours of practice you can reach 80 wpm, with 50 hours 100 wpm double that to 100 hours of practice to reach 120 wpm
Source: medium.com
Module Summary
In this module we moved on from theory and got to grips with the actual practice needed to master touch typing. Although slow at first the key drills covered in this module may seem uncomfortable and even slow they are vital to unwiring and rewiring the brain. We started with the home row and placing your fingers in this resting position using the key bumps on the F and J keys to locate the row without looking. Each finger was then assigned to specific keys and practised pressing them and moving backwards and forwards between keys.
Each row (home, top, bottom and numbers) was covered in turn allowing each hand and finger to learn its role for the specific keys. The hands and fingers were used in unison to start typing real words and useful information. You were encouraged to find as many ways to practise as possible and retest your speed often to see improvement. Typing is not a theoretical skill; after you have mastered the theory, just like driving, you need to get out on the road!
.svg)