
Module 3: Waterproofing & Flashing Techniques

Proper waterproofing and flashing are critical to preventing leaks, which account for most roofing failures. This module teaches advanced techniques for sealing roof penetrations, seams, and transitions to ensure long-term water resistance in both residential and commercial roofing systems.
1. Roof Flashing Types (Step, Counter, Drip Edge, Pipe Boots)

Flashing is a thin metal or rubber material used to direct water away from vulnerable areas where the roof plane is interrupted.
Key Subtopics:
Step Flashing:
Used where roofs meet vertical walls (e.g., chimneys, dormers).
Installed in layers with shingles, overlapping each piece like steps.
Typically made of galvanized steel, aluminum, or copper.
Counter Flashing:
Placed over step flashing to create a secondary water barrier.
Often embedded into mortar (chimneys) or secured to siding.
Drip Edge:
Metal strip installed along roof edges to prevent water from curling back under shingles.
Required by building codes at eaves and rakes.
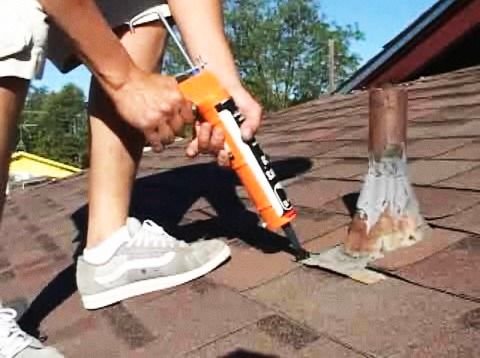
Pipe Boots (Vent Flashing):
Rubber or metal collars that seal around plumbing vents, HVAC pipes, and exhaust flues.
Must be properly sealed with roofing cement or membrane adhesive.
2. Leak Prevention Strategies (Ice & Water Shield, Sealants)
Even with proper flashing, roofs need additional waterproofing measures in high-risk areas.
Key Subtopics:
Ice & Water Shield:
Self-adhesive membrane applied in valleys, eaves, and around penetrations.
Prevents leaks from ice dams and wind-driven rain.
Roofing Sealants & Caulks:
Polyurethane & Silicone Sealants: Used for sealing small gaps around flashing.
Asphalt Roof Cement: Temporary fixes but not a long-term solution.
Proper Underlayment Selection:
Synthetic underlayment (more durable) vs. felt paper (traditional but less waterproof).
3. Chimney, Skylight & Vent Flashing (Best Practices for Watertight Seals)
These are high-risk leak points due to complex intersections with the roof.
Key Subtopics:
Chimney Flashing:
Requires step flashing + counter flashing + cricket (saddle) if chimney is wide.
Sealant must be UV-resistant (silicone or polyurethane).
Skylight Flashing:
Pre-manufactured flashing kits must match the skylight brand.
Proper integration with underlayment to prevent side leaks.
Vent Pipe Flashing:
Rubber boots must be UV-rated to prevent cracking.
Metal collars should be secured with roofing nails and sealant.
4. Membrane Seaming & Welding (Hot Air, Chemical, and Tape Methods)
Single-ply membranes (TPO, PVC, EPDM) rely on strong seams to remain waterproof.
Key Subtopics:
Hot Air Welding (TPO/PVC):
Uses a hot air gun to melt membrane edges before pressing together.
Requires proper temperature control (1,000–1,200°F) to avoid weak seams.
Chemical Welding (EPDM):
Solvent-based adhesives bond seams (must cure fully before rain).
Primer is often required for proper adhesion.
Tape Seaming (Peel-and-Stick):
Used for quick repairs or cold-weather installations.
Must be rolled firmly to eliminate air bubbles.
Seam Testing:
Air pressure or water testing to confirm watertight seals.
Why This Module Matters
90% of roof leaks occur at flashing points (NRCA).
Improper sealing leads to rot, mold, and structural damage.
Mastering these techniques reduces callbacks and extends roof lifespan.
.svg)