
5.1 Introduction
Once you have mastered a few different hair styles, have developed a small portfolio and are confident in your skills, it is time to start taking on clients.

This can be an exciting and nerve-racking time for many stylists, especially those who have not freelance styled before. Thankfully, once you have mastered the skills necessary to give your brides the perfect styles, everything else can be learned relatively quickly.
Aside from the styles themselves, knowing what to put in your kit and how to gain clients are the two most important things you should learn. Every other aspect of successfully styling bridal hair as a career stems from those two strengths.
This module gives you all the tips and recommendations you need to successfully run a bridal hairstyling business.
We begin by talking about your styling kit, including a discussion of the top recommended brands in the country.
We then provide you with numerous styling tips, helping make styling hair easier and faster. Next, we discuss the
importance of a test run. Finally, we talk about how you can market yourself to get more clients.
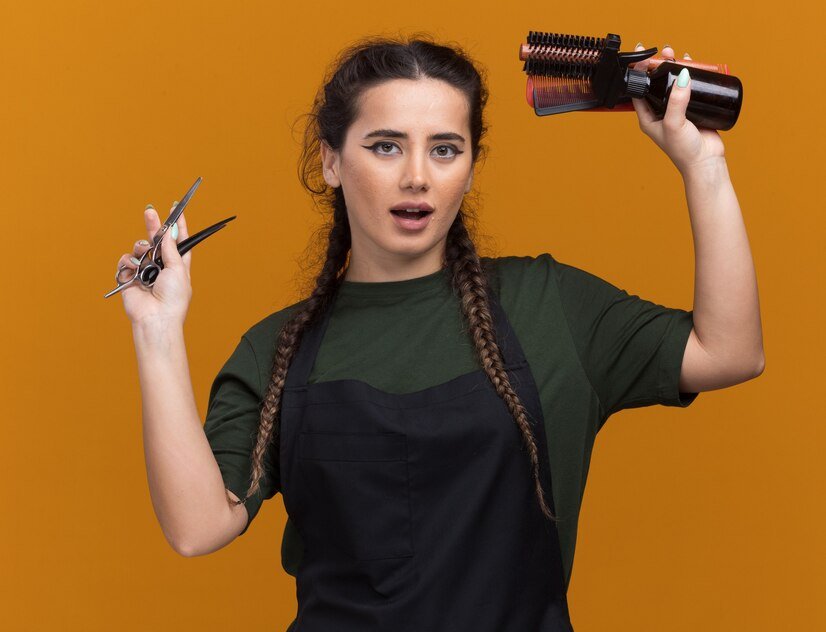
5.2 Your Styling Kit
Then you are just starting out, make sure you focus on building the perfect styling kit.
Your ability to perfectly style a bride's hair depends on the products and equipment you have in your kit. Earlier
modules in the course have already discussed a few of the essential tools needed to get you started, and the next
section provides you with a few brand recommendations.
Carrying Your Kit
If you choose to work as a stylist who visits brides at their homes, you need to find a way to carry your kit with you from
your home to the bride's house. Never under-pack in an effort to save room. It is much better to bring too many supplies than not enough. This means you need a large enough kit to carry each one of your products and tools.
You can find kit carrying cases through salon suppliers and on Amazon.
It is a good idea to invest in a high quality one, rather than to try to DIY one yourself. Professional carrying kits are built to withstand a lot of weight while still being easy to transport and aesthetically pleasing. Most stylists opt for ones that
resemble rolling suitcases, so they can easily get it from the car to a home.
Try to find one with a lot of storage and specialised pockets. This reduces the risk of damage or leaks while the case is rolling about. It also gives you a special spot to put each one of the supplies you need, encouraging you to keep your kit tidy between clients.
Additional Tools to Put in Your Kit
We have covered numerous tools needed to style bridal hair, including wands, hairspray, and pins. There are a few others that you should put in your kit before you are ready to begin styling. Even if the style your bride wants does not require that particular tool, you never know when it may come in handy.
Flat Iron. Flat irons are perfect for straightening curly hair, giving you a straight base to work from when creating slicked back styles or those that require a specific type of curl. These tools are also great for giving straight hair even more shine. If you are creating a slicked back bun, a top knot, or a tight French twist, a flat iron can make the job a lot easier.
Blow-Out Spray. Blow-out spray is perfect for brides who want to wear their hair down in a simple yet elegant
style or those who have naturally thin hair.
Blow-outs create a lot of volume, making them perfect for dramatic brides.
Additionally, some styles benefit from using a blow-out as their base. Carrying some blow out spray in your kit guarantees you always have it when needed.
Cape. Even though you are not cutting the bride's hair, you should still keep a cape in your kit. You want to be sure you protect their clothes from sprays and other products. You should also advise the bride to remove any jewellery before you begin, as some hair products can damage certain gems, metals, and stones.
Water Bottle. Having a water bottle on you is also handy. It is usually advisable to work with dry hair, but in some
cases a bit of dampness can come in handy.
For example
Spraying the ends with water before tucking them into the French twist can help encourage longerlasting hold and
reduces flyaway hairs.
Extensions. You never know when you need a bit of extra volume that you cannot achieve through teasing alone. Keeping a few extensions in varying lengths and shades in your kit can sometimes rescue a style from looking drab. In other cases, adding a bit of length can help make styling much easier and faster.
Keeping Track of Your Inventory
It is incredibly important to keep track of each and every product, tool, and piece of equipment in your kit. There are a few reasons why you should do this. Most importantly, it helps you know when to restock your supplies, so you never run out in the middle of a style.
You should always glance at your inventory list a few days before your booked style to be sure you have everything you need. This gives you time to stock up if you are out of items.
Ideally, you should make two notations. The first is the amount of the product you had when you first created the kit, so
you know what level to restock to. The second number is the kits current levels. Obviously, you cannot do this with items such as hairspray or gel, but you can estimate how full a bottle is based on weight.
Activity #1: Create a Template Inventory List
Estimated time: 10 to 15 minutes
Using a computer or a pen and paper, create a template inventory list for your kit. You should include all the items in your kit and the amount of each item. You should also leave blank columns, so you can fill the new amount after each style. If you decide to do this by hand, make sure you make plenty of photocopies, so you do not need to recreate the whole template each time the sheet is used up.
5.3 Recommended Brands
While the skill of the stylist is the most important factor in completing a bridal style, the quality of the products you use is also very important.
Using discount store brands creates a very different look than a style completed with more upscale, salon-trusted names. As you work with each product and build your customer base, you may find that you prefer one particular brand to the other. Everyone has their own unique preferences. You may even find that the bride has a brand in mind that they would prefer. However, when you are putting together your kit for the first time, keep these brands in mind.
Styling Products

It is important to invest in high quality, salon quality styling products. A few brands sold by supermarkets, such as L'Oréal, may suffice if you are short on funds. Wherever possible make sure you only buy the very best.
A few of the top recommended brands by UK stylists include:
* Kerastase
* Paul Mitchell
* Goldwell
* Davines
* Oribe
* Phyto Paris
Heating Tools
The heating tools you use also play a big role in how the style looks when it is finished. Inadequate products result
in styles that fall flat, failing to hold.
The following brands are recommended by stylists across the UK's top salons:
* Dyson
* Elchim
* Parlux
* Sultra
* The Beachwaver Co.
Pins, Brushes, and Other Supplies
When it comes to the best brands for pins, brushes, and other more minor supplies, stylists are divided. Many buy these items from Amazon, taking advantage of bulk sales in the case of pins and other discounts. When you are first starting out, you can safely purchase these items from the drug store, as long as you still invest in a higher quality drug store brand.
As you progress in your career, you may find that you are frustrated with a particular brush or style of pin. If this is
the case, you can start upgrading these items, researching other, salon quality replacements that meet your
needs.
A few of the most popular ones are:
*BaByliss
*Cricket
*Dupont
*Comare
*Isinis
*Mason Pearson
Fact
The average person in the UK spends almost £4,500 on their appearance, including hair styles and styling products.
Source: Totally Money.com
5.4 Styling Tips
There is a lot of pressure involved when styling a bride's hair.
Learning a few tips and tricks can help you get the job done faster, better, and with more confidence than before. These tips are also valuable pieces of advice you can pass along to the bride as you style their hair, fostering a stronger
connection between you.
Don't Saturate Hair with Spray

Never saturate hair with hair product, to the point where it is damp, and then use a heating product on the hair. Even if you first protected it with a heat serum, this practice can cause a lot of damage to the hair. In worst case scenarios this can actually singe the hair.
Instead, start with the smallest amount you suspect works and increase slowly from there. Not only does this
protect the bride's hair, it also prevents the style from becoming overdone.
Hold the Styling Wand Downward
When using a styling wand, point the smaller tip toward the ground as you wrap the hair around it. This helps create
beautiful, bouncy waves and ensures uniformity, since you create them the same way each time. Another benefit is that the hair often falls right off the wand once it is curled, meaning that there is less manoeuvring you need to do with a hot wand.
Use a Light Hold Spray Wherever Possible
Heavy hold sprays definitely have their place in bridal hair styles. However, their use should be restricted to those styles that require a lot of hold, such as a French twist. The rest of the time, consider switching to a light, medium, or flex hold spray. This gives the hair the same type of hold, but keeps it looking more natural. Flex holds in particular work well for styles that rely on a lot of loose hair, as it ensures the hair is still touchable and moves in a natural way.
Heat Up Your Tools in Advance
If the bride is coming to you, make sure you heat up your tools in advance. This cuts down on the length of time it takes to complete the hair style. In other cases, you may be travelling to the bride. In those situations, warn the bride that you need about five minutes to get your kit set up immediately after you arrive. This gives you time to lay out all the tools you need, preparing the ones that need to be heated, before the bride expects you to start on their hair.
Tell the Bride to Wear a Button-Down Shirt
Most shirts cannot be removed without affecting a bridal style in some way. This often happens long after the
stylist has left, leaving brides in a desperate situation. You can help prevent this by warning the bride to wear a
button-down shirt when you style their hair. Removal is easy, without flattening the style.
Activity #2: Think About Your Own Styling Tricks
Estimated time: 10 to 15 minutes
Every stylist has their own unique tips and tricks they use when styling hair. Chances are, through practising the styles discussed earlier in the course, you developed a few of your own.
Start a Tips and Tricks section in your journal to keep track of all the hints, tips and tricks you pick up throughout your styling career.
5.5 Test Runs
Doing a test run is incredibly important for numerous reasons.
If your bride does not seem to want one, you should do your best to talk them into it. In fact, there are a few stylists who refuse to do a bridal 'do' unless the bride agrees to, and shows up for, a test run. Completing a test run is incredibly important for numerous reasons.
To begin with, it is the only way you and the bride can tell if their desired style works with their hair type and facial
structure. These test runs also give you a chance to show the bride the types of variation on a style you can complete.
For example
If you are giving your bride the modern romantic up-do covered in modules two and three, you can use the test run to demonstrate how the style looks with braids, twists, and gems. Test runs are also crucial because they tell you exactly how long a style takes to complete. Wedding days are always very tight, schedule wise, making it risky to guess how much time it may take to finish the style. A test rungives you and the bride a chance to time the style, ensuring that nothing runs late on their big day.
Timing
Recommend to all brides that you complete the test run a month or two before the wedding. It is important that
the bride's hair stays relatively the same from the time of the test run to the actual day, so be sure that they do
not arrange for any haircuts or dyes in the meantime. For most brides, a month before the wedding is ideal.
If the bride does want to have colour added to their hair, such as highlights, this should be done two weeks before
the wedding. This ensures they still look fresh but have had a chance to fade a bit, making them slightly more
natural.
Dying the hair can change its texture, impacting the time involved in completing the style. For brides that do opt
for dyes before the wedding, you should do two test runs. The first should still be about a month to two before
the wedding. This is the one where you experiment with styles. The second test run should involve the style
completion alone, exactly as you intend to do it on the wedding day.
Recommended Tools
You should bring your entire kit with you for each test run. Make sure it is fully stocked, including items you are not sure you need. You never know when inspiration may strike, or a bride may have a new request.
Ask the bride to wear something similar in colour to their wedding day outfit. It is also helpful if they have completed any makeup they intend to wear in a similar style. This helps you both visualise the bridal hair as it is expected to look on the big day. If the bride has any special jewellery or accessories they want to wear, make sure they have those ready as well.
Activity #3: Create a Test Run Cheat Sheet
Estimated time: 10 to 15 minutes
Spend some time creating a test run cheat sheet, filled with all the information your brides need to know about their wedding test run. This sheet should include a few reasons why test runs are important, as well as a list of items the bride needs to have ready or tasks they need to complete before your arrival. Putting this material together now ensures that you remember all the important details.
5.6 Travelling vs. Home Salon
When you decide to freelance style hair, you have two main choices.
The first is to work out of your home, with a stable salon set up. The second is to travel to the bride's home or hotel, working on their hair at a location that is convenient to them. There are benefits and drawbacks to each approach, so you should take the time to learn about them both before making a decision about which one is best for you. There is no one right answer, with the best choice for you depending on your lifestyle, available space, and your own preferences.
Travelling
As a freelance bridal stylist, you may find that you are often asked to travel to the location of the wedding, the
bride's home, or the bride's hotel to complete their hair.
Pros. There are several advantages to this approach. You do not need to have the space in your home for an at- home salon, making this a much more accessible option, especially for stylists just beginning their careers. In addition, travelling to visit a bride makes their day a lot easier. Not all brides have the time to run to someone's home or a salon for their hair. By offering this service, you can increase your customer base. It also helps do your part to reduce as much stress on the bride's wedding day as possible. Some stylists charge more for on-site styling, making it slightly more lucrative and worth your time.
Cons. Some stylists find that packing up their kit to be cumbersome, especially if you are only doing this for one person. Hotels and bride's houses can also be cramped, making it hard to have the freedom of movement you need. Purchasing all the bells and whistles that the most successful bridal stylists have, such as a portable sink or even a portable vanity, can be costly.
At-Home Salon
Another option available is to build a salon in your home or to rent a chair at an established one. Some brides prefer to attend a salon, as it seems more professional.
Pros. There is no need to pack up your entire kit or invest in costly equipment. Instead, you can rely on your own
investment in your salon to provide everything you need. A home salon also gives you much more room to move
around. In addition, you can build them to have a lot of air flow, reducing the risk of inhaling or working in fumes.
Cons. Building a salon in your home can be very expensive. Depending on your lifestyle, you may not have suitable
living arrangements, making this an impossible option. At home salons also increase the taxes payable on your home. You may also have to purchase costly insurance packages to ensure that your care covered when your clients are on your property.
Fact
The hairstyling industry in the UK employs over 277,300 people.
Source: Habia.org
5.7 Getting Clients
After you have the tools, the skills, and the confidence, you need to find clients.
Marketing yourself can seem like a daunting task, but it can actually be a bit of fun. As you network, set up your social media accounts, and work to find as many new clients as possible, remind yourself of your passion for styling hair. This simple reminder can make self-promotion much easier.
Set Up Professional Social Media Channels and a Webpage
Styling bridal hair is a professional business, so be sure you have separate, business social media accounts. This gives you the means to connect with your clients and potential clients without divulging personal information. It also helps you stand out as an expert in your field.
There are numerous social media platforms, but you should focus your efforts on only a few:

Facebook. Facebook is one of the best ways to promote yourself without investing a lot of money. You can quickly set up a professional page and start posting your portfolio almost immediately. Make sure that you use the same name for all social media accounts, so your potential clients can find you easily.
Instagram. Use Instagram to share images of styles you have completed, tools you recently purchased, and other exciting visual updates about your business. Remember to use hashtags liberally to expand your audience reach.
Pinterest. Brides love Pinterest. Don't miss out on this valuable marketing platform and set up an account as
soon as possible. You can share the same images you post on Instagram, but Pinterest gives you the tools to
organise these images into boards. Chrome and Firefox both have a Pinterest extension, making it a breeze
to pin images and articles you see online.
You should also spend some time and create a website. You do not to have anything too elaborate at the beginning, but it should contain information about pricing, your portfolio, and contact information. As you expand, you may want to spend more time on your website, adding a blog or other elements to help boost your SEO score.
Networking
Once you have your social media accounts and web presence established you need to start networking. Invest in
some high-quality business cards, not the kind you print off at home, so you can hand these out at events. Start
attending bridal shows, first as a guest and then set up a booth as your customer base expands. Reaching out to
other professionals in the wedding industry is the best way to get referrals and other word of mouth references.
Take a Quick Recap Test
Module Summary
This is the end of the last module in the bridal hair course, giving you tips and recommendations on running your
own successful styling business, along with marketing advice. These sections are quite important if you are
planning to open your own freelance bridal hairstyling business in the future. The course covered all the
information you need to successfully work as a bridal hair stylist.
We began by talking about the tools you need to invest in early on, and followed that up with two modules
walking you through a beautiful modern style step-by-step.
We also showed you a few other hair styles your brides may request.
Finally, we gave you the tips and tricks discussed in this module.
The module began by talking about your bridal styling kit, giving you a few product
recommendations to keep in mind when you begin to compile it. We also gave you styling tips and information
about performing the perfect test run. The location of your work is also important to consider, and we reviewed
the pros and cons associated with working from home versus travelling to visit your clients. Finally, we left you
with marketing tips and tricks, helping you attract more customers.
.svg)